
Build and Deploy EC2 Instance, IAM Role and Policy Using Terraform

Project Manager|| Cloud/DevOps Enthusiast || AWS Certified Cloud Practitioner || Lawyer. Love talking about anything Cloud or DevOps related. Let's Cloud the Cloud!
Introduction
Your company launched an application on Amazon EC2. It was later discovered that the deployed application needed access to a different service which is S3 bucket. Using terraform, attach an IAM role to the EC2 instance with a Policy that allows GetObject on the S3 bucket. An IAM role must be attached to an EC2 instance if you want to allow secure access to an AWS service.
Project Prerequisites
Basic Terraform knowledge
Set up Terraform on your system
AWS understanding and AWS account setup
**STEPS **
- Configure AWS User/AWS Provider Initial Setup
On your local computer inorder to deploy/apply the resources specified in your Terraform template, configure an AWS user on your local computer/terminal that terraform will use to deploy your tf resources on AWS.
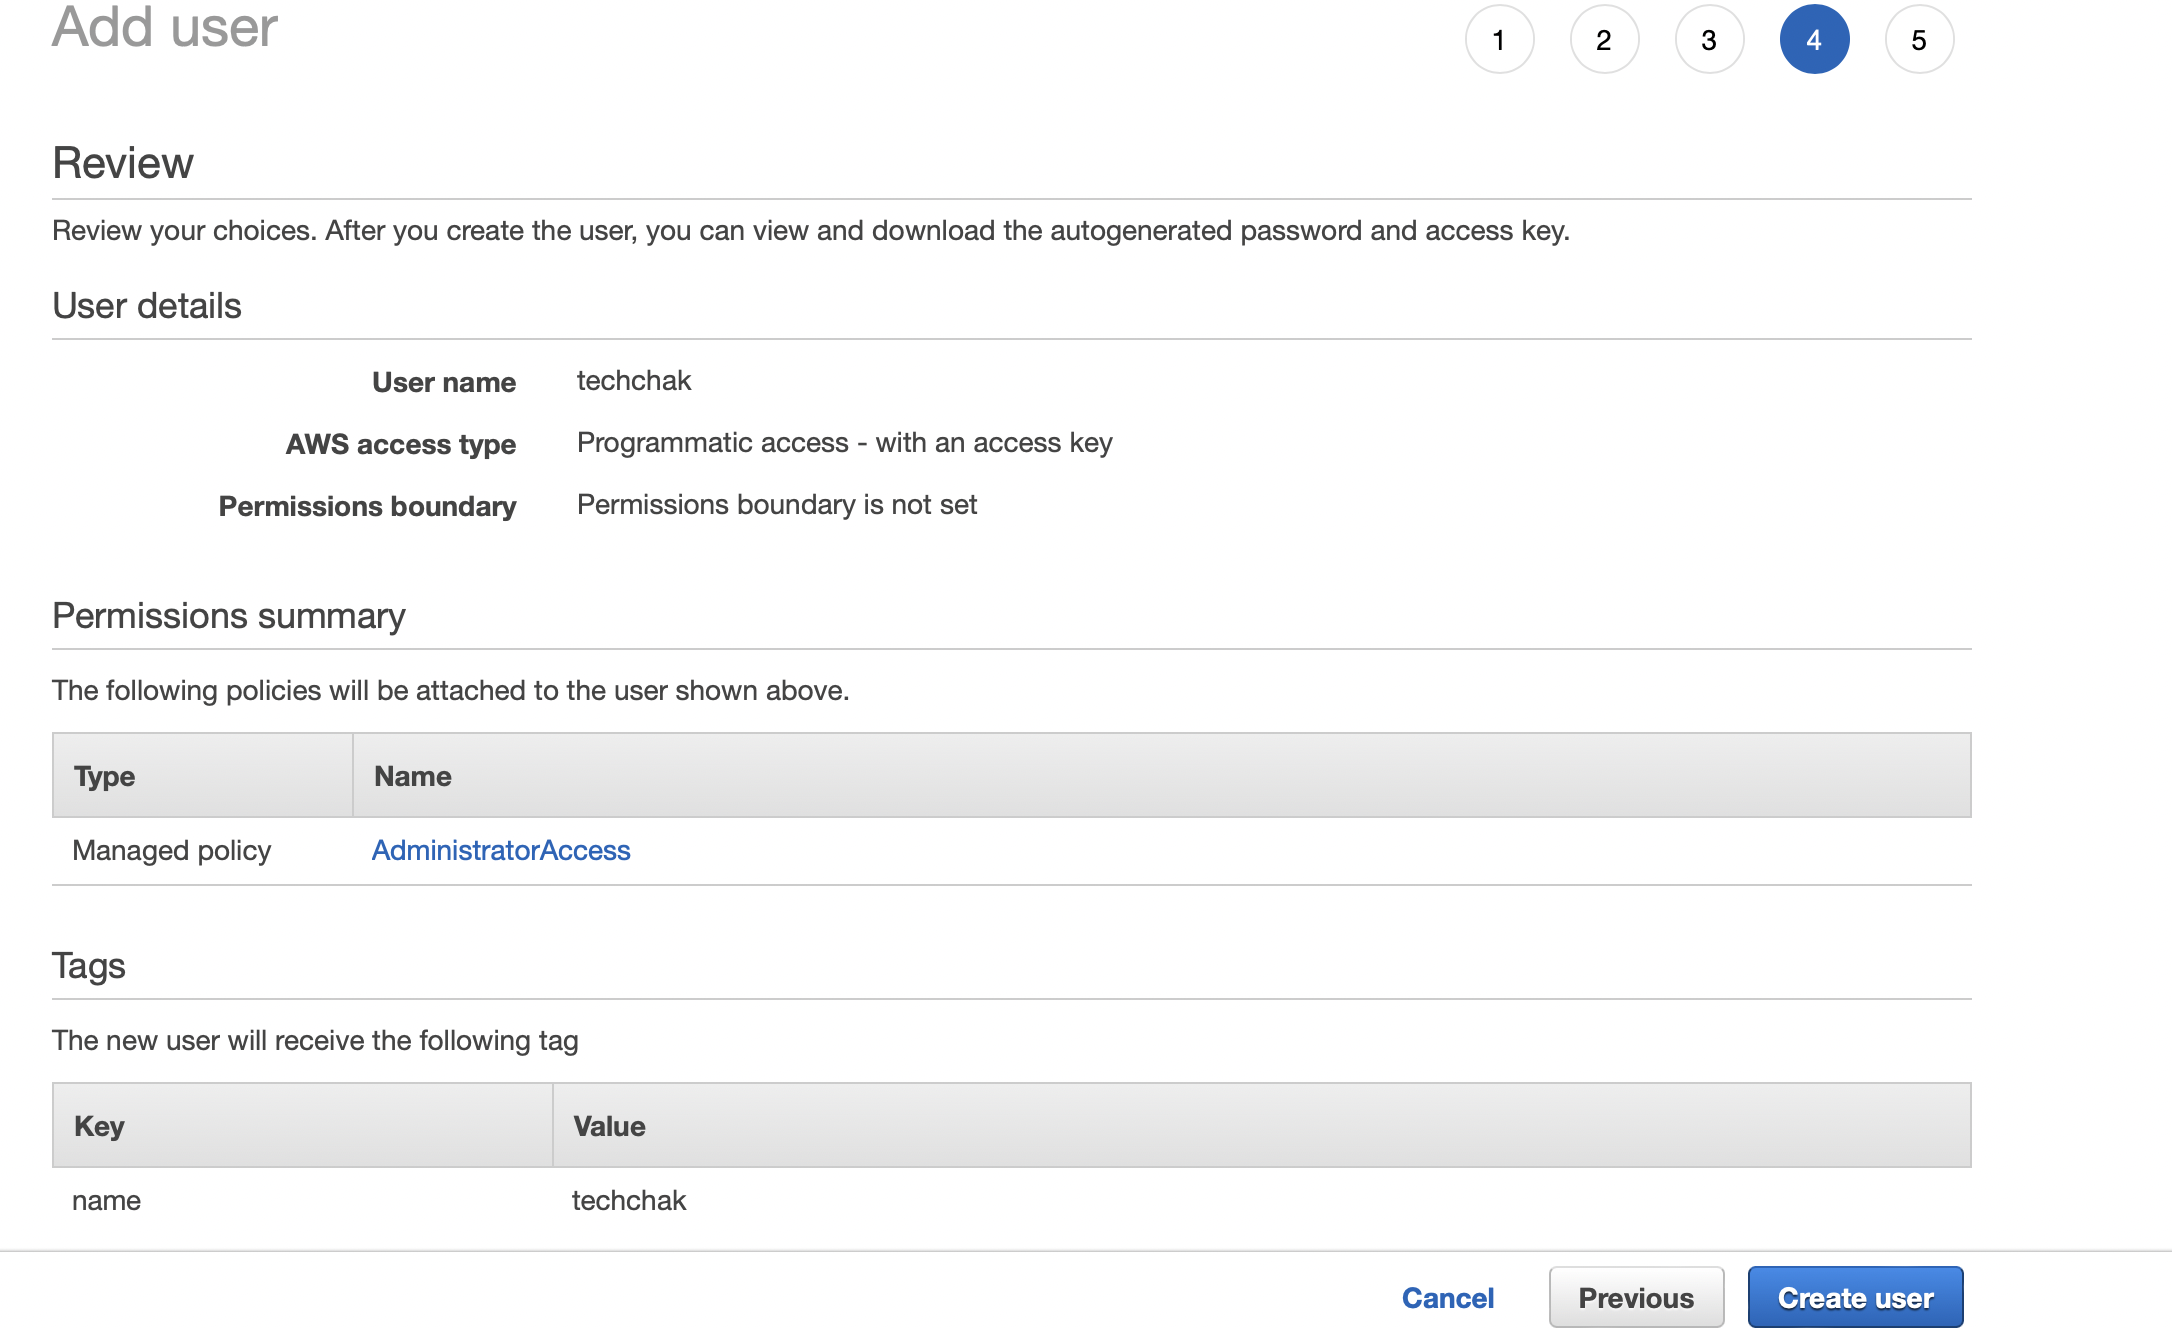
The first step to configuring will be to create a user on AWS in order to get the user aws_access_key_id and aws_secret_access_key. This user will be used by terraform to run AWS API commands. Give it a username, select access type (tick programatic access since we are using terraform which is a client that communicates with AWS) and store the aws_access_key_id and aws_secret_access_key safely. Also attach the right permission to the user. For the purpose of this article, I attached the AdministratorAccess Managed Policy. In your test, make sure to assign least privilege access to the user based on your company policy.
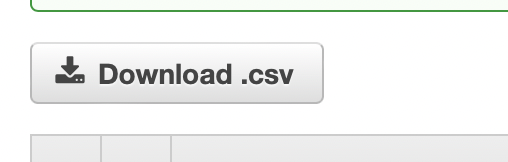
Here contains the Access key ID and secret access key. Please note that it is not good practice to specify your aws_secret_access_key and aws_access_key_id, in your terraform file neither should you make it public or mistakenly push it to source control.
After the above, to configure this user, input the command, aws configure --profile profile_name (and in my case for the purpose of this article I used, aws configure --profile techchak) in your terminal and the next prompt is where you can input your credentials (the aws_access_key-id, aws_secret_access_key you earlier downloaded) and the default region name.
Note we gave it a profile name called techchak. If you do not specify the profile name, AWS will give it a default name tag which you can also use if you do not have a user already configured in the default profile.
Create a Folder For Your .tf Files
Create a folder on your local system and name it (for the purpose of this article I named mine "techchak"). Open the folder named techchak on your VSCode.
Create the Necessary Files
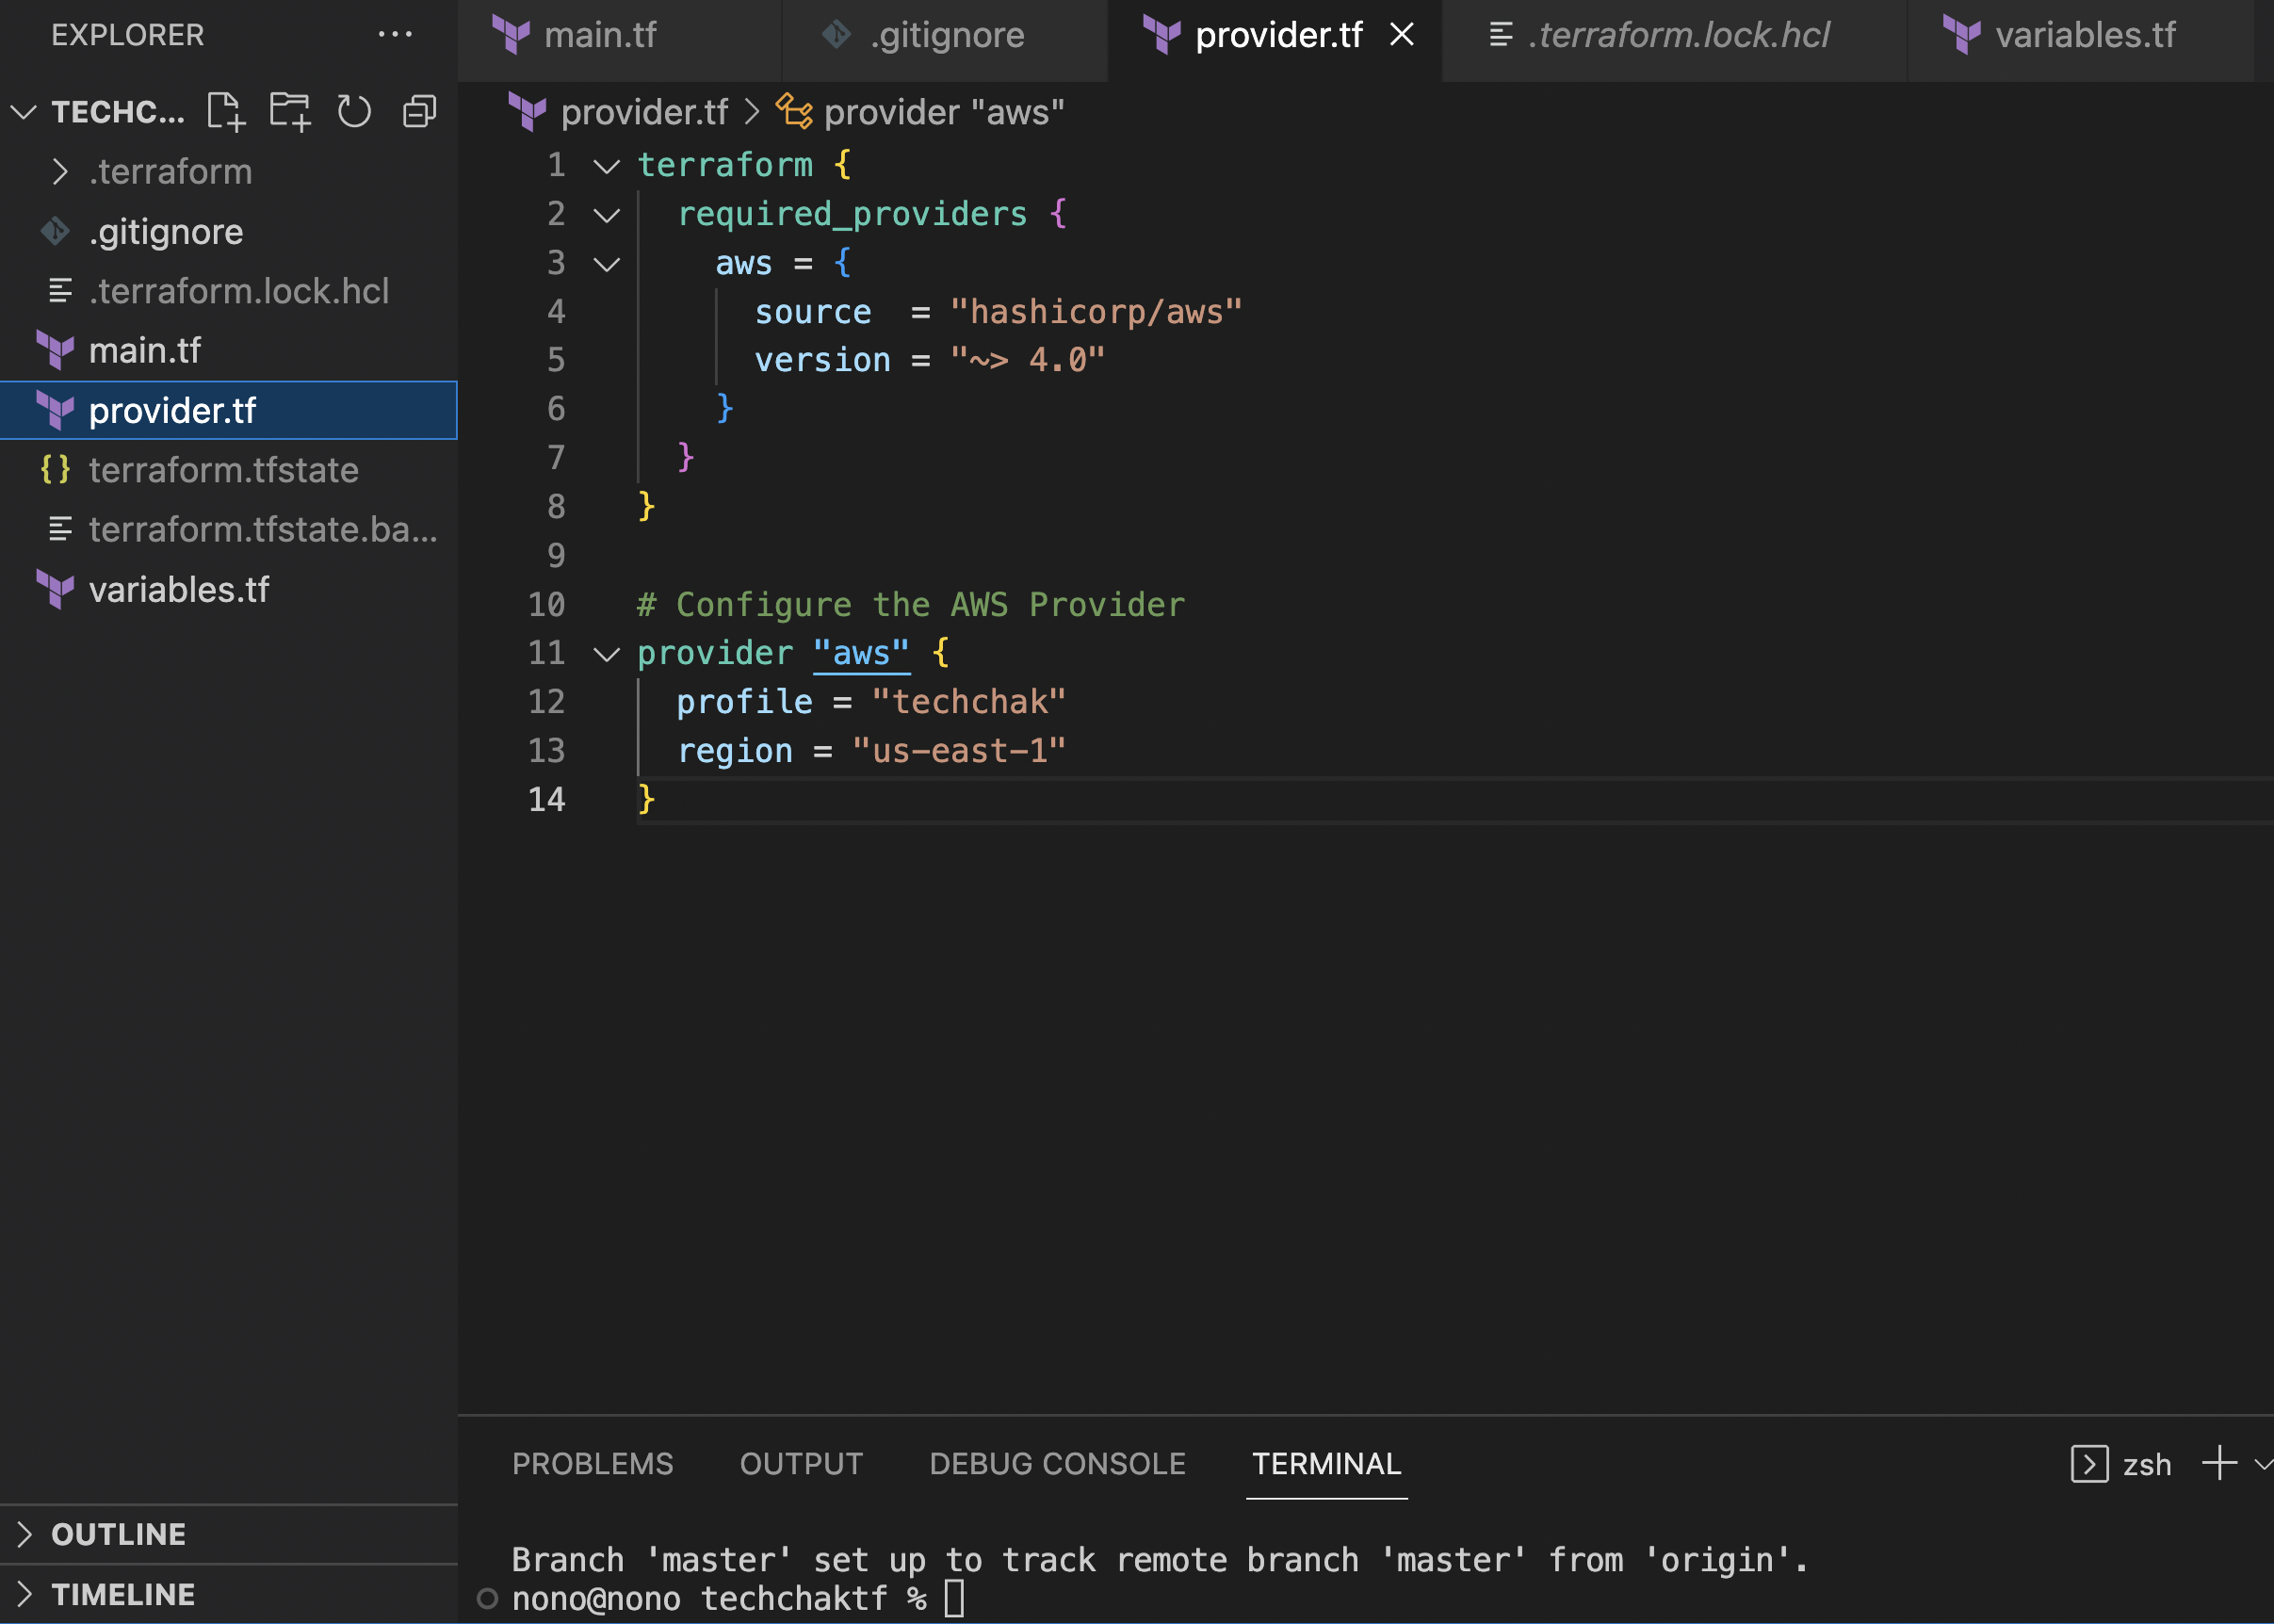
There are basically three main files to create inorder to get your terraform code to deploy. They include but are not limited to the following: a) main.tf (b) provider.tf and (c) variables.tf files. Terraform commands read all the .tf files when executed.
Configure AWS Provider
- Initialize Terraform
Once you have your AWS Provider resource configured, using the terraform init command, initialize terraform on your terminal. Once you have inputed the init command, Terraform will create a lock file .terraform.lock.hcl to record the provider selections. You should get this once it successfully initializes.

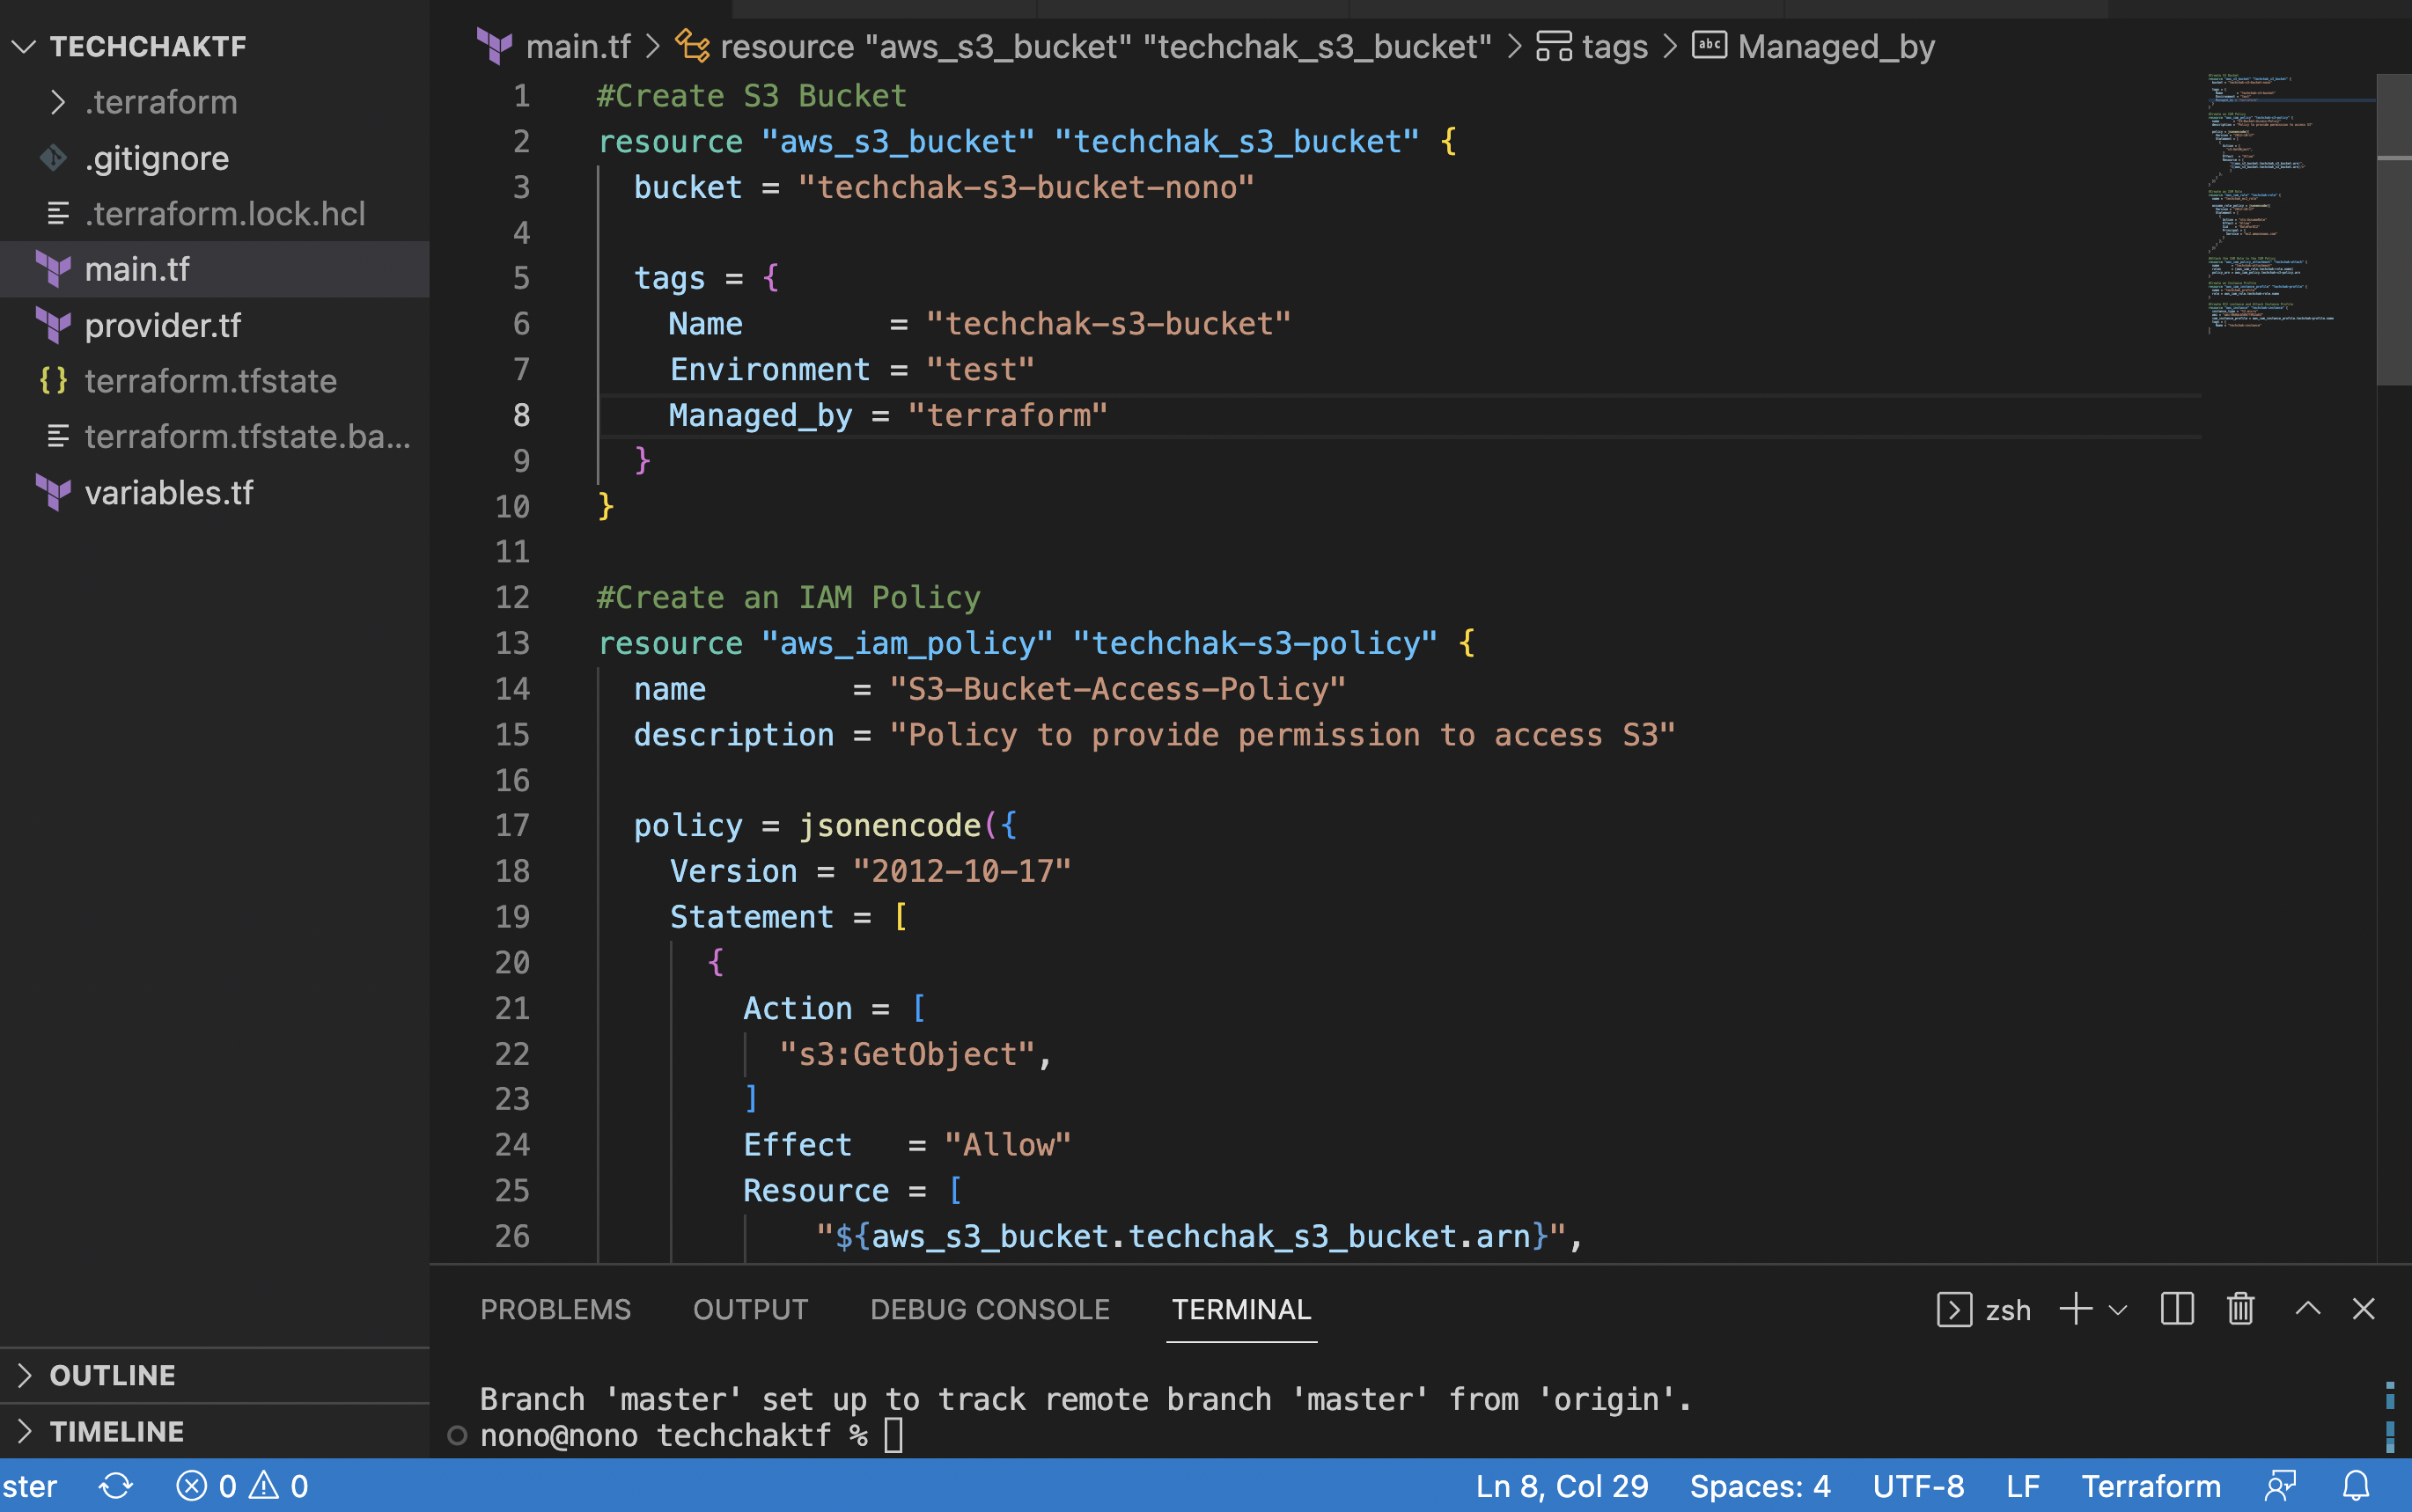
- Create an S3 Bucket Resource and IAM Policy Resource
- Create an IAM Role
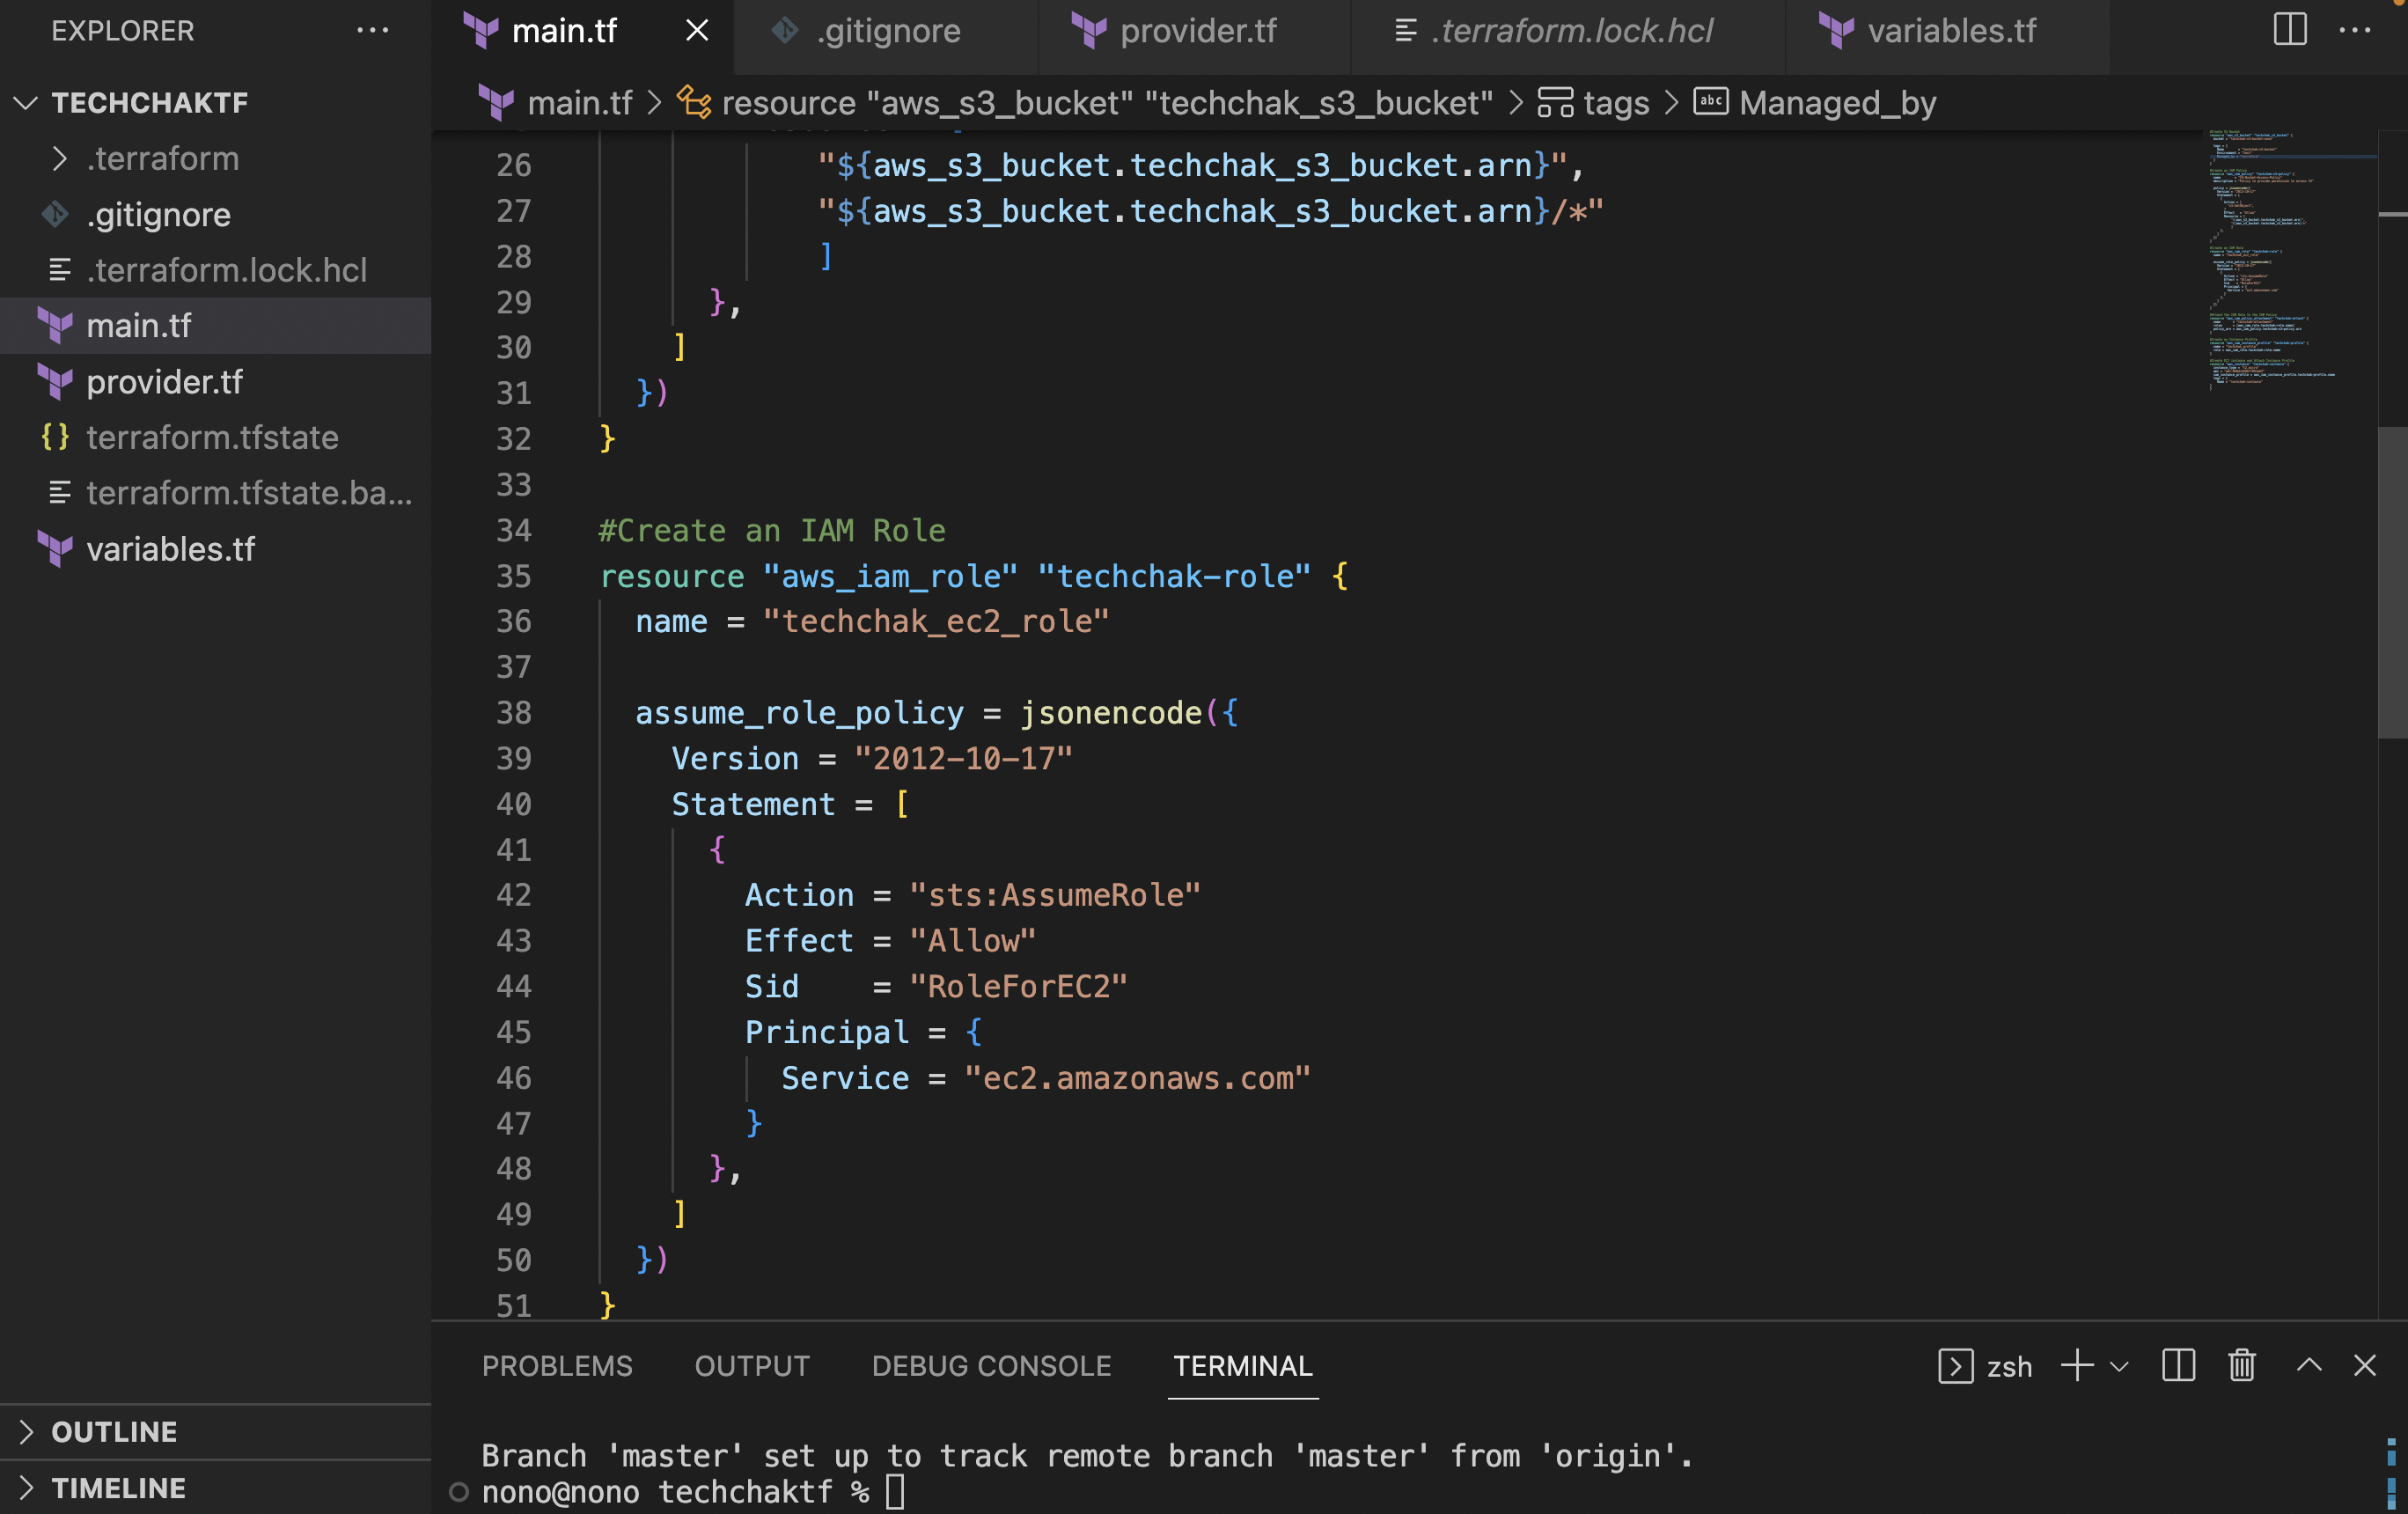
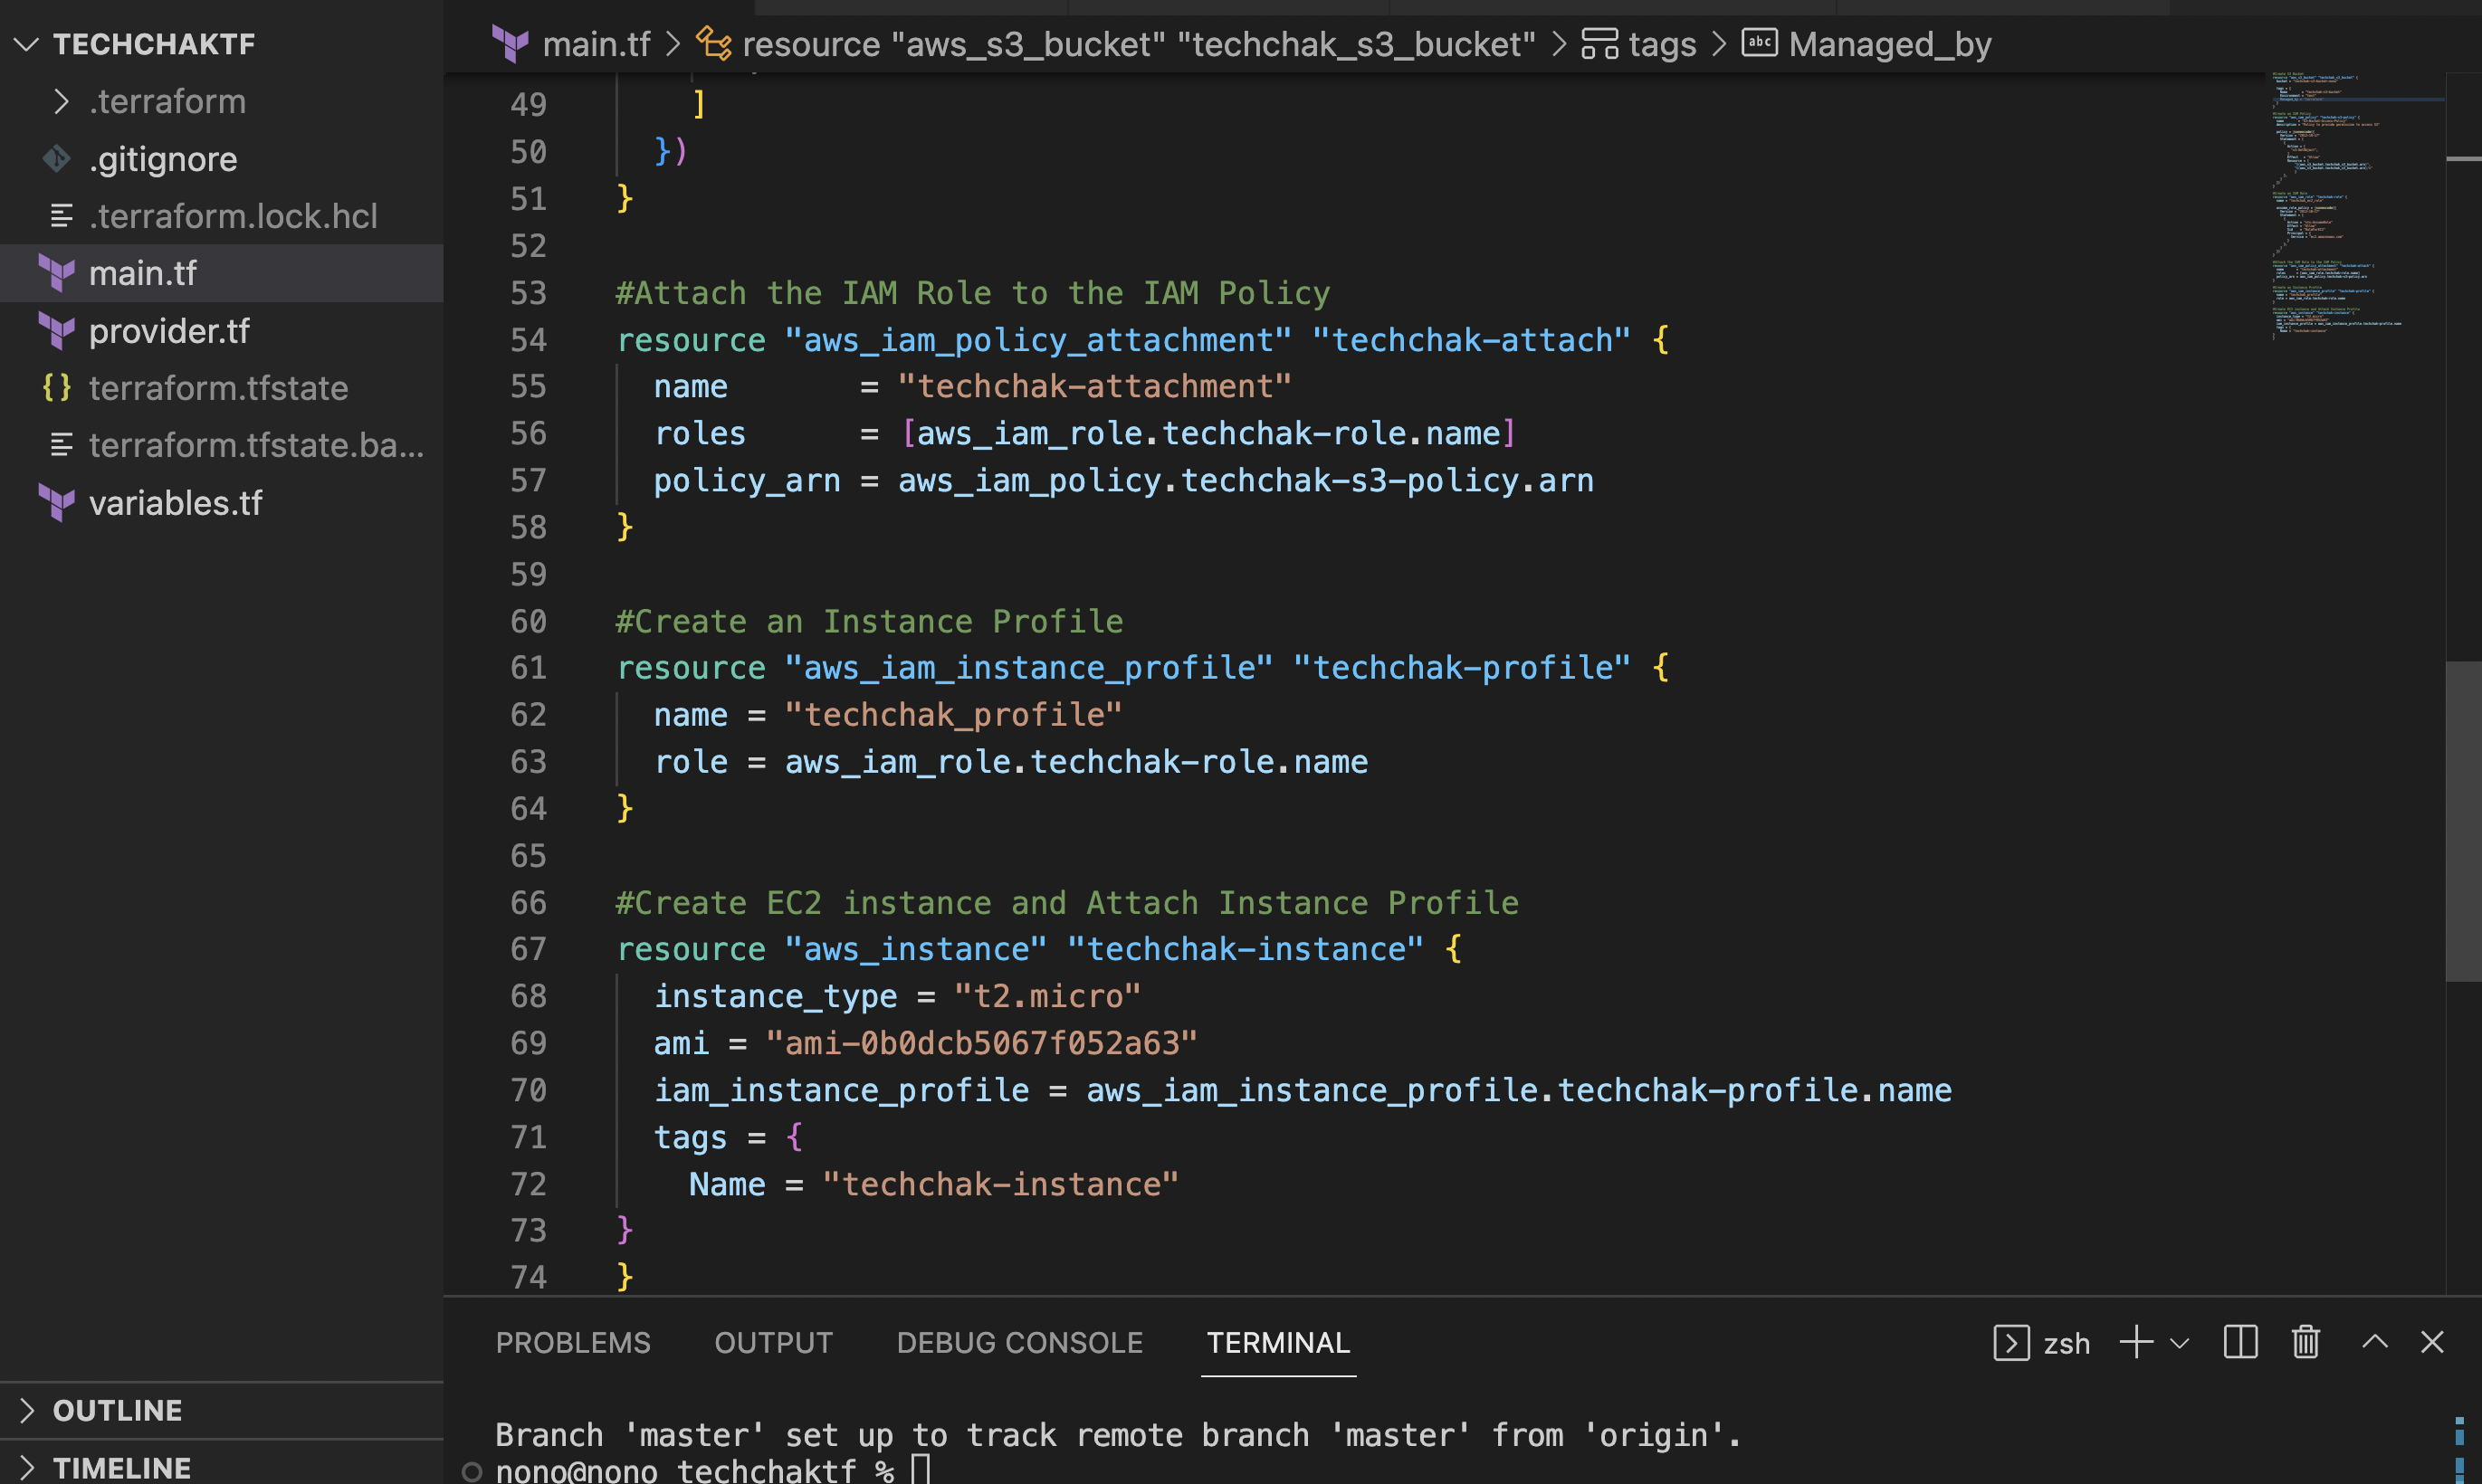
- Attach the IAM Role to the IAM Policy.
See lines 53-58 in the screenshot below.
- **Create an Instance Profile. **
See lines 60-64 in the screenshot below.
Note: You cannot attach an IAM role to an instance directly, you have to use an Instance Profile to pass the IAM role, as seen in Line 53 of the code below. Also, a role can belong to multiple instance profiles but an instance profile can only have one IAM role.
- **Create an EC2 Instance and Attach the Instance Profile to it. **
See lines 66-74 in the screenshot below.
Terraform Plan.
By inputing the command terraform plan, terraform will let you know if you intend to apply the resources spelt out in your code.

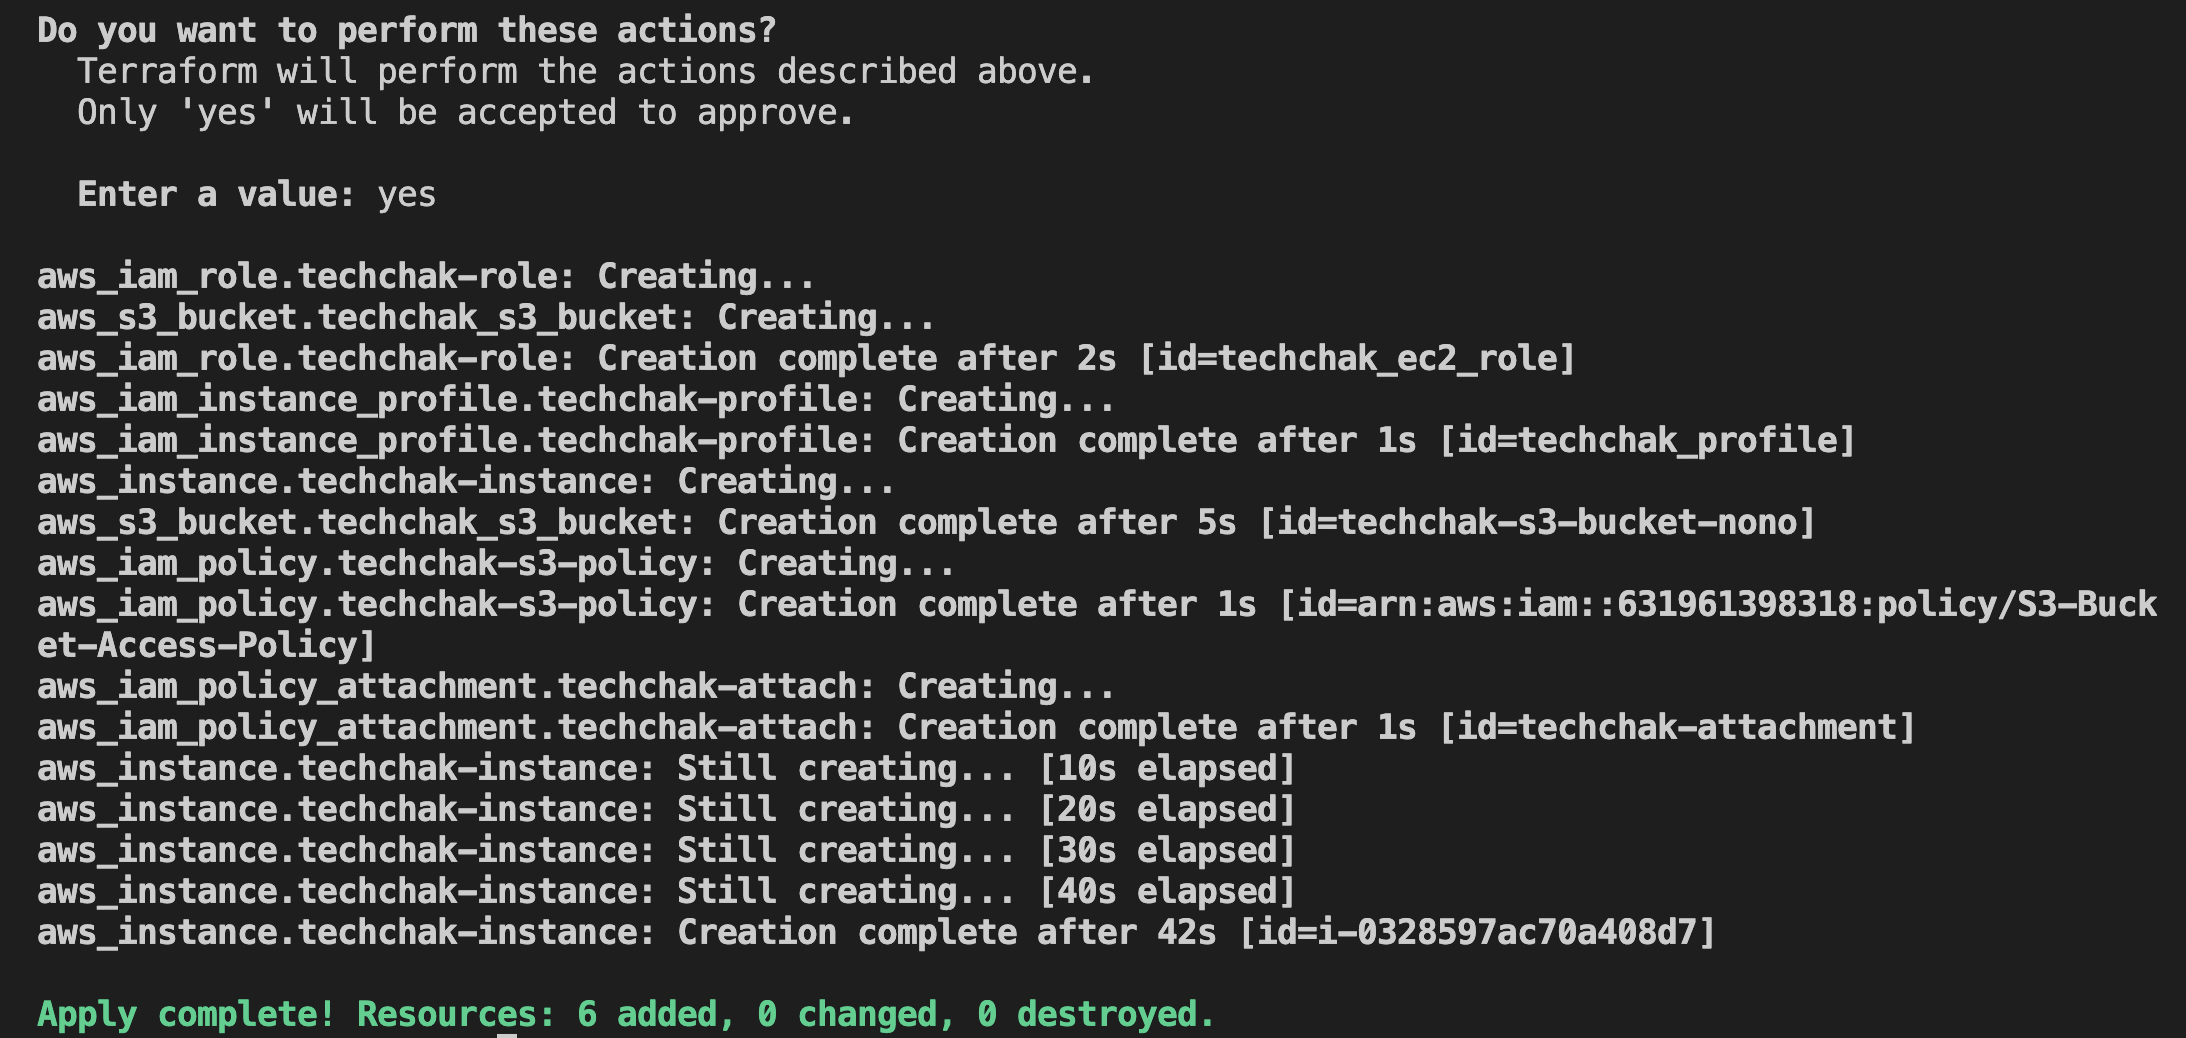
**Terraform Apply **
Input the command terraform apply to deploy all the resources.
Confirm the instance has been created on the EC2 Console and role attached.
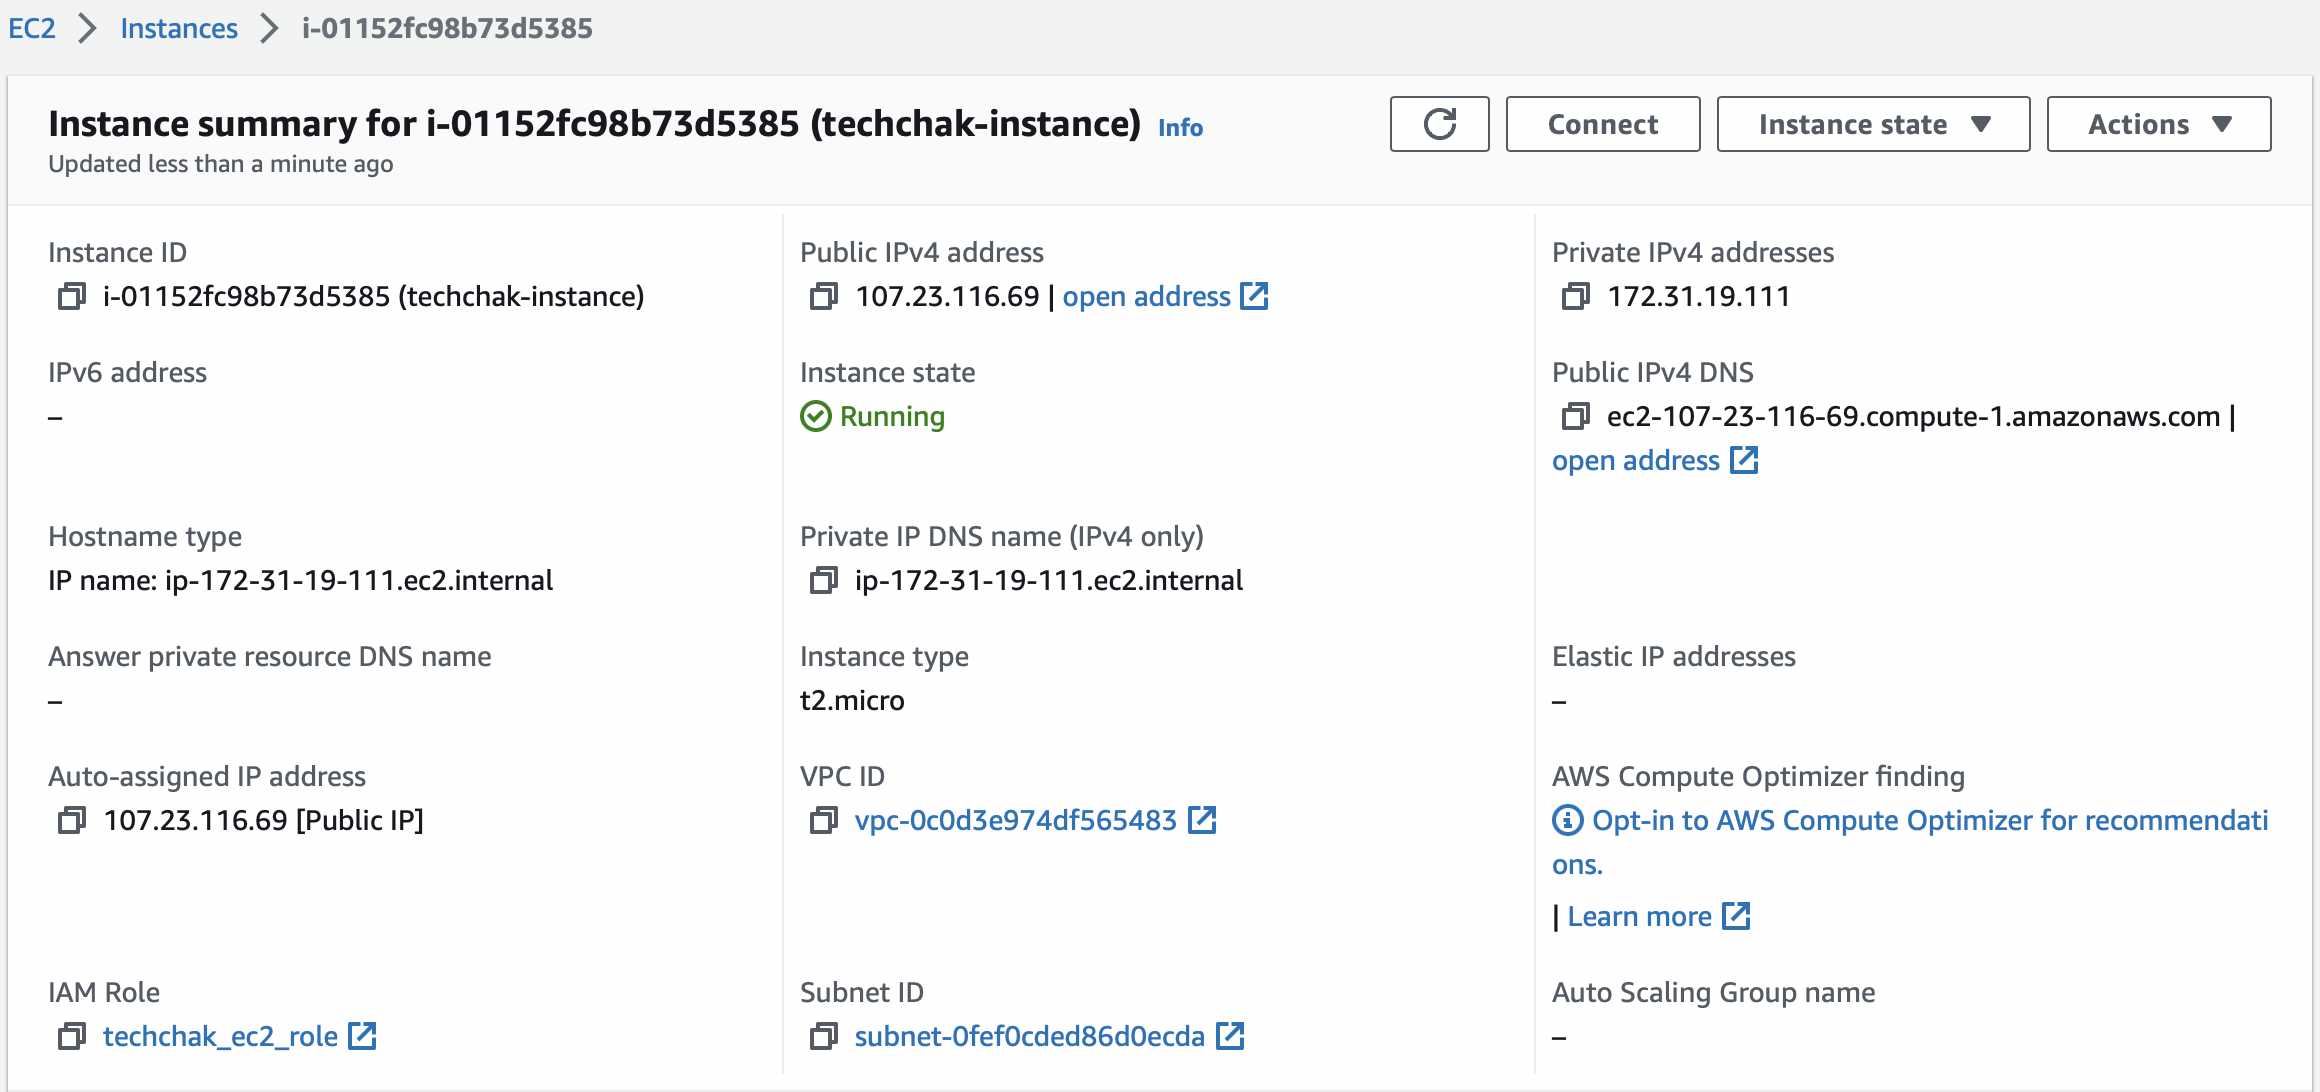
Note: Always verify that your terraform apply actually did apply and create the resources you specified by checking the service on your AWS Console even though apply complete means that your resource was created.
PRO-TIP: Whenever you are building out your terraform template, it is recommended to always make small incremental changes. So that you can treat any errors that pop up as a result of terraform applying a single resource as opposed to terraform applying on multiple resources that might end up displaying/returning limitless red error lines.
For this tutorial, I terraform applied after each resource created and also double-checked on the console that it was created.
Cool yea?

Now, you know I won't leave without dropping a nice gem... A nice to have once you are done deploying your terraform resources is to push your code to a GitHub repository so that other team members can review or add comments to make the code better.
If you have read up till this point, thank you! and please feel free to like, share, comment, or ask questions. Your feedback means a lot!


