
Run a React App on AWS Cloud9 From Scratch

Project Manager|| Cloud/DevOps Enthusiast || AWS Certified Cloud Practitioner || Lawyer. Love talking about anything Cloud or DevOps related. Let's Cloud the Cloud!
Let us go through an easy step-by-step guide on how to run a react app on AWS Cloud9 from scratch.
Case Study
A ReactJs website has just been created and you have been unable to preview the newly created react app. You're to test and run the ReactJs code on Cloud9 to enable you and the others access the application via a URL or an IP address.
In order to successfully carry out this task, your understanding of Git commands, AWS resources like EC2 instances, Security Groups, and Cloud9 will be tested.
Backdrop
Using the STAR method (specific situation, task, action, and result of the situation you are describing) and having understood the specific situation and task as outlined in the case study, let us now dive into how to solve the challenge.
Project Prerequisites
Knowledge of AWS and AWS Cloud 9
Must be familiar with Git commands
Knowledge of GitHub
Step 1
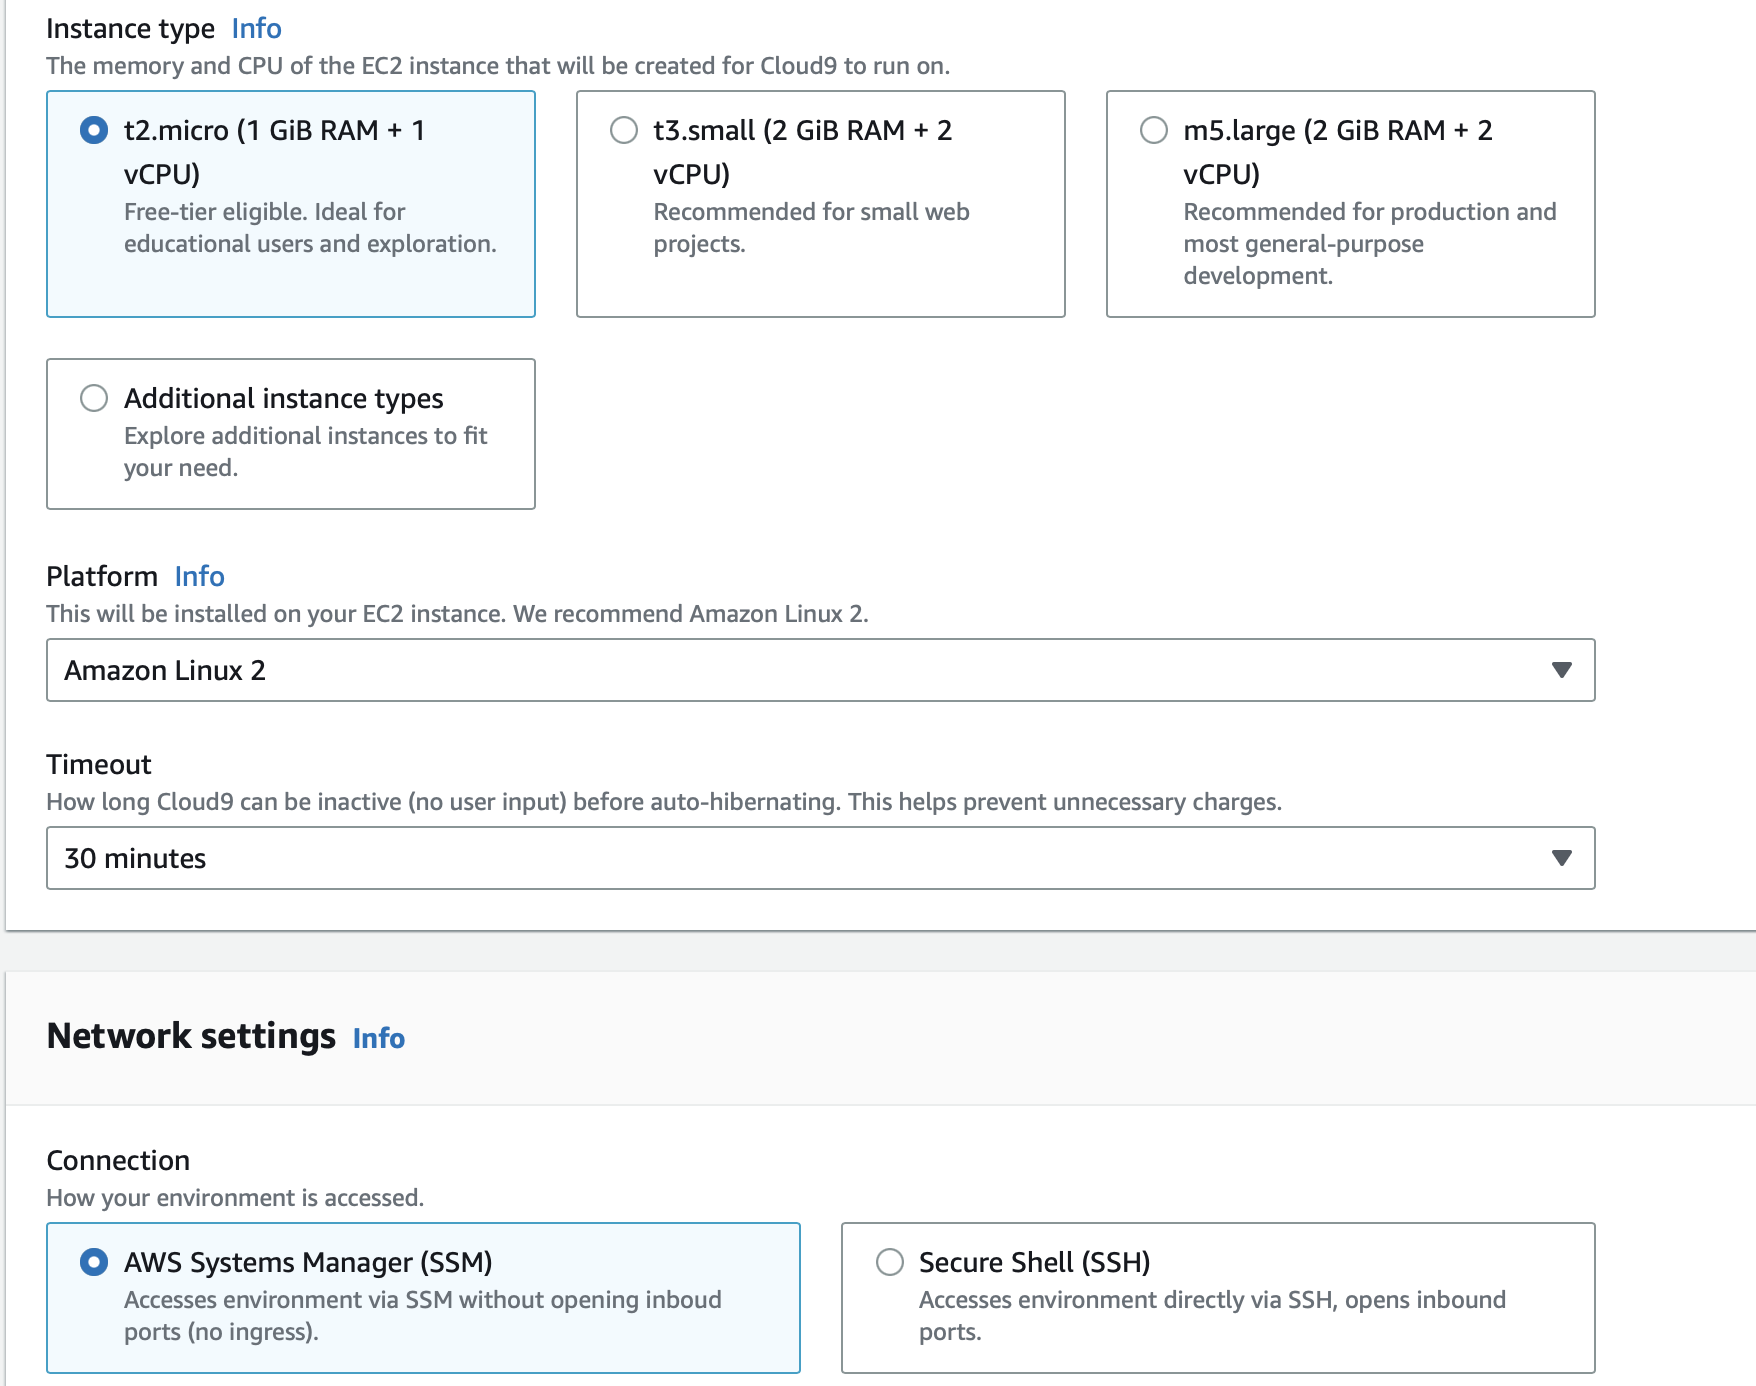
- Create a Cloud9 environment:
Cloud9 is basically a cloud environment has helps you write, run, and debug your code with just a browser.
While creating a Cloud9 environment, fill in the required sections like your environment name, environment type, instance type and network setting (for this guide we will use SSH), then create.

For instance type, I would recommend using the t.2micro instance type to avoid ridiculous bills! lol
Step 2
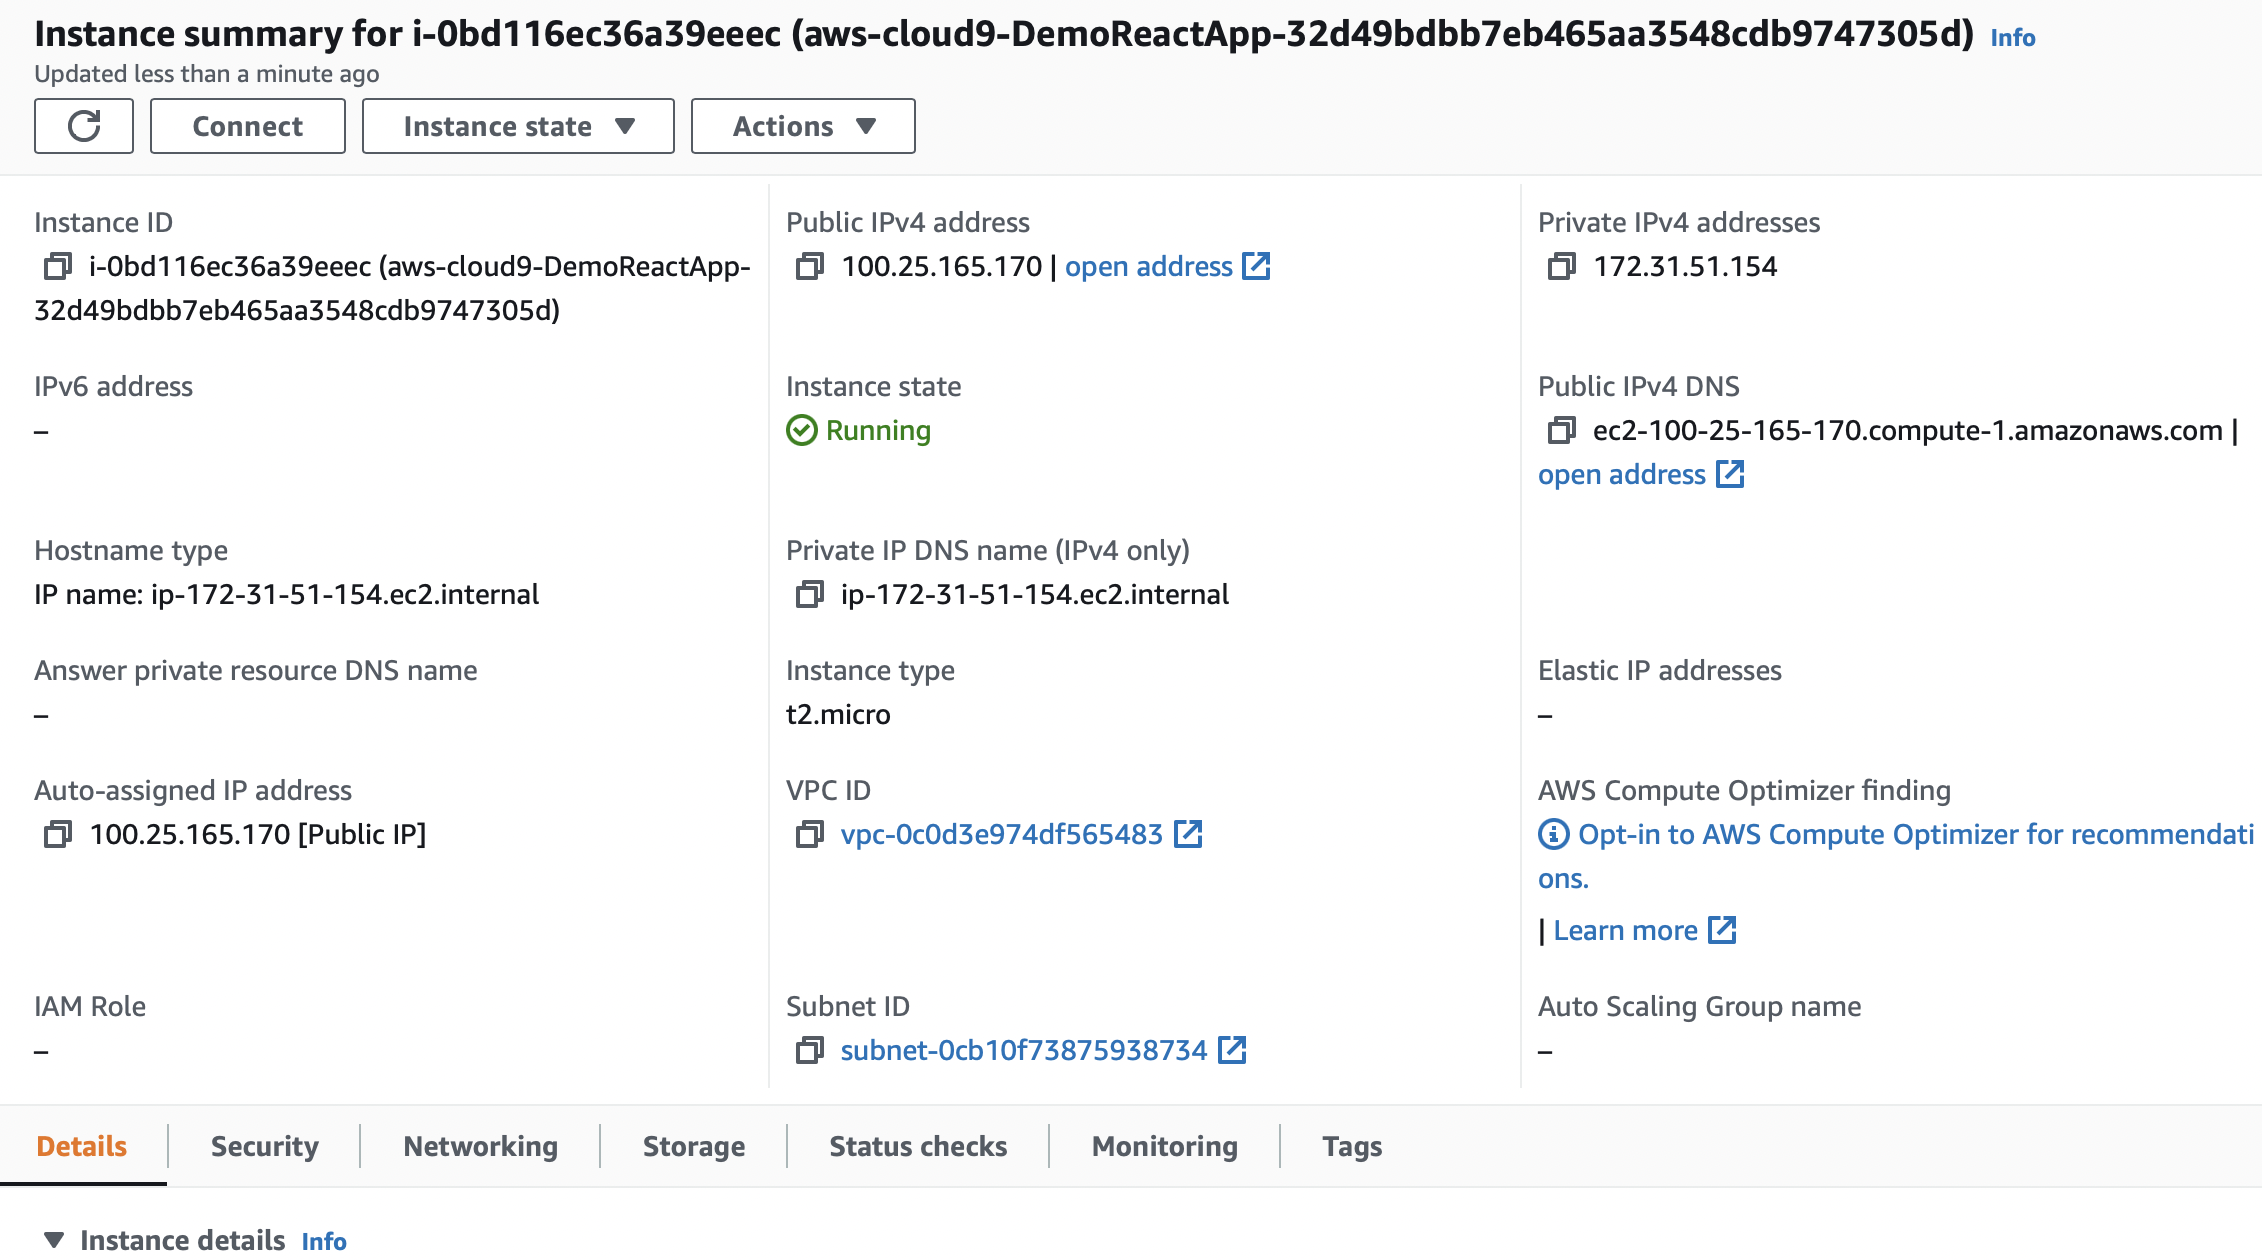
Once the environment has been created, go to your EC2 Console and you will see an instance created by Cloud9. This instance will host/serve your react application.
Step 3
- git clone the repo url
Open your cloud environment, then clone your GitHub repo which has the react js using the command
git clone https://github.com/OkiriGabriel/techchak-sample-react-app-1.git
Step 4
- Navigate into the react app and run it by using the command
cd techchak-sample-react-app-1

Step 5
Once you have navigated into the app, in order to run it, input the command
npm start
You might come across an error prompt react-scripts not found. This is an expected error because, before you run an app you must install all the packages the app needs by running npm install.
npm install works by looking at the package.json file and then it creates all the packages the app needs to run and also creates a node modules folder.
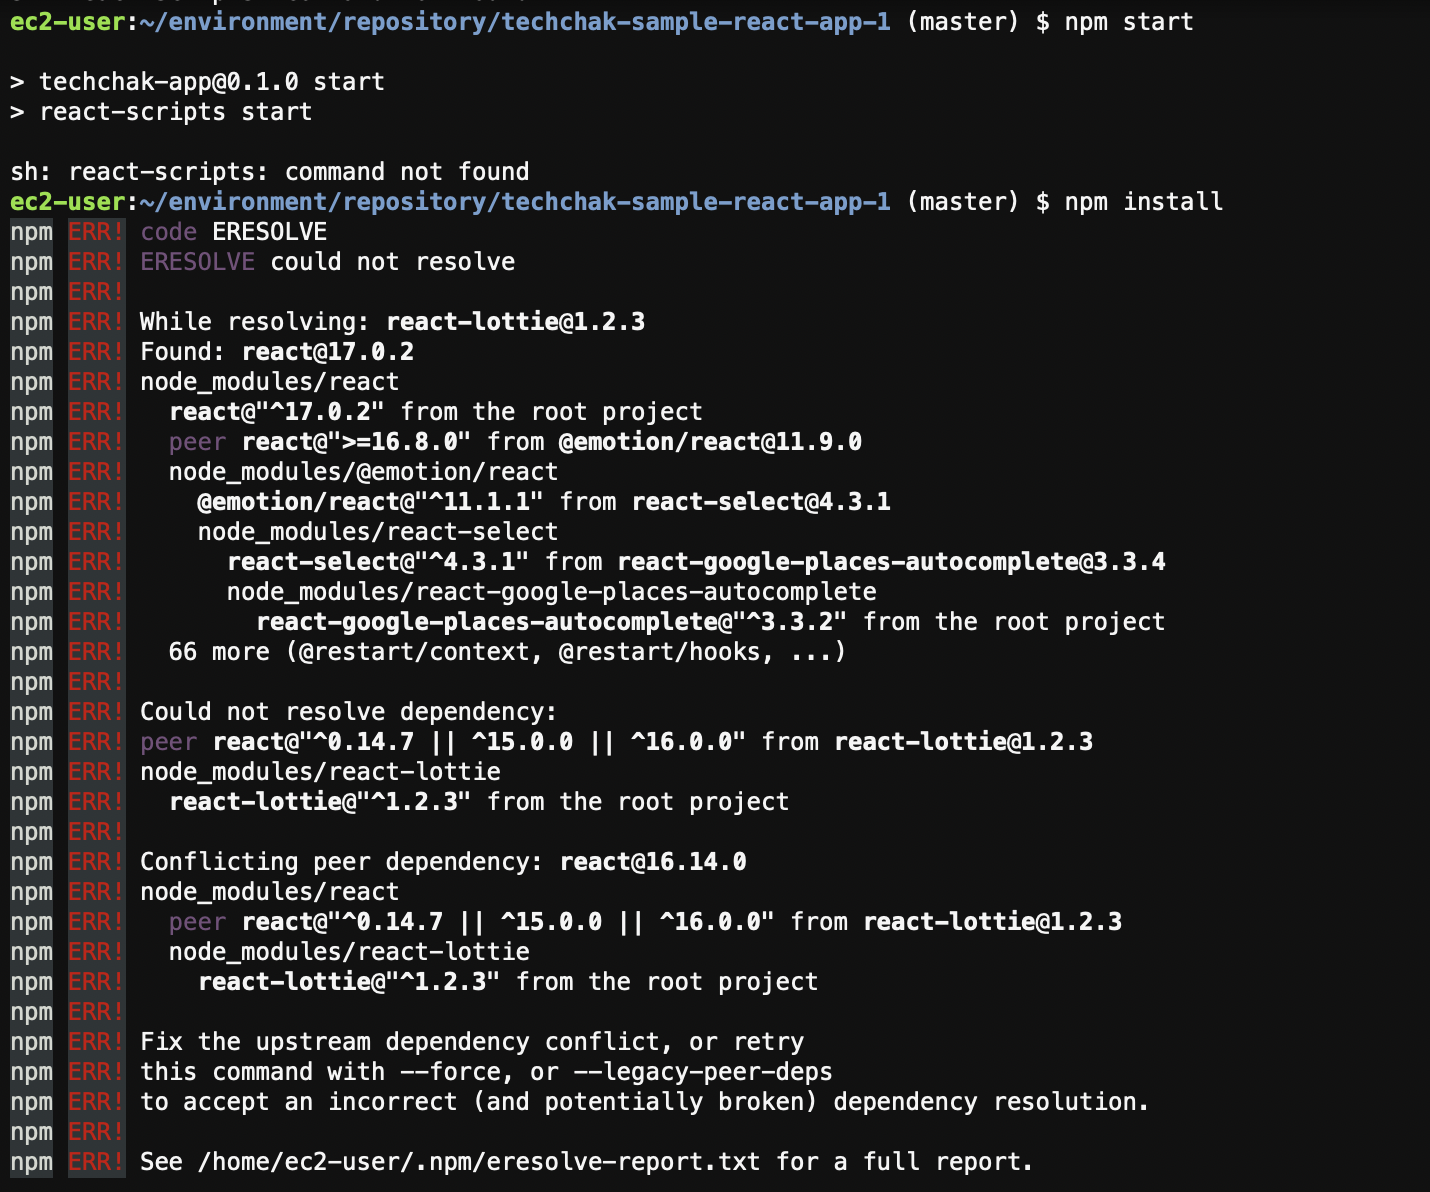
For this particular react code, npm install may fail with the error as seen above.
Usually, the fix for errors like this can be staring you in the face if you read through the error messages. Google has also been proven to be your best friend in finding answers to resolve your errors.
Use npm install --force to get it to run. The --force argument will force npm to fetch remote resources even if a local copy exists on disk.

Step 6
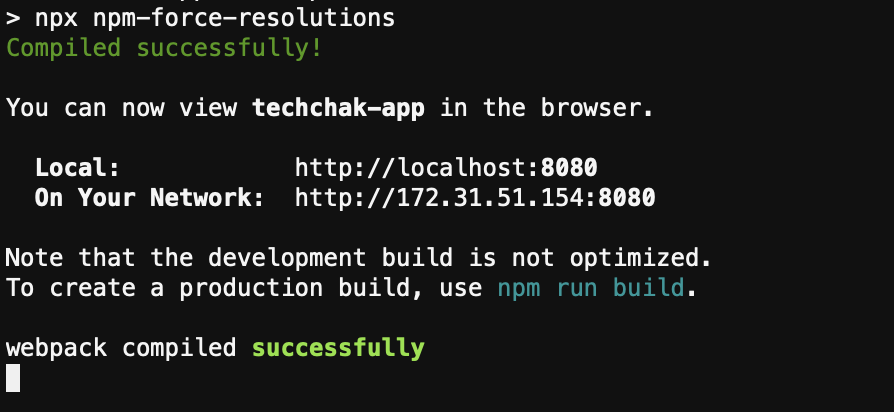
Once npm install --force has successfully run. Enter the command npm start to get the app to start running successfully and you should get this.
Step 7
Now, its time to preview your app on your browser and this is where it gets tricky.
In the screenshot in step 6, you see where localhost and on your network is mentioned. Those are the ways to access/preview your app. However, hitting any of the URLs (localhost or your Cloud9 IP) will keep loading endlessly because the IP address (as seen on your network) is a Private IP and Private IP's only work within their network circle.
To explain this in working, if you input the command curl "on your network IP ":listening_port -vv within the Cloud9 environment, it will successfully return 200 OK which means it works and the reason is because, the Private IP is also the Cloud9 Instance Private IP which is in the same network range (this is networking 101).
See:
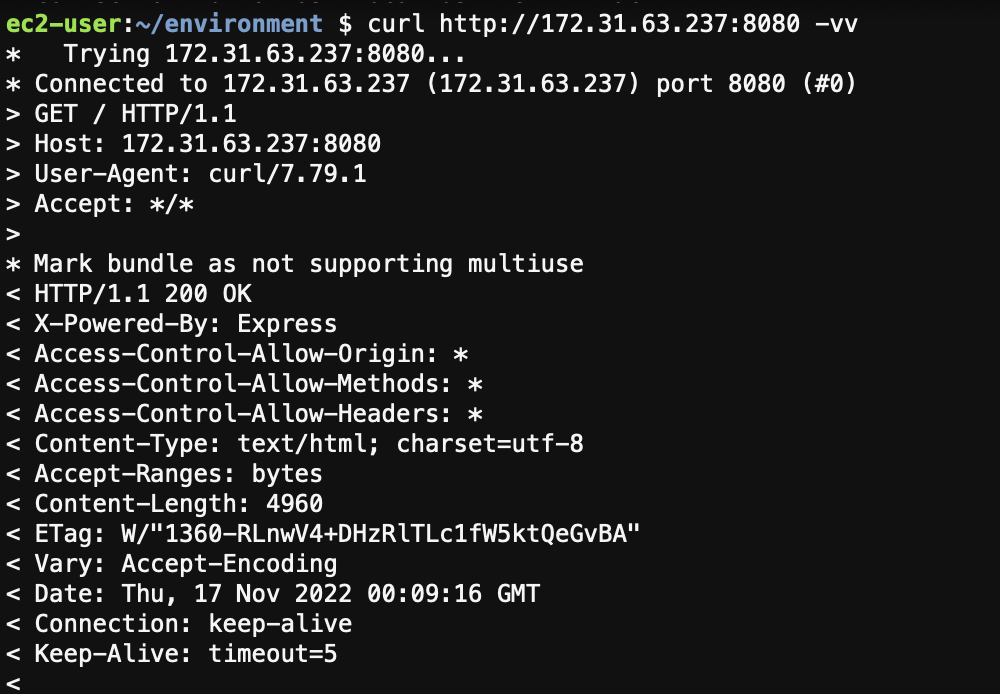
Now, you can access your app using the curl command from the Cloud9 instance environment. You will recall that up till now we cannot still access this app over a web browser, Do you know why?
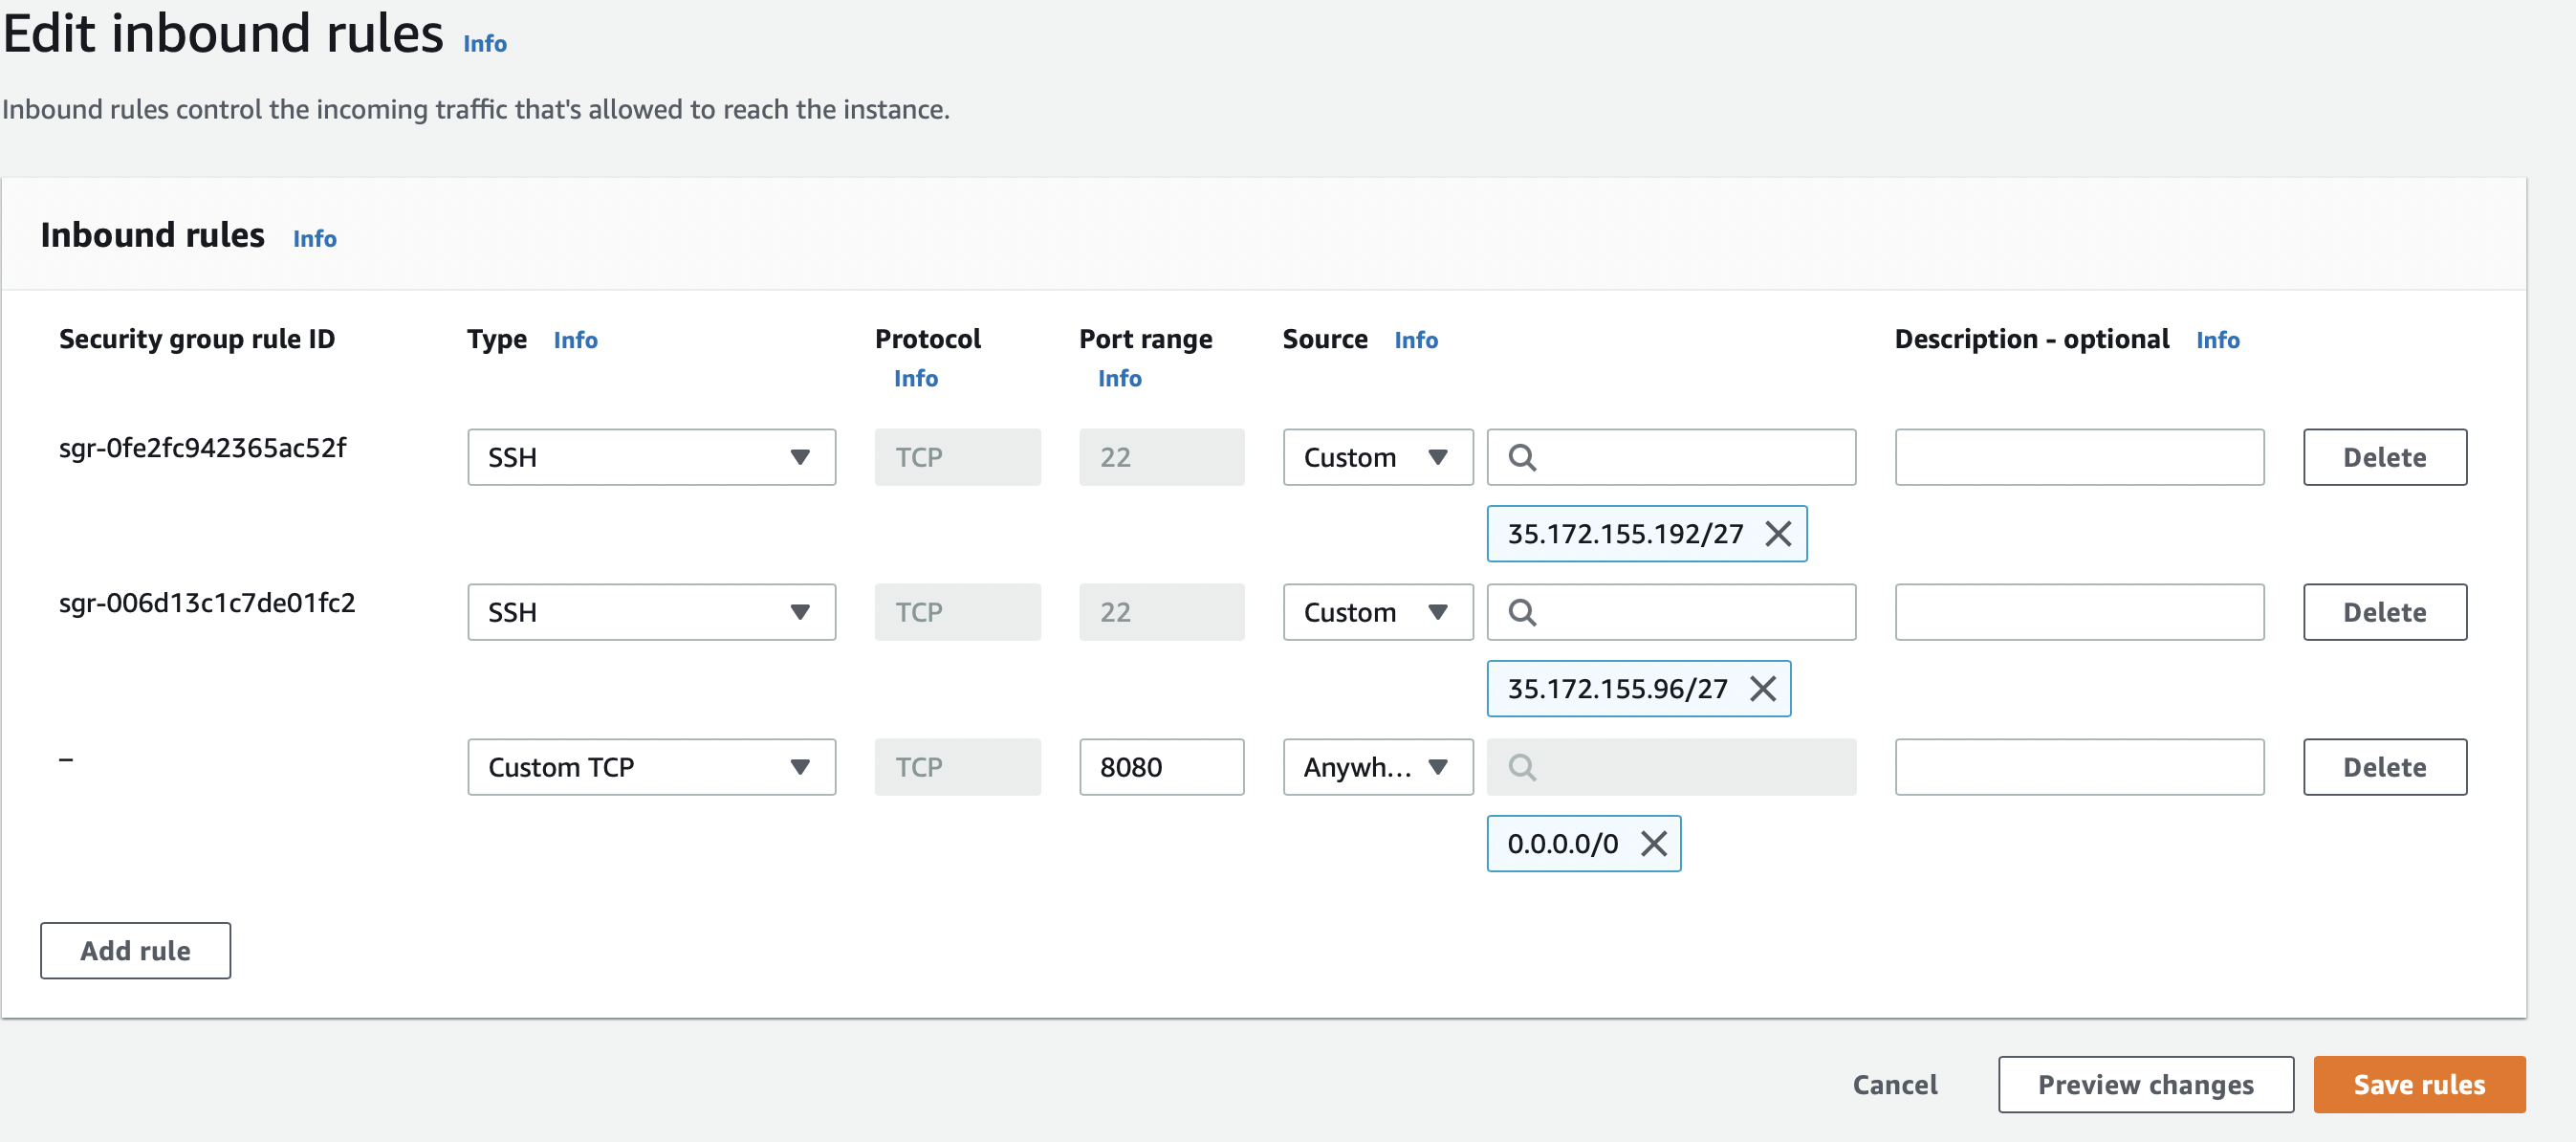
This is because the application listens on port 8080 and we need to edit the Cloud9 instance Security Group to allow inbound traffic from your local system IP on port 8080.
For this tutorial I used 0.0.0.0/0 which means any IP. Please note that it is not the ideal especially when working in a real work environment, rather use the specific IP range.
Step 8
Afer editing and saving the changes made to your SG inbound rules. Go back to your instances on the EC2 console and copy the Public IP4 address and paste it on your web browser. For example, 100:25.167.179:8080(8080 being the port your app is listening on) and voila! Your app will be up!
Congratulations!!!

Your task is successfully completed! We have been able to successfully run a react app on AWS Cloud9 from scratch!
Isn't that amazing? Let's take it a step higher.
In a production environment, it is good and common practice to ensure your instance is behind a LoadBalancer via an AutoScaling Group (ASG) so that your LoadBalancer routes traffic to your app and just incase your instance fails, the ASG will recreate your instance and your LoadBalancer can still hit or send traffic to the new instance created.
**Note **that the benefit is that your LoadBalancer will have a static DNS that users can use to access your application. However, optionally, you can create a domain name leveraging services like AWS Route 53, GoDaddy or NameCheap.
The essence of this domain name (eg. app.example.com) is for branding and easy access for users to remember a domain name for the app rather than an IP address or a long Load Balancer DNS name.
Awesome! If you have gotten this far, thanks for reading and I hope it was worth it for you.