
S3 Cross-Region Replication

Project Manager|| Cloud/DevOps Enthusiast || AWS Certified Cloud Practitioner || Lawyer. Love talking about anything Cloud or DevOps related. Let's Cloud the Cloud!
Intro
Amazon S3 is a service that is used to store objects, host websites and so much more depending on your use case. At the core of it, it is literally a bucket that holds stuff. S3 is a global resource. However in the cause of creating an S3 Bucket, if you do not pay close attention to all boxes to fill or check you might miss the part where you have the choice to select which region it is to be created in. Nice, yea!
Let us make a real-time copy of the objects in bucket A into bucket B and ensure that both buckets are not in the same region. We will use S3 replication to solve this issue so that bucket B serve as a backup in case of a failover or where objects in bucket A get deleted.
Prerequisites
- In-depth understanding of S3.
Seeing that S3 is an AWS resource, you must first have an AWS account to enable you try out new things and learn in the process.
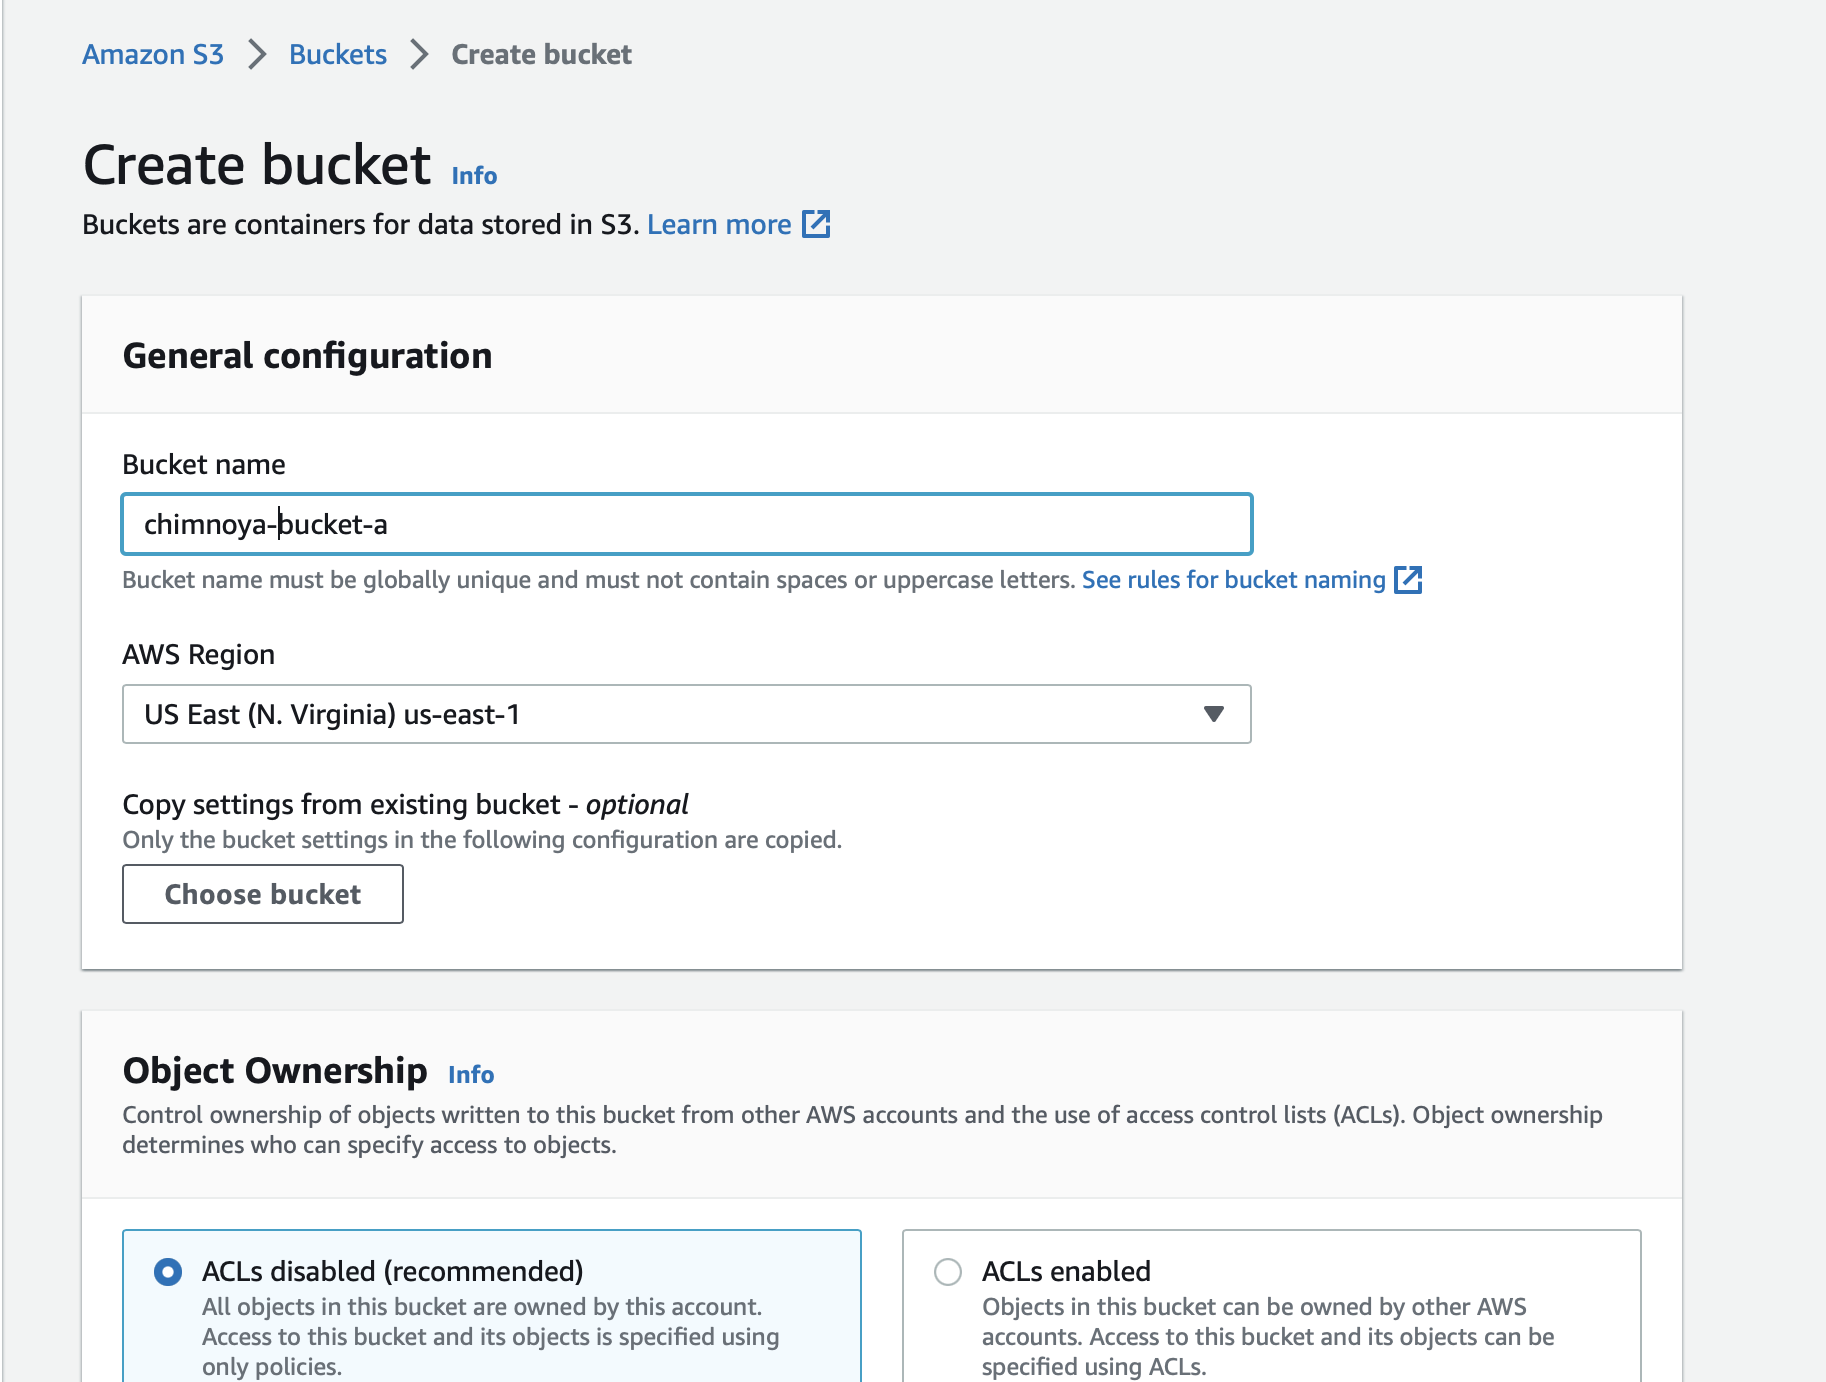
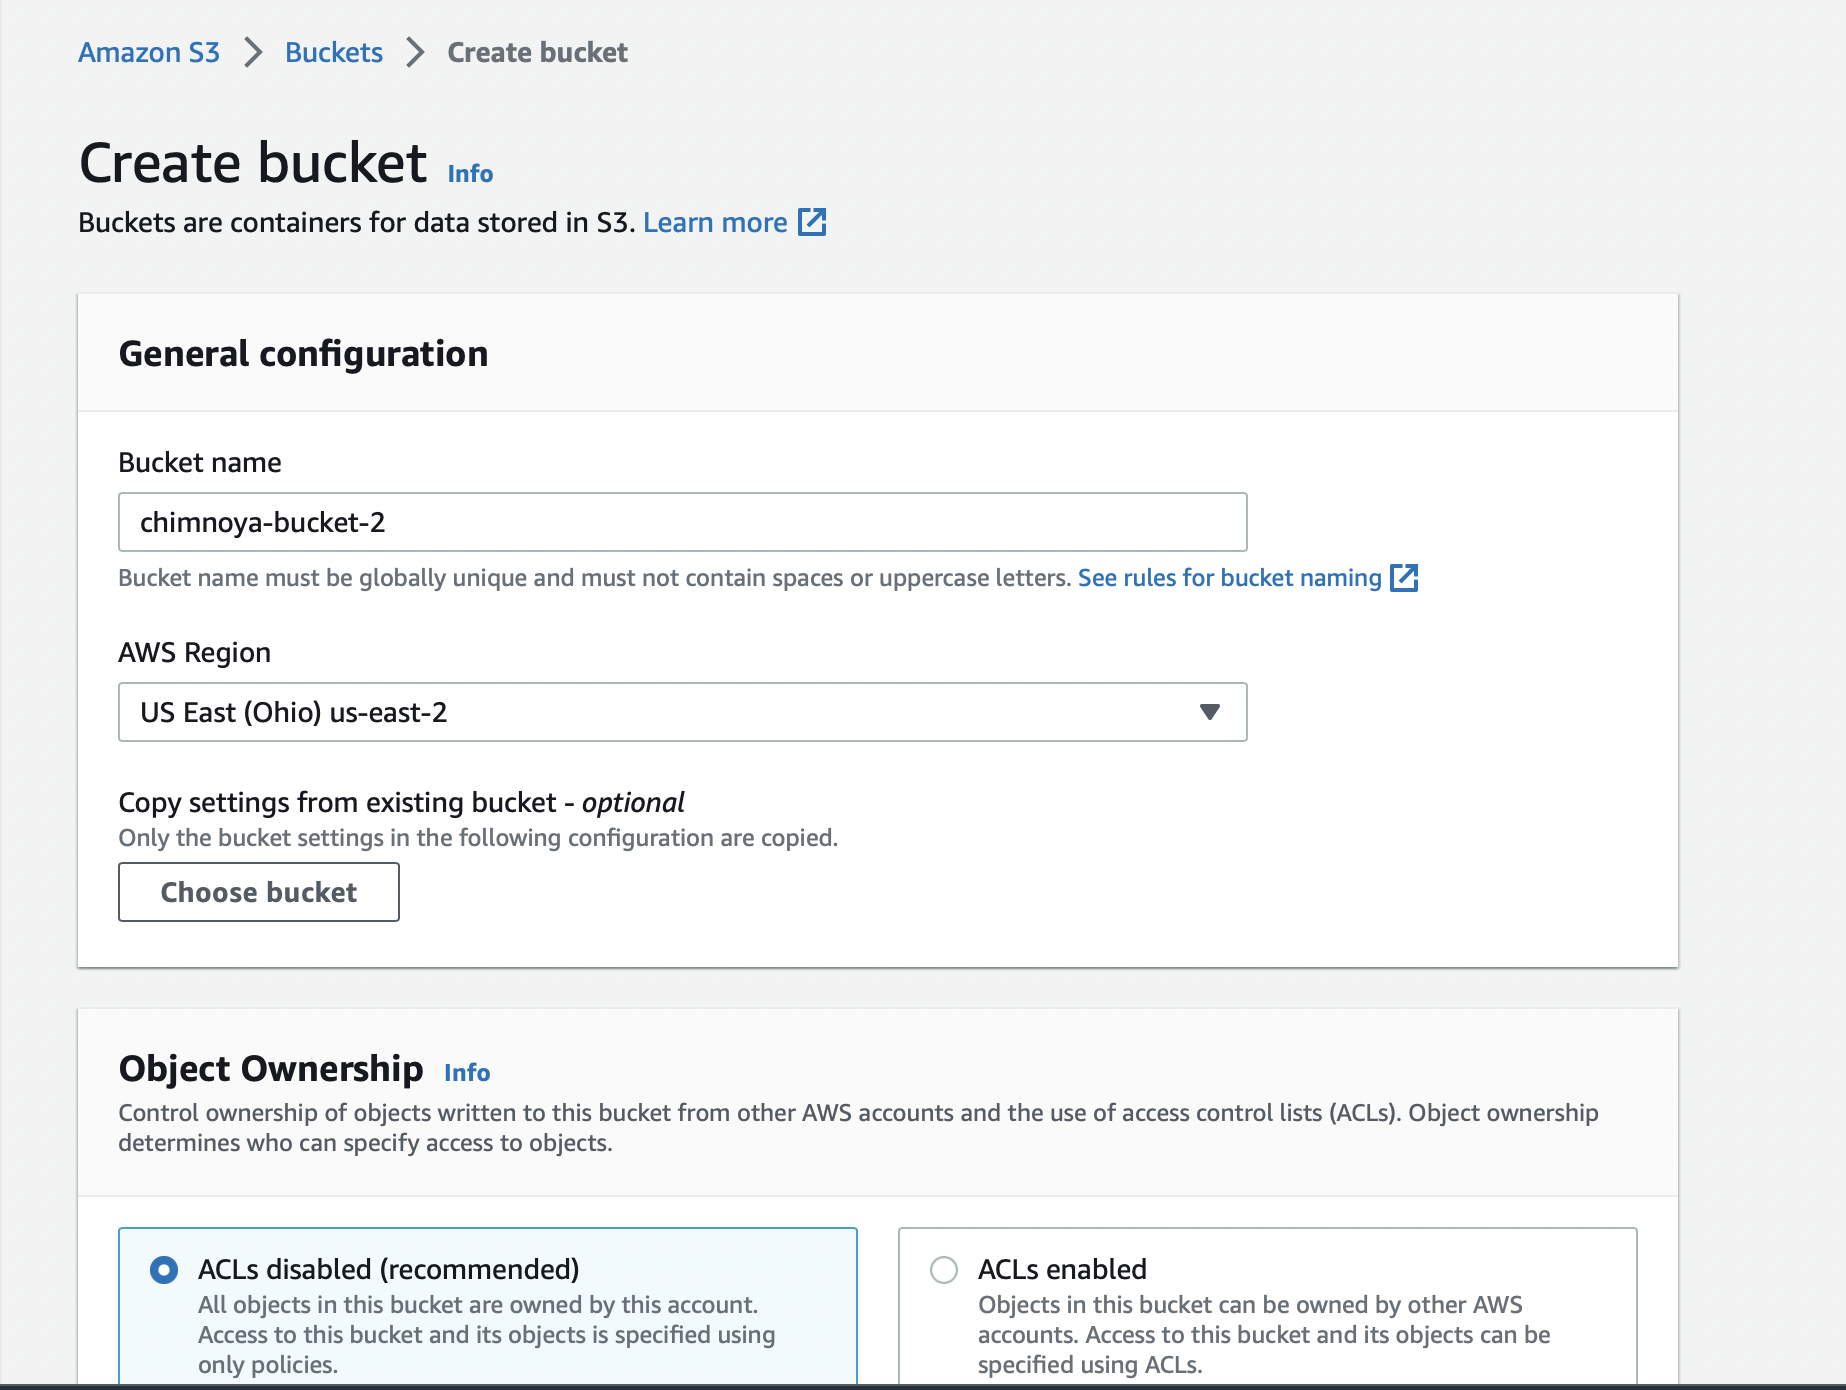
Now, we can deduce from the task that you will require two buckets. Navigate to your S3 Console and create bucket A in any region of choice (I created mine in us-east-1) and bucket B in us-east-2. Bucket A will serve as the source and Bucket B as the destination.
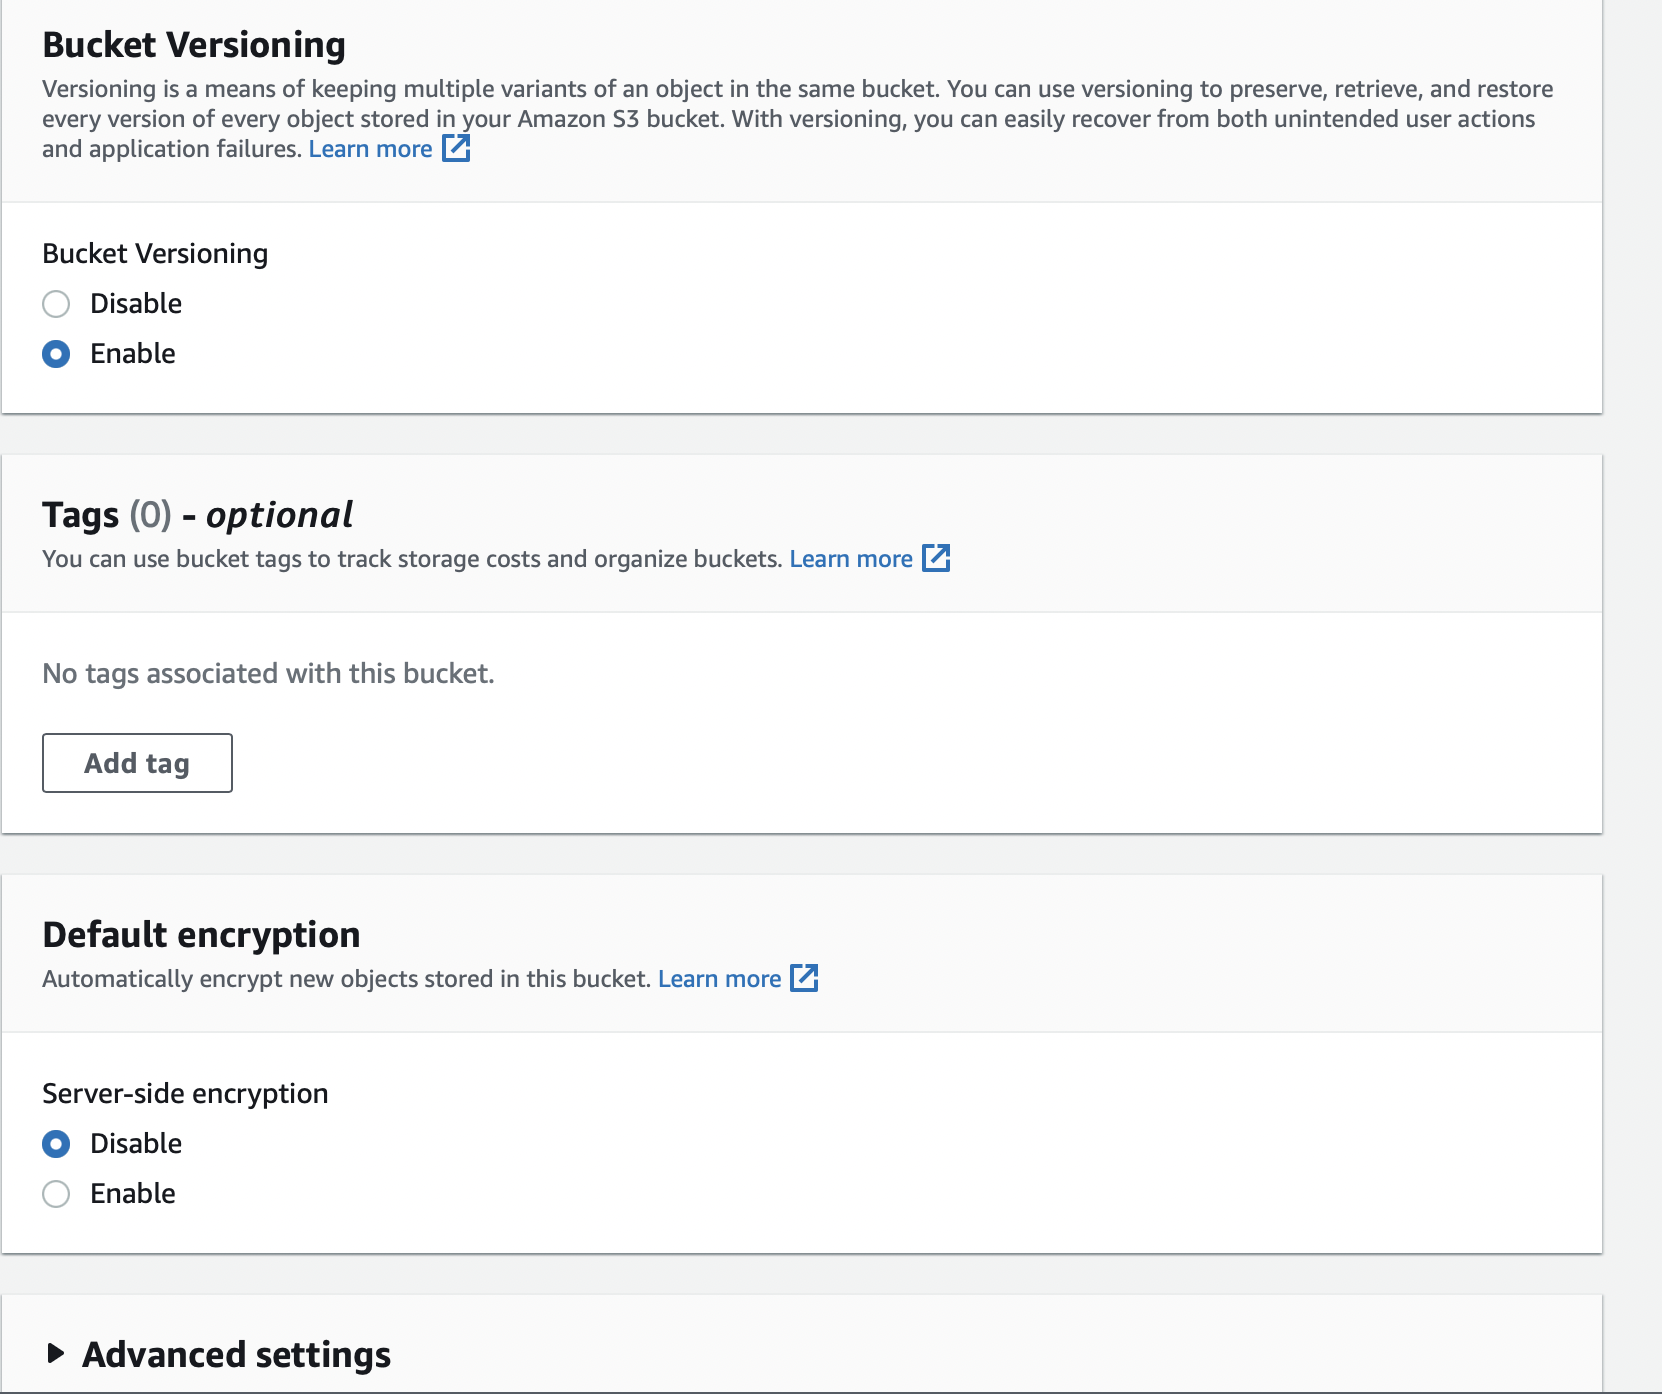
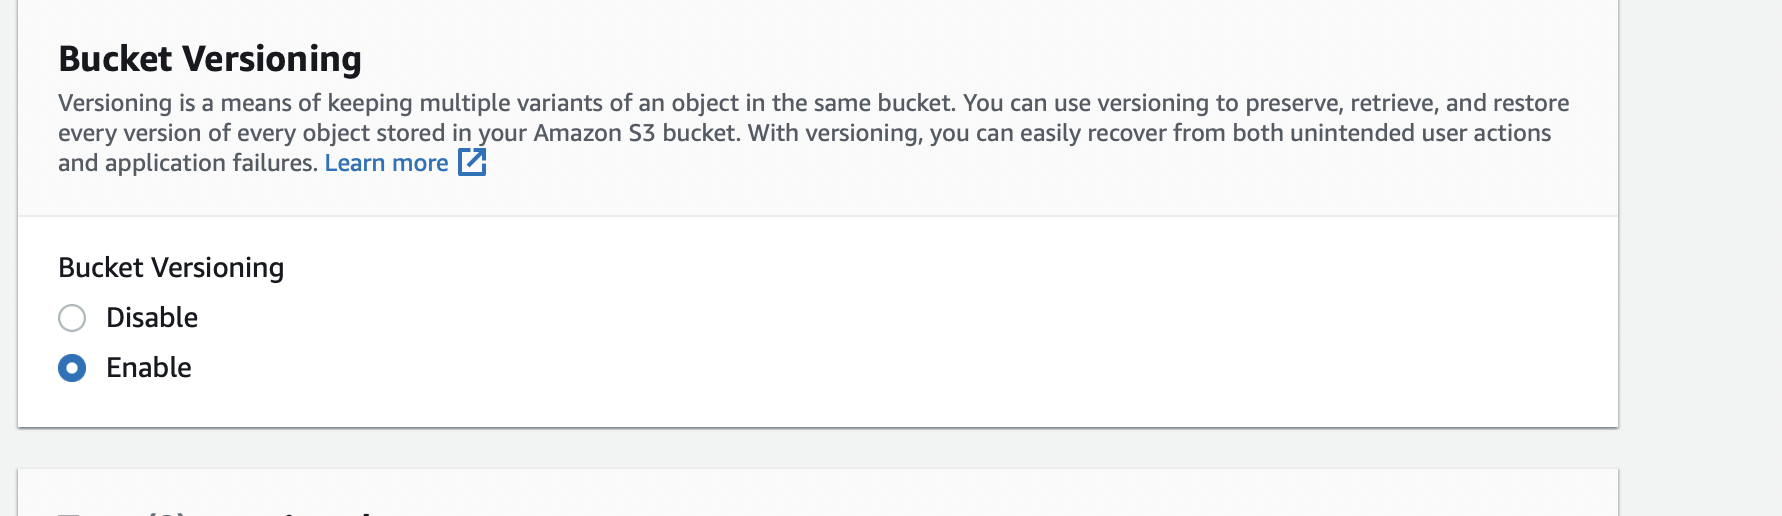
Note: When creating the bucket, make sure to enable bucket versioning for both buckets.
Step 1 - Create Buckets
Bucket A
Bucket B
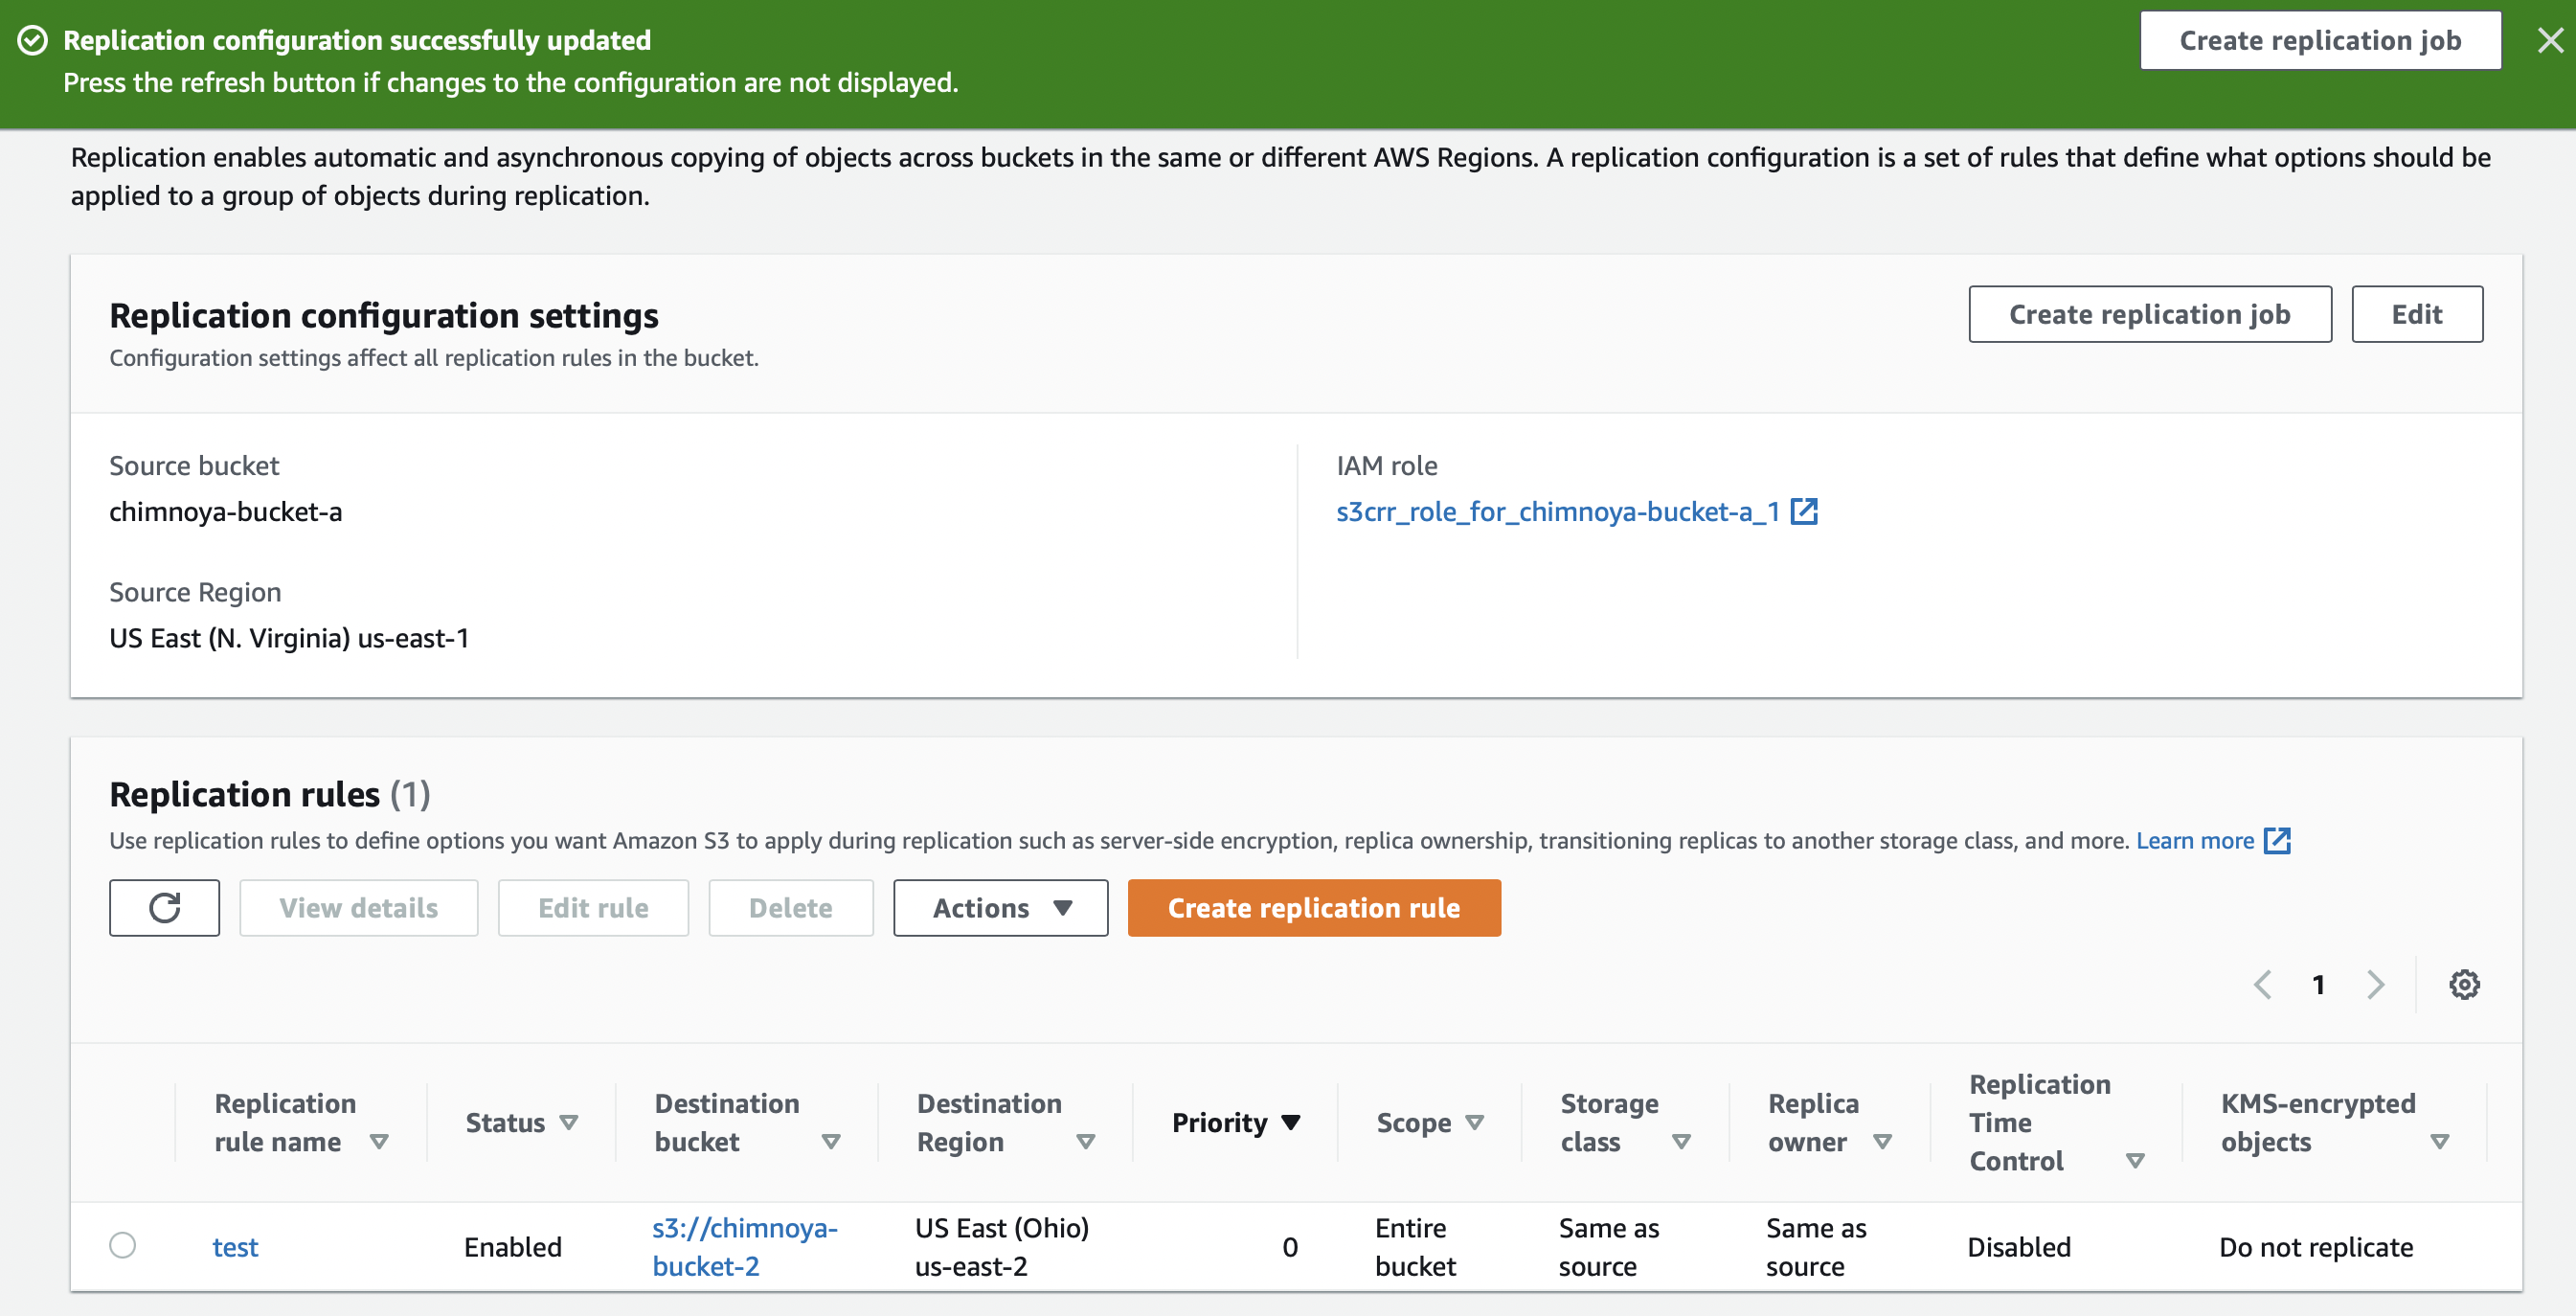
Step 2 - Configure Replication Rule in Source Bucket
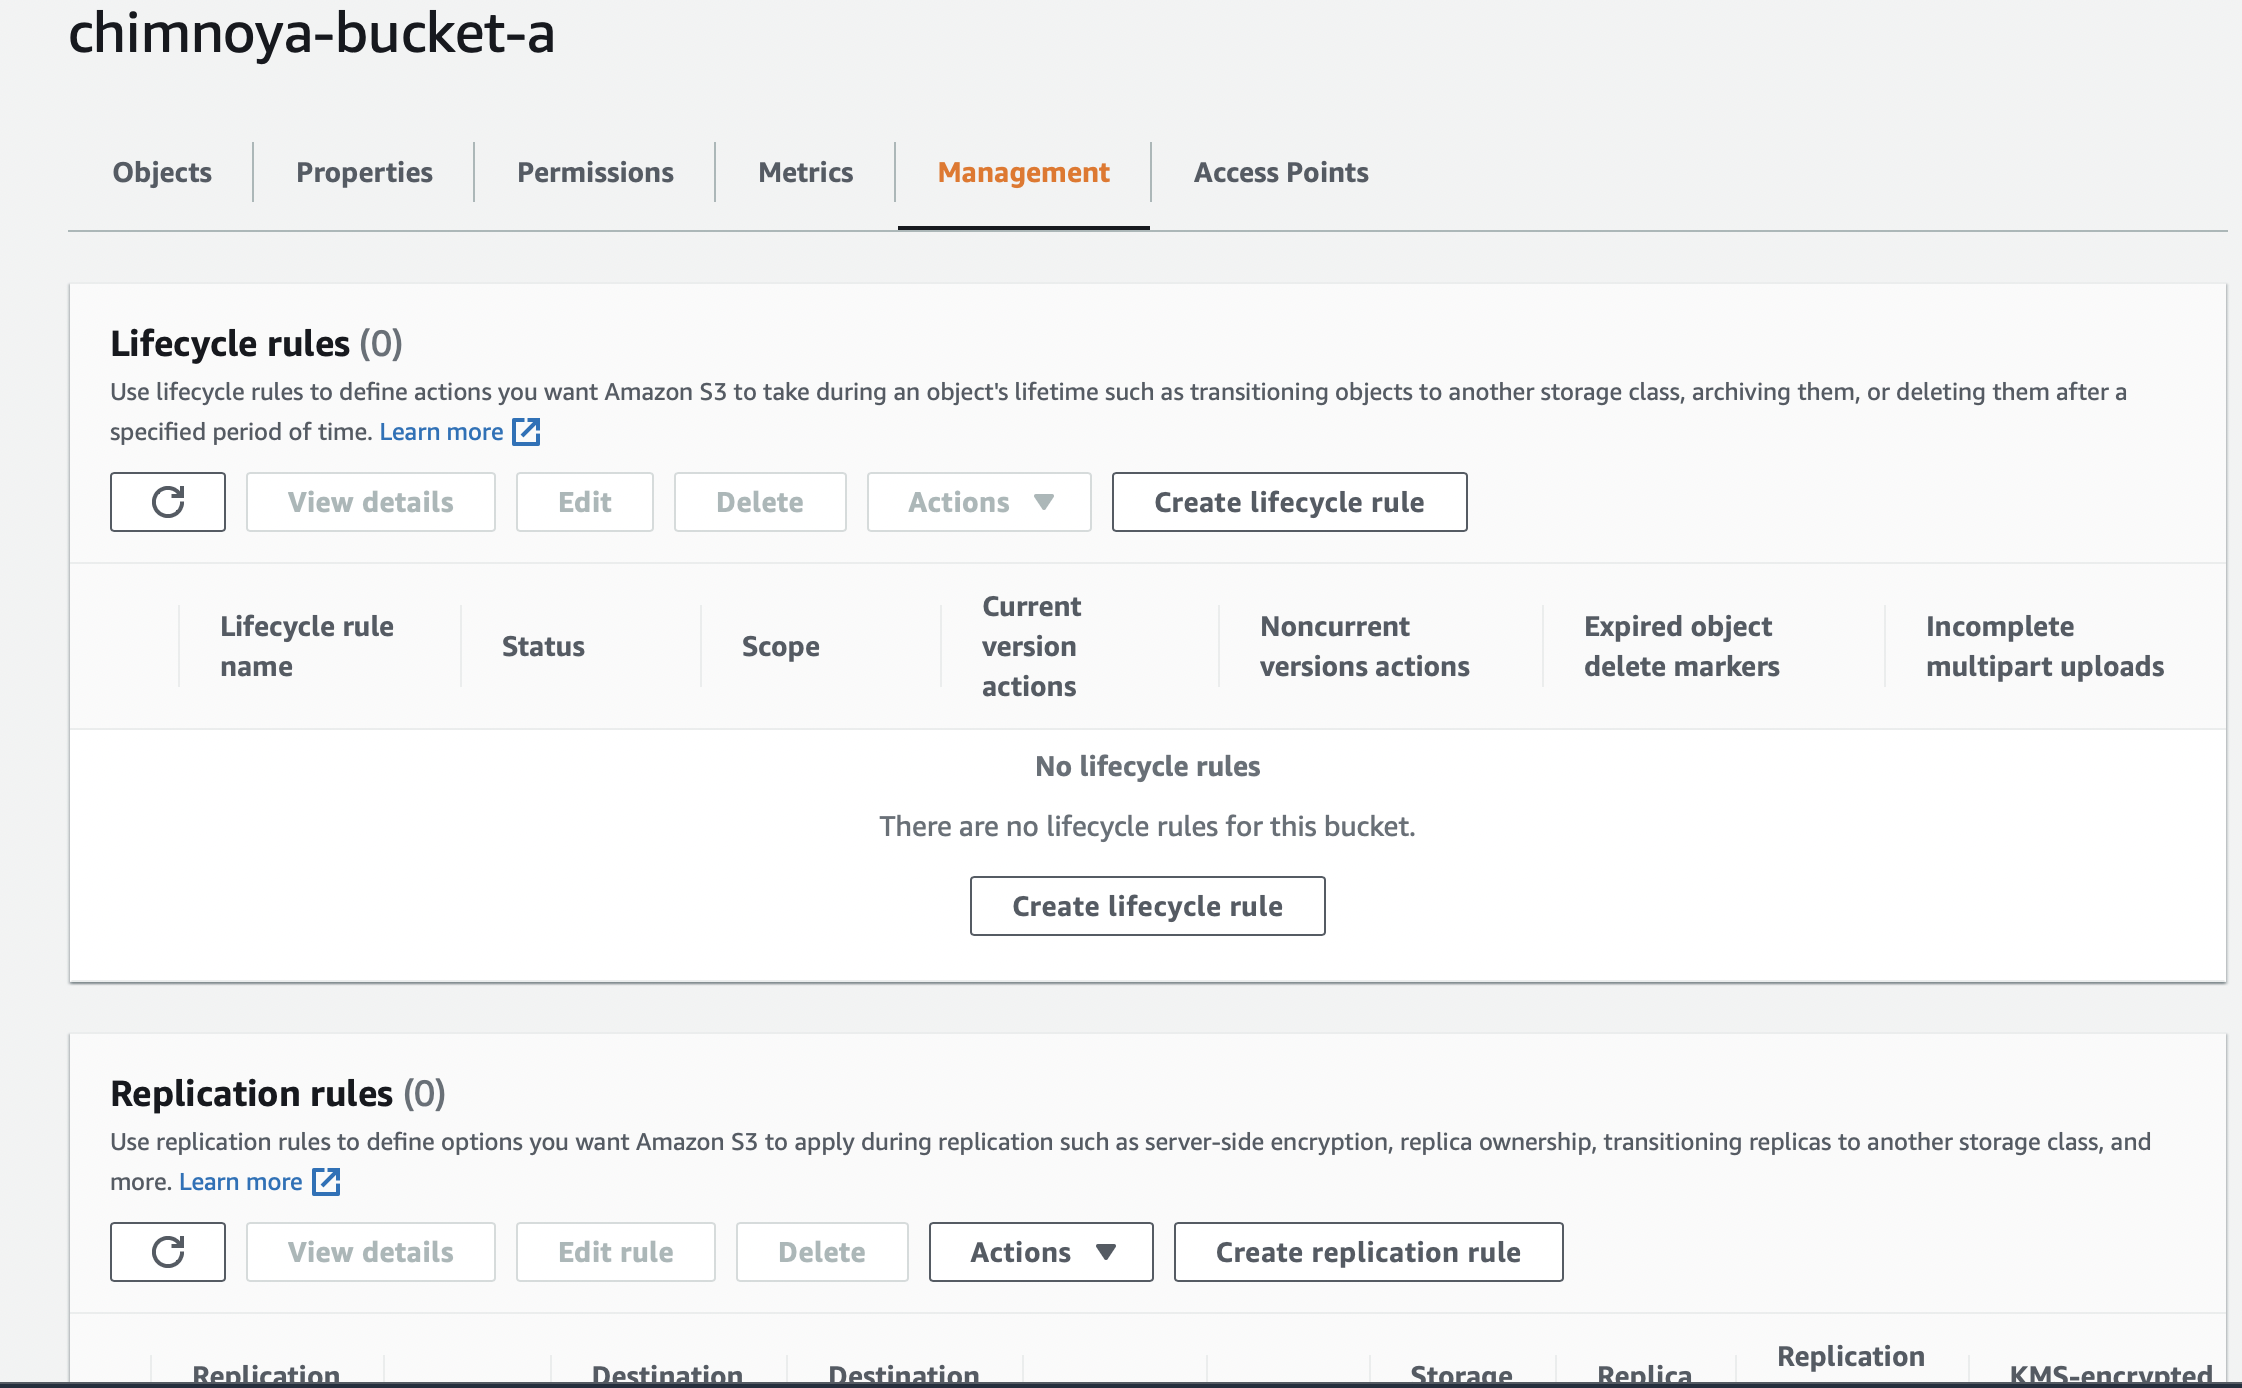
Go to your bucket list and click on bucket A. In the management tab of the source bucket, click on create replication rule.
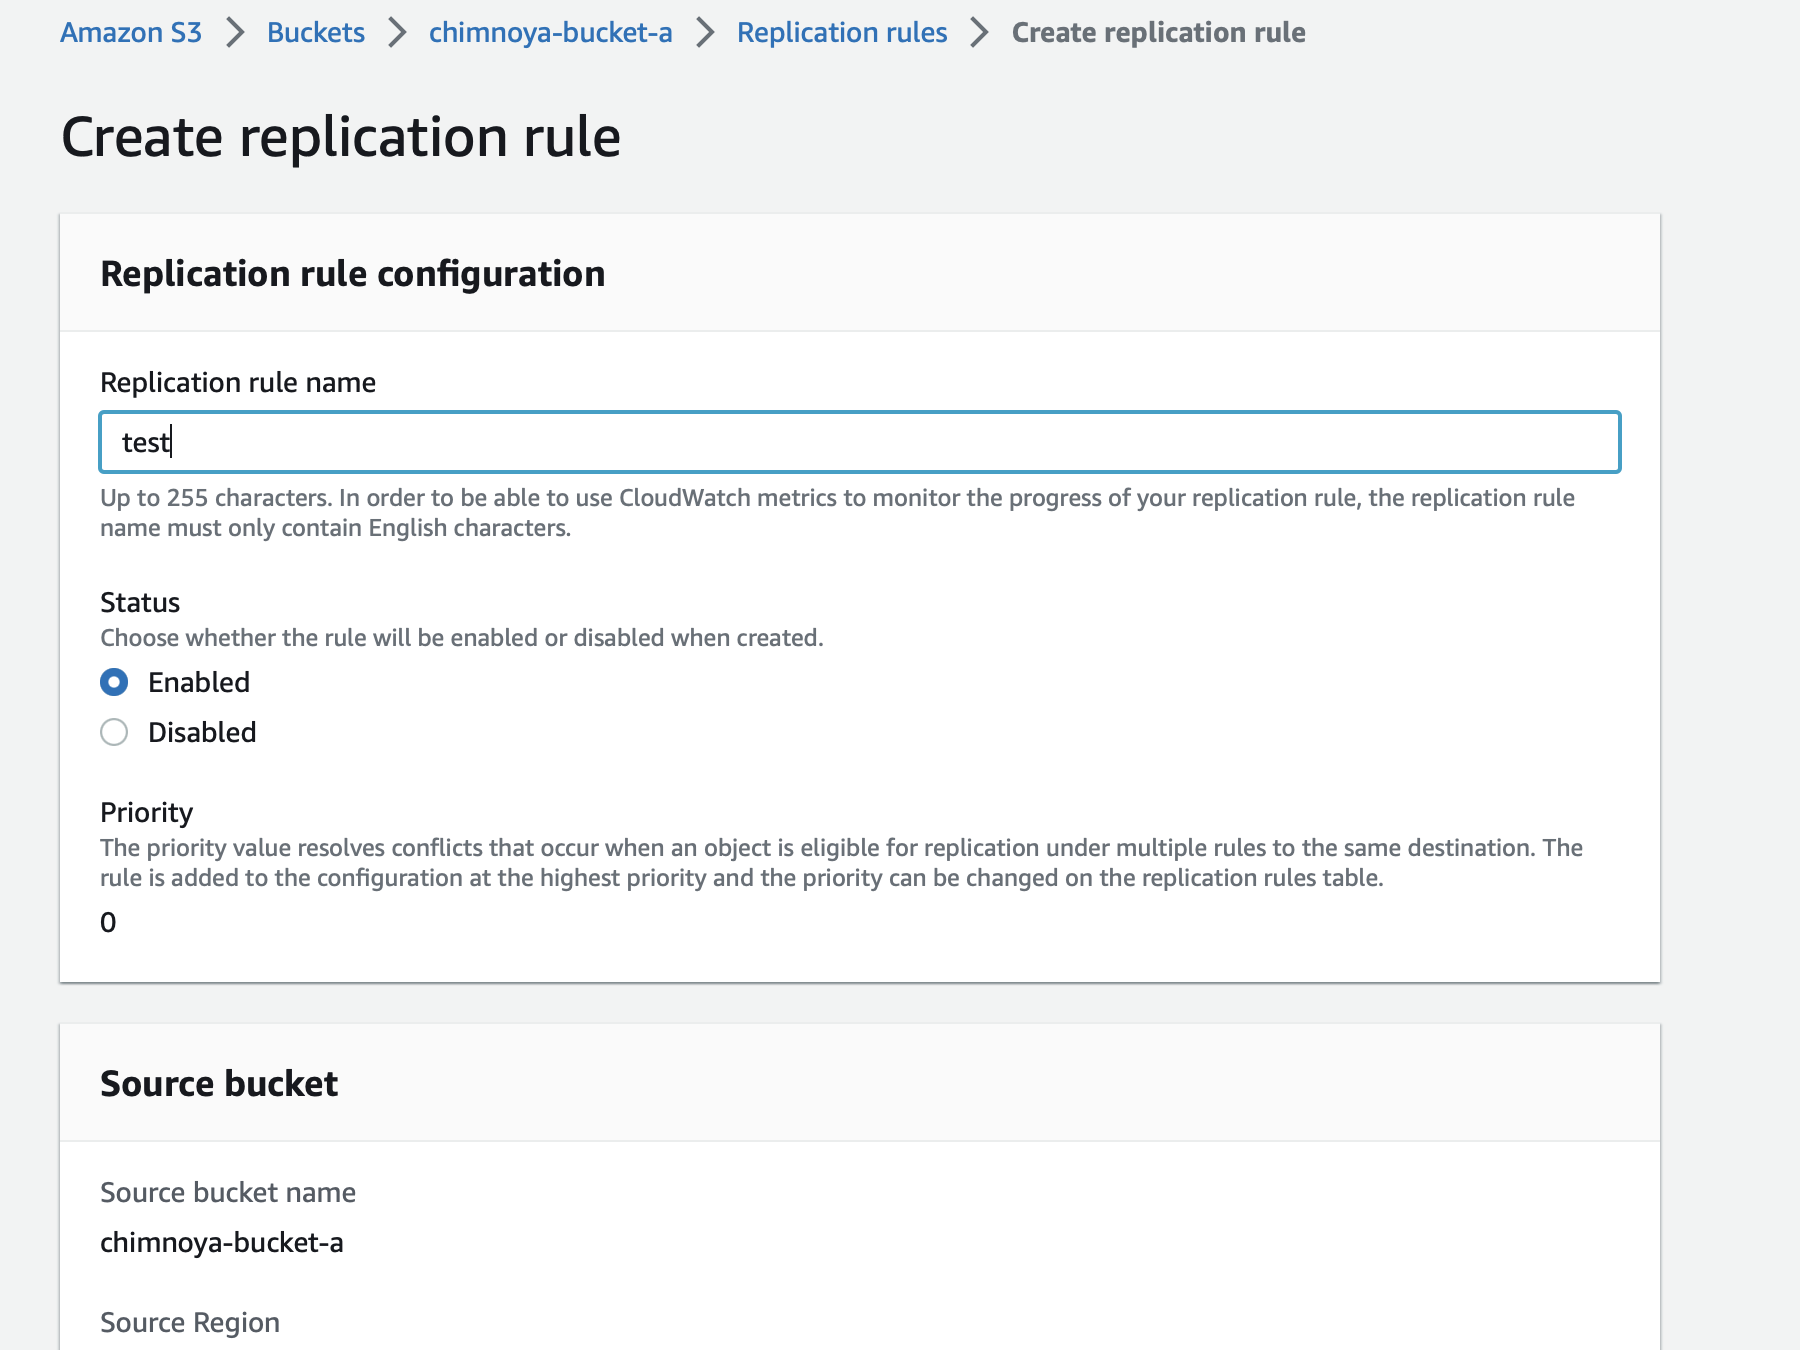
Input replication name and enable rule upon creation
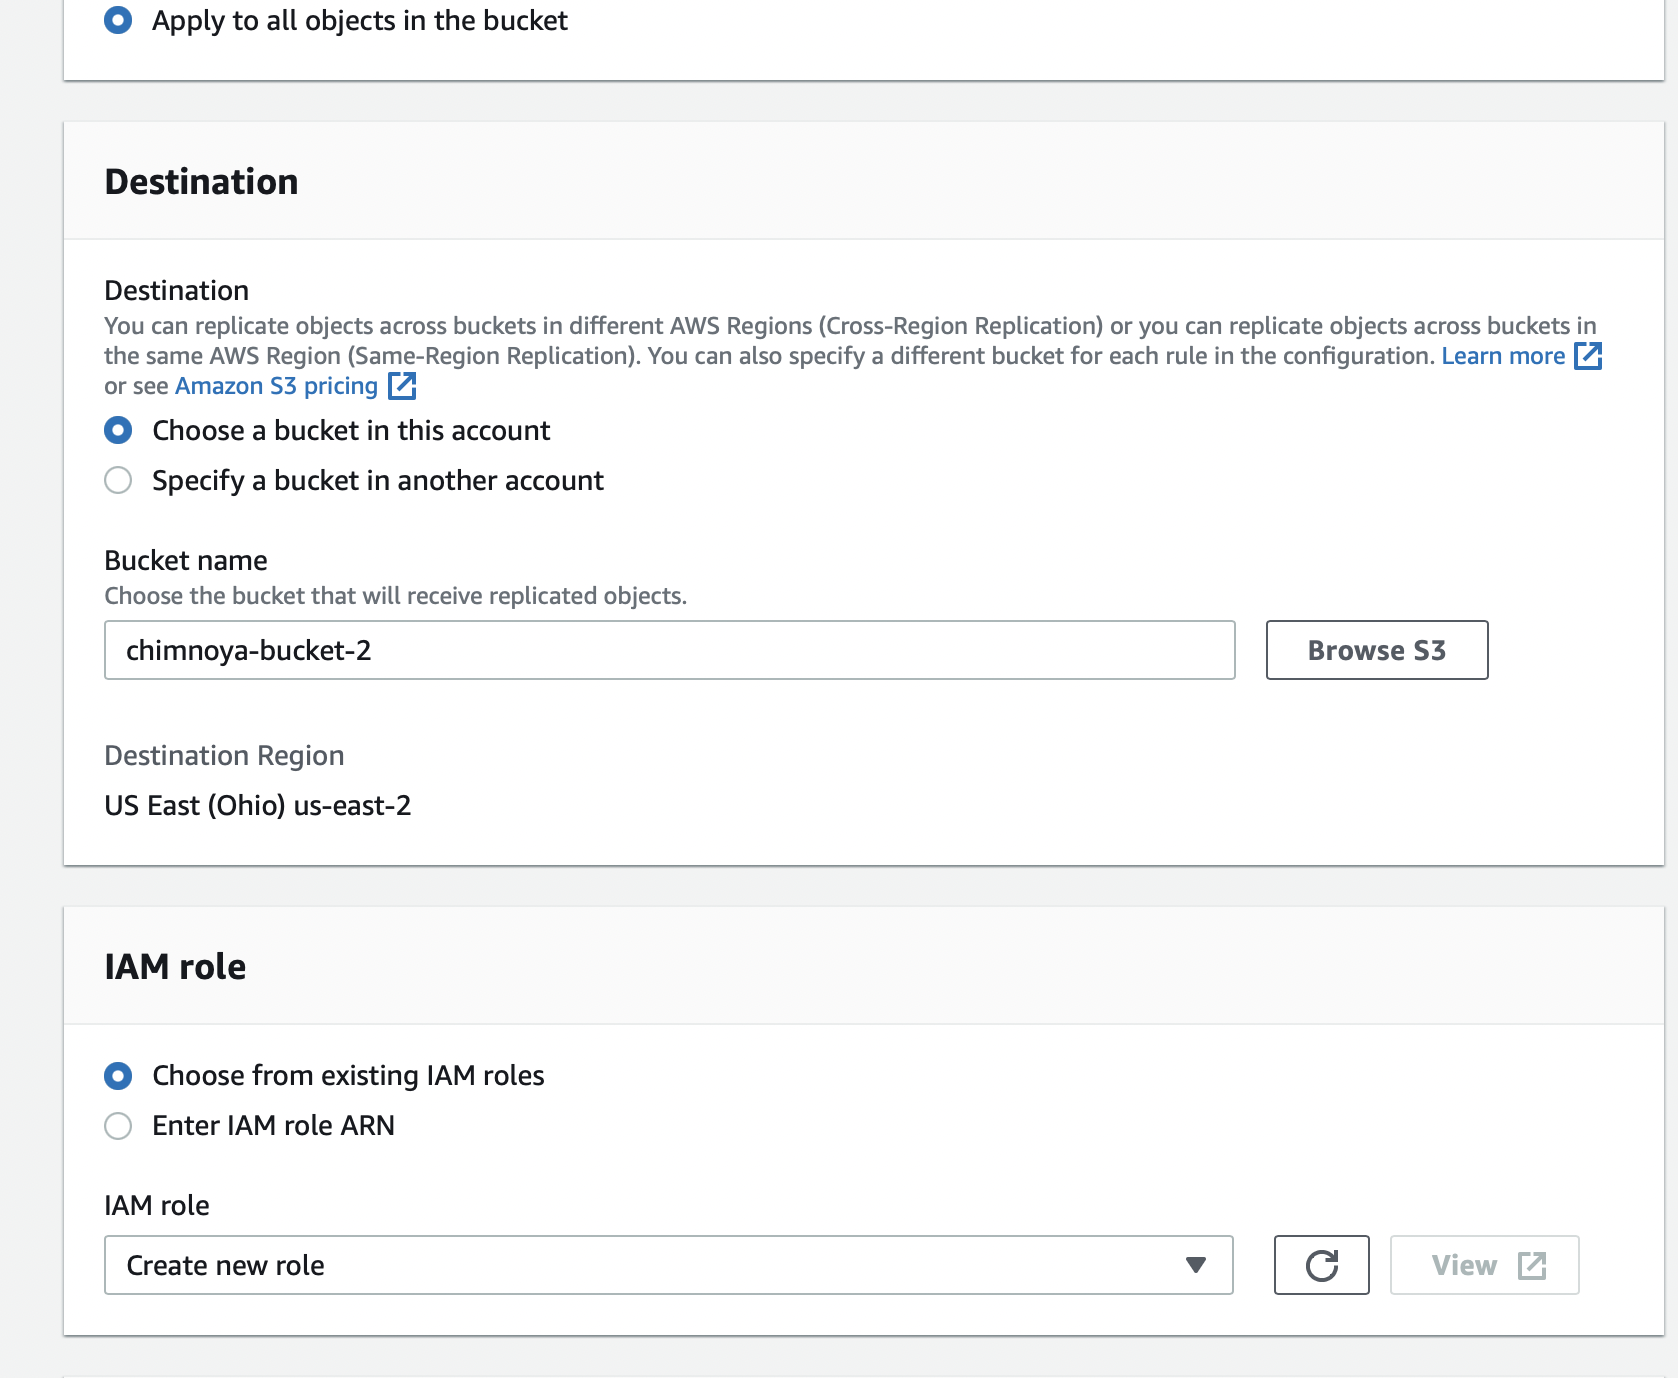
Choose the destination bucket name and IAM role that the replication process will use. For the IAM role, choose create new role as your replication rule.
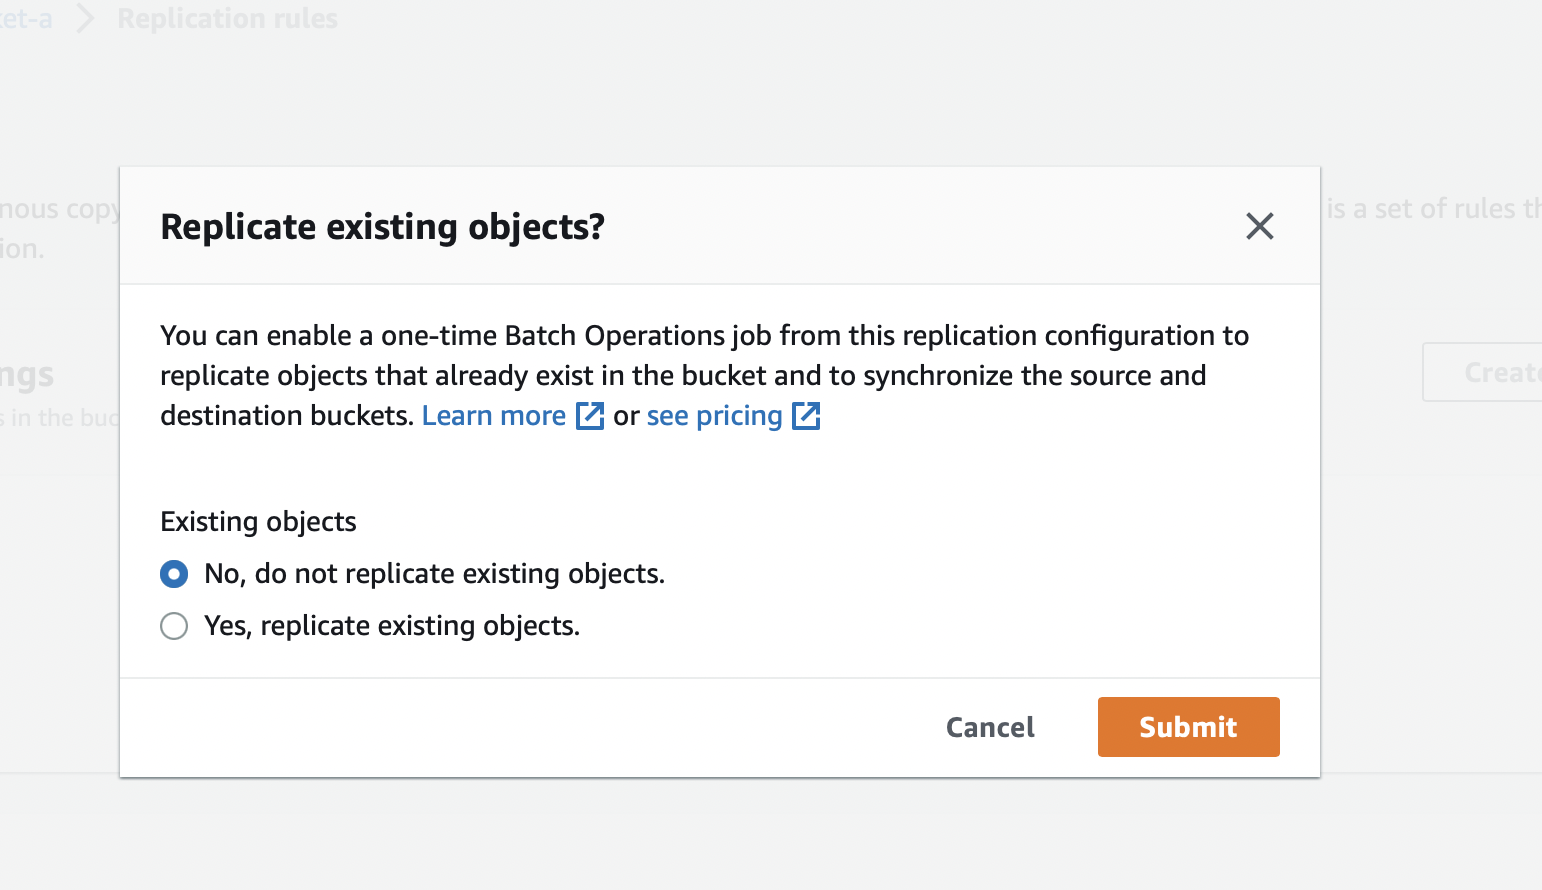
Click on save and a pop-up notice will appear, make sure to check the first option seeing that we do not have any existing object in the source bucket.
Step 3 - Upload Object(s) in Source Bucket
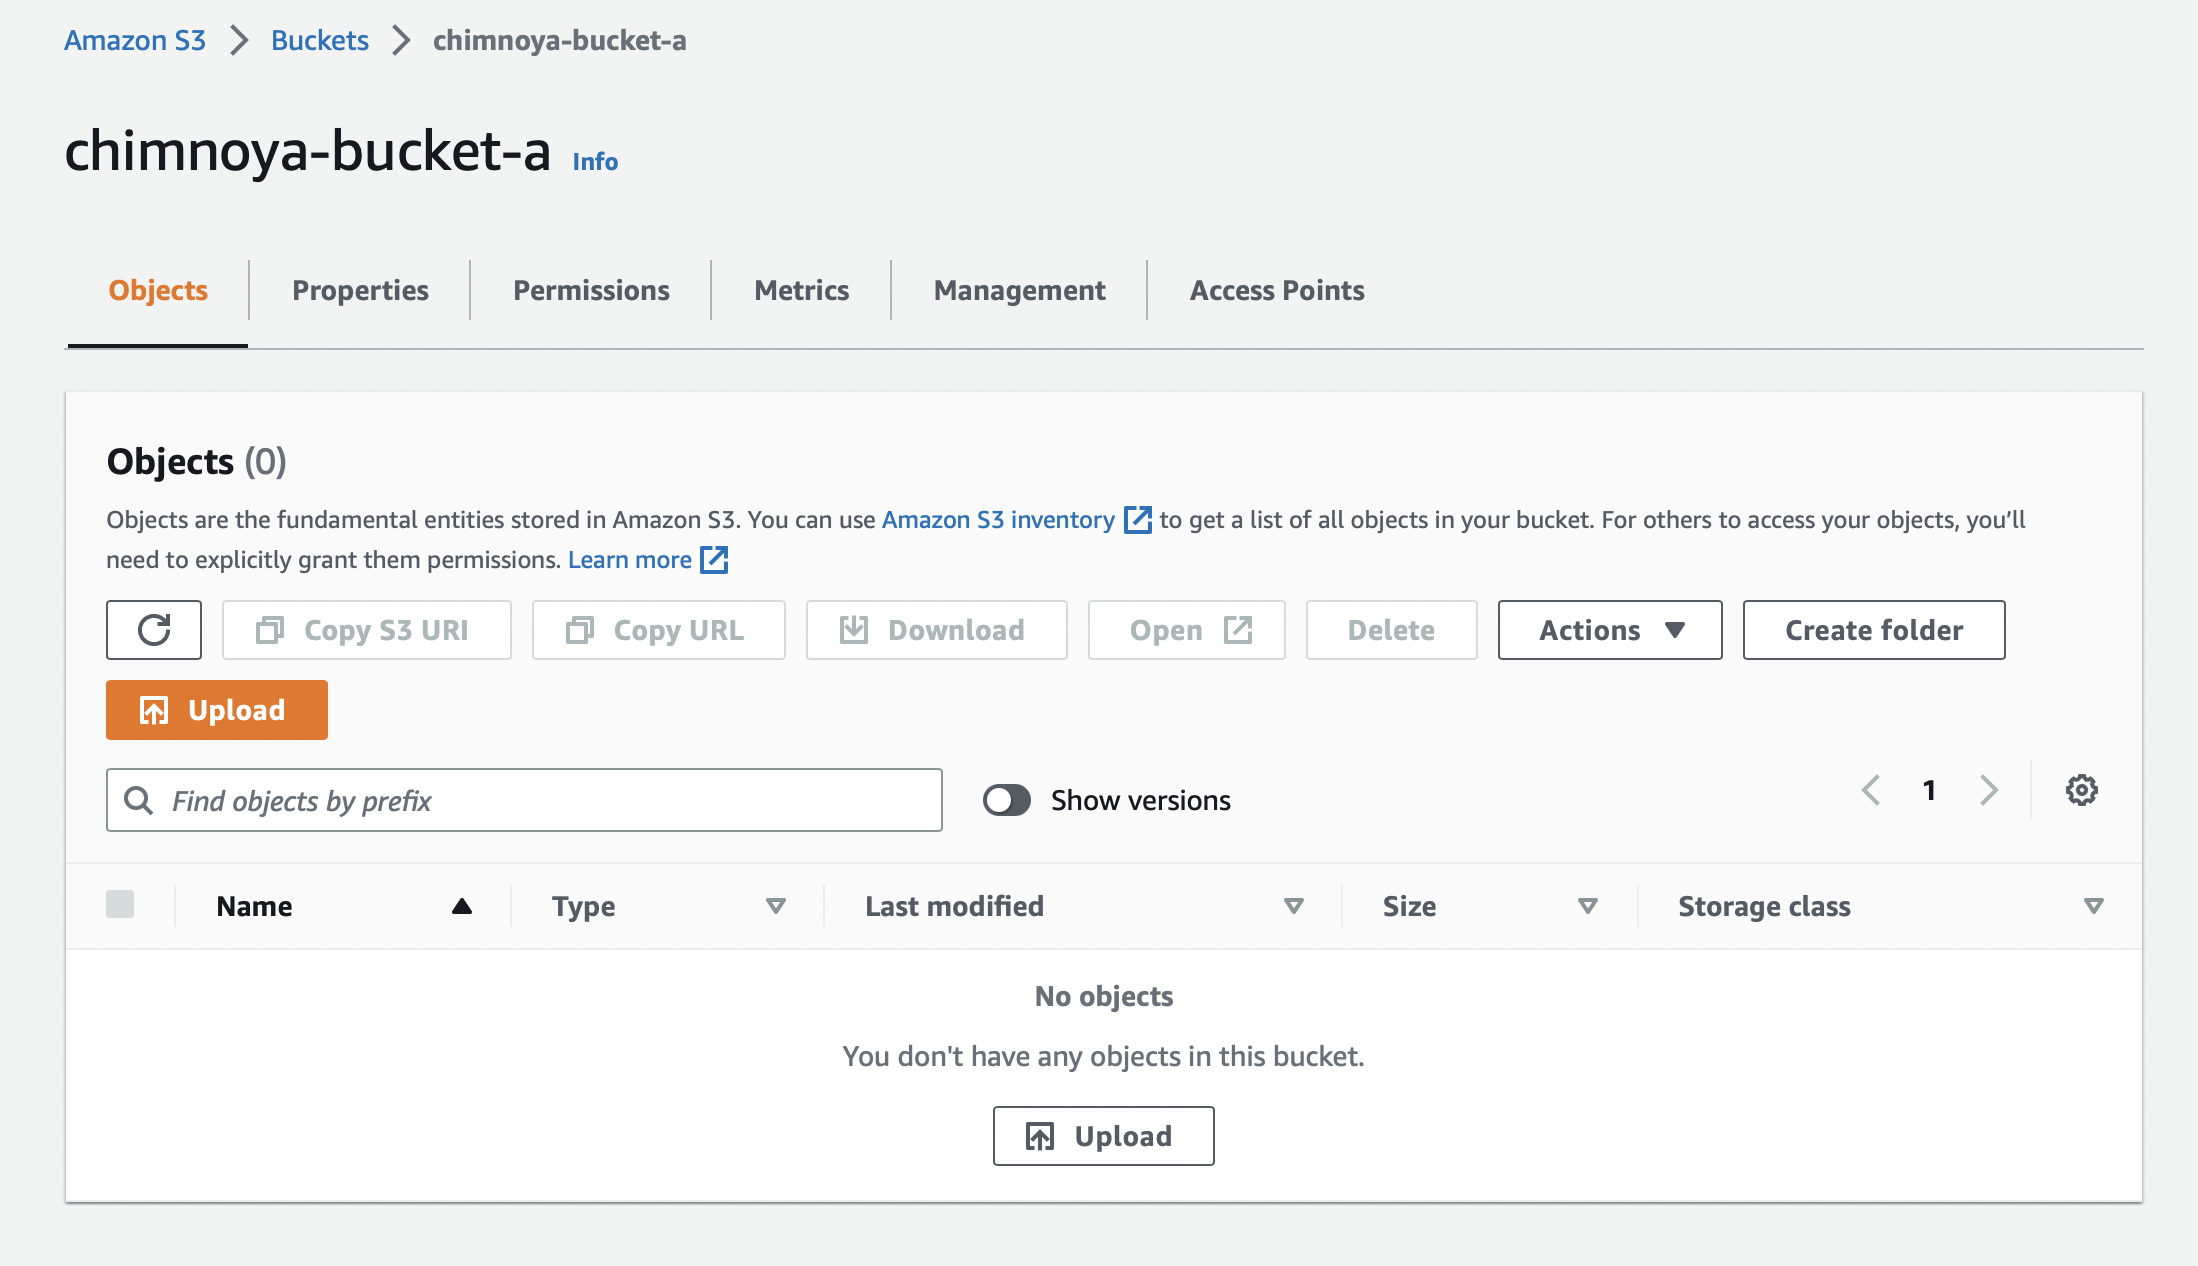
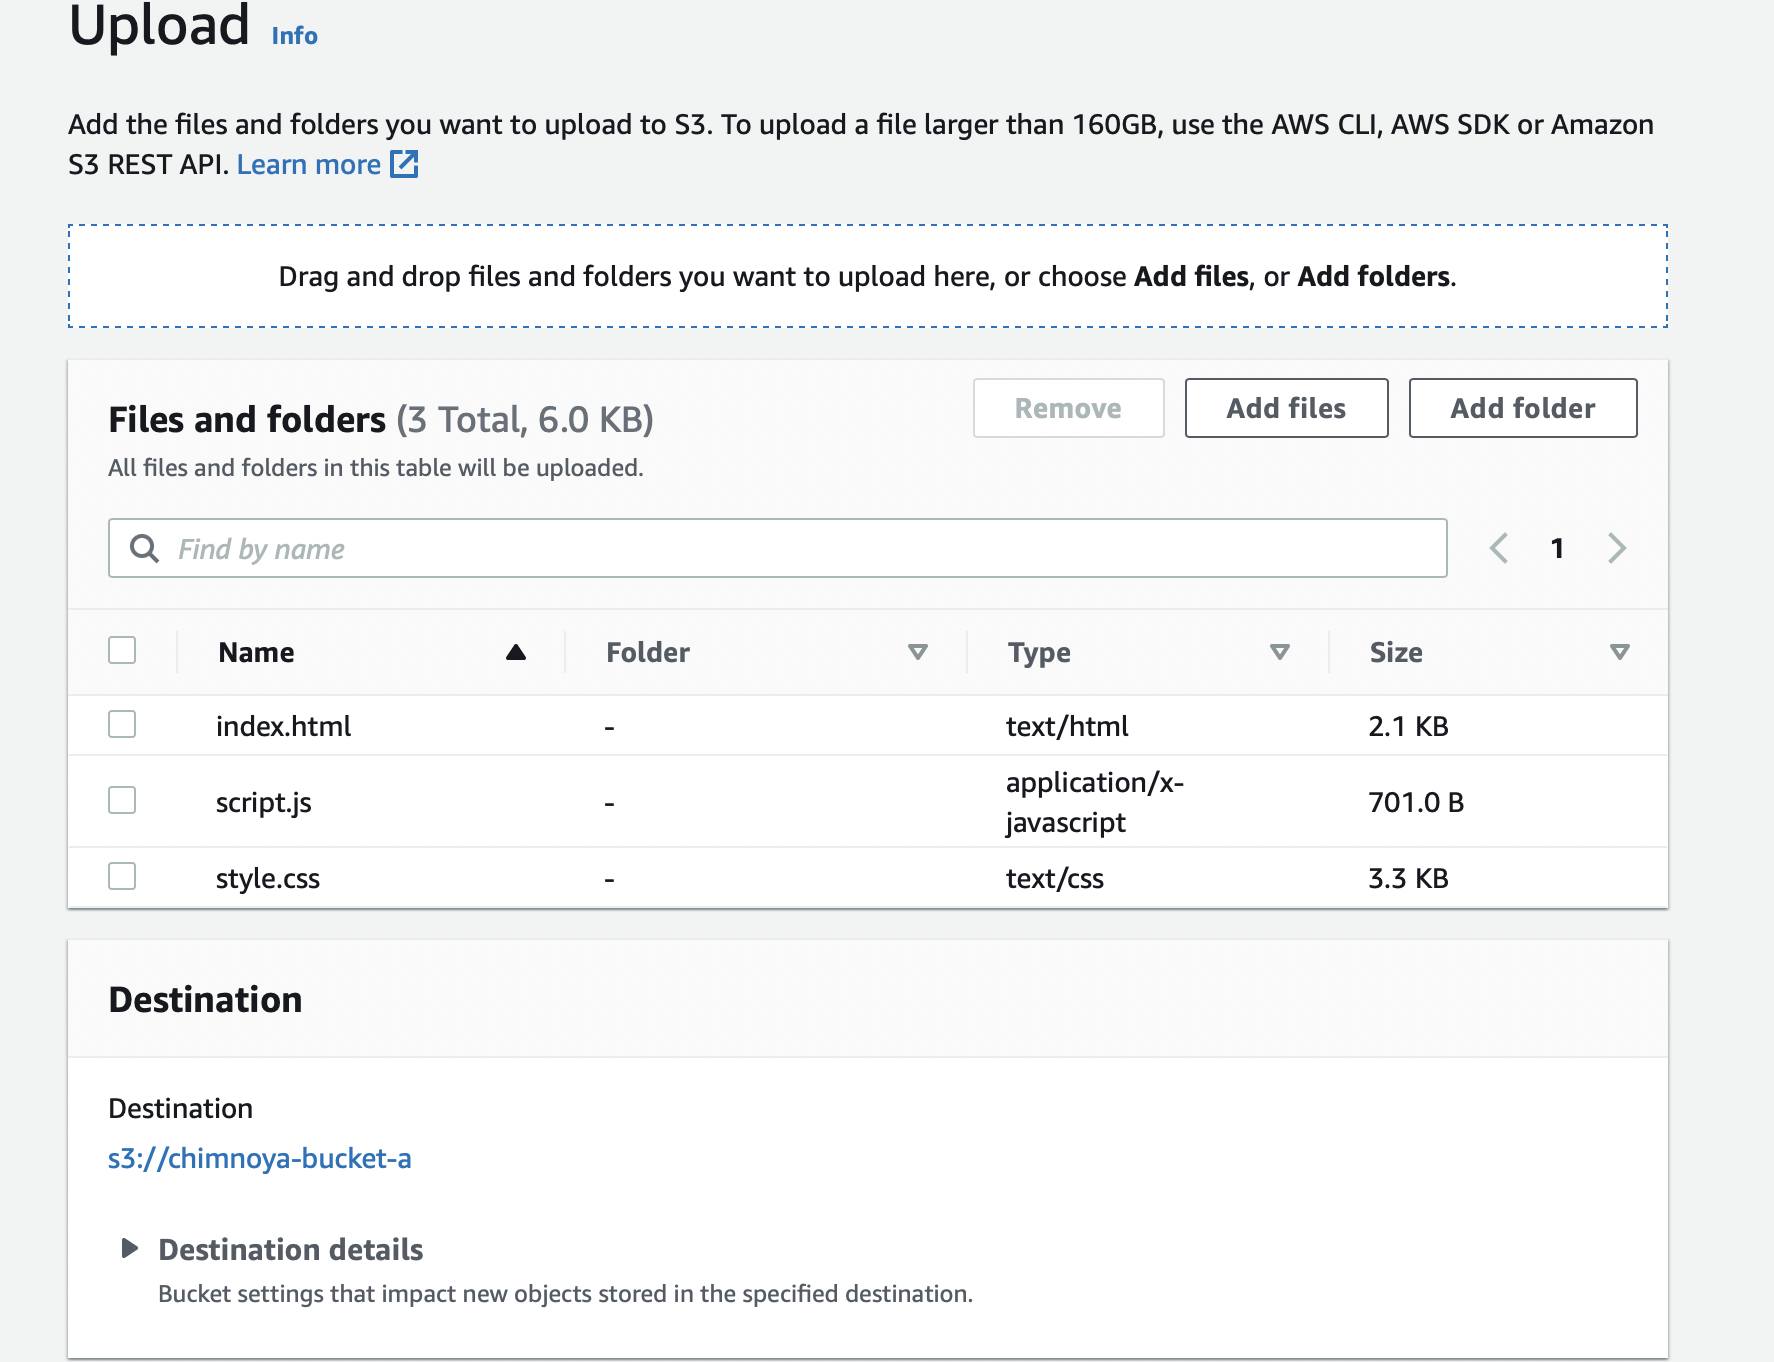
To upload objects in source bucket, navigate your way back to the bucket list and click on bucket A and click on upload to upload any object of your choice. It could be a picture or document(s).
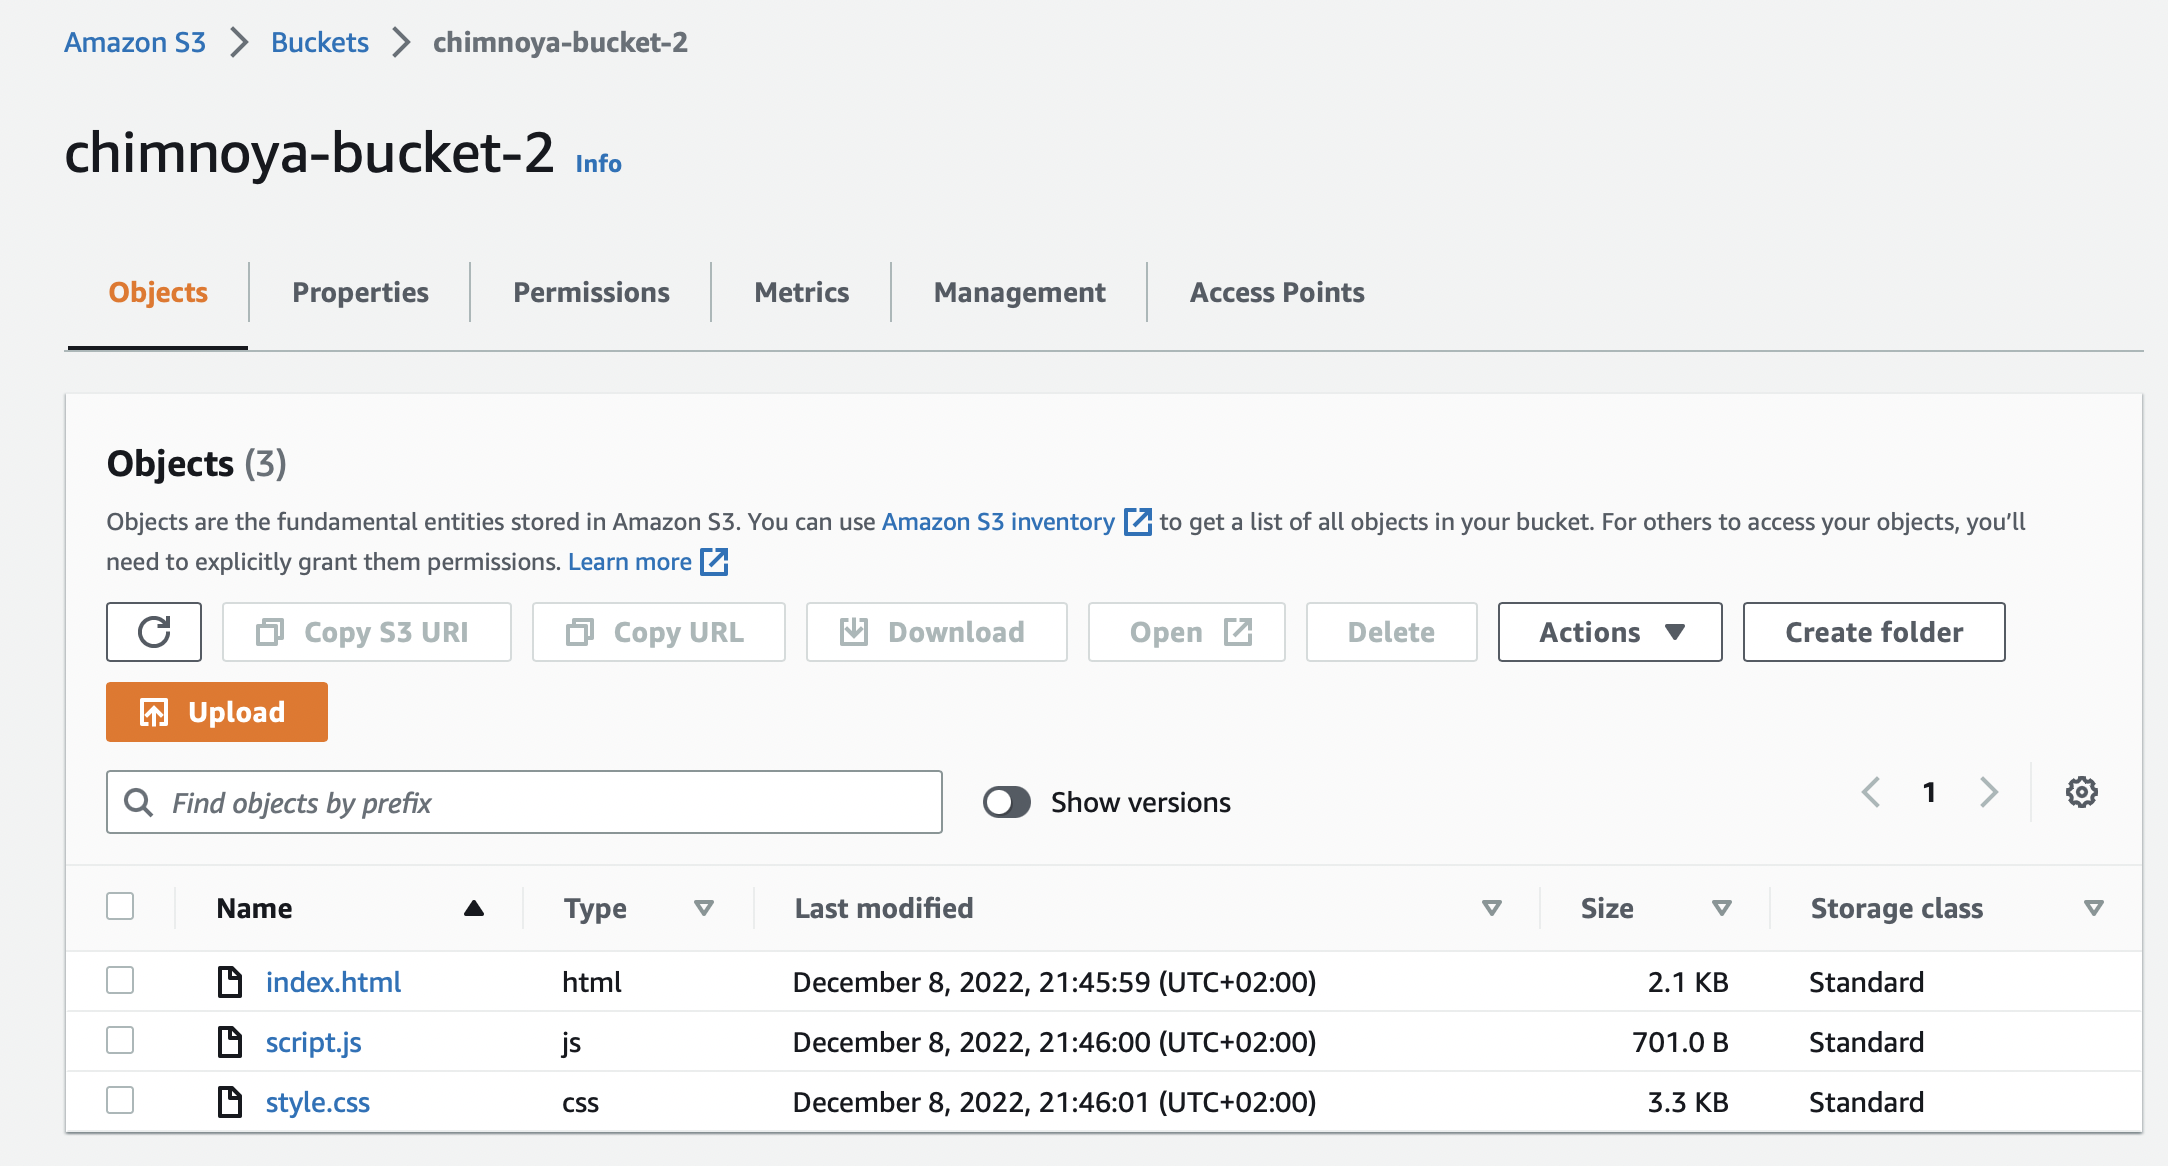
Step 4 - Check Destination Bucket
After uploading object to the source bucket, give it a few minutes and check on your destination bucket to verify that the object in the source bucket has been replicated in the destination bucket. Remember that no object was uploaded to the destination bucket but because of the replication rule where you specified the destination bucket, any object uploaded in the source will automatically be uploaded in the destination as well.
All done!