
Hosting A Static Website Leveraging CloudFront And AWS Certificate Manager (ACM)


This is a brief but worthy learning guide on how to host your static website or resume or anything you can think of by using CloudFront and by protecting this website through the use of ACM.
Prerequisites
Knowledge of AWS
Knowledge of Domain Name Service
Backstory
CloudFront is an AWS service that helps deliver content through a worldwide network of edge locations. Edge locations on the other hand are data centres that Amazon has designed in-order to deliver services with the lowest latency possible. They’re closer to customers/AWS users than Regions or Availability Zones to ensure that content requests by users and responses are delivered fast and optimally.
Now that we have that out of the way, let’s dive in
!In my previous article here, I went into details on how to host a static website. So, do check it out so you can have an in-depth understanding of the steps. For this tutorial, we will see how CloudFront and ACM will be leveraged when hosting a static website.
Step 1
- Create an S3 bucket, upload your website as the object and make it publicly available.
Step 2
- Create a CloudFront distribution.
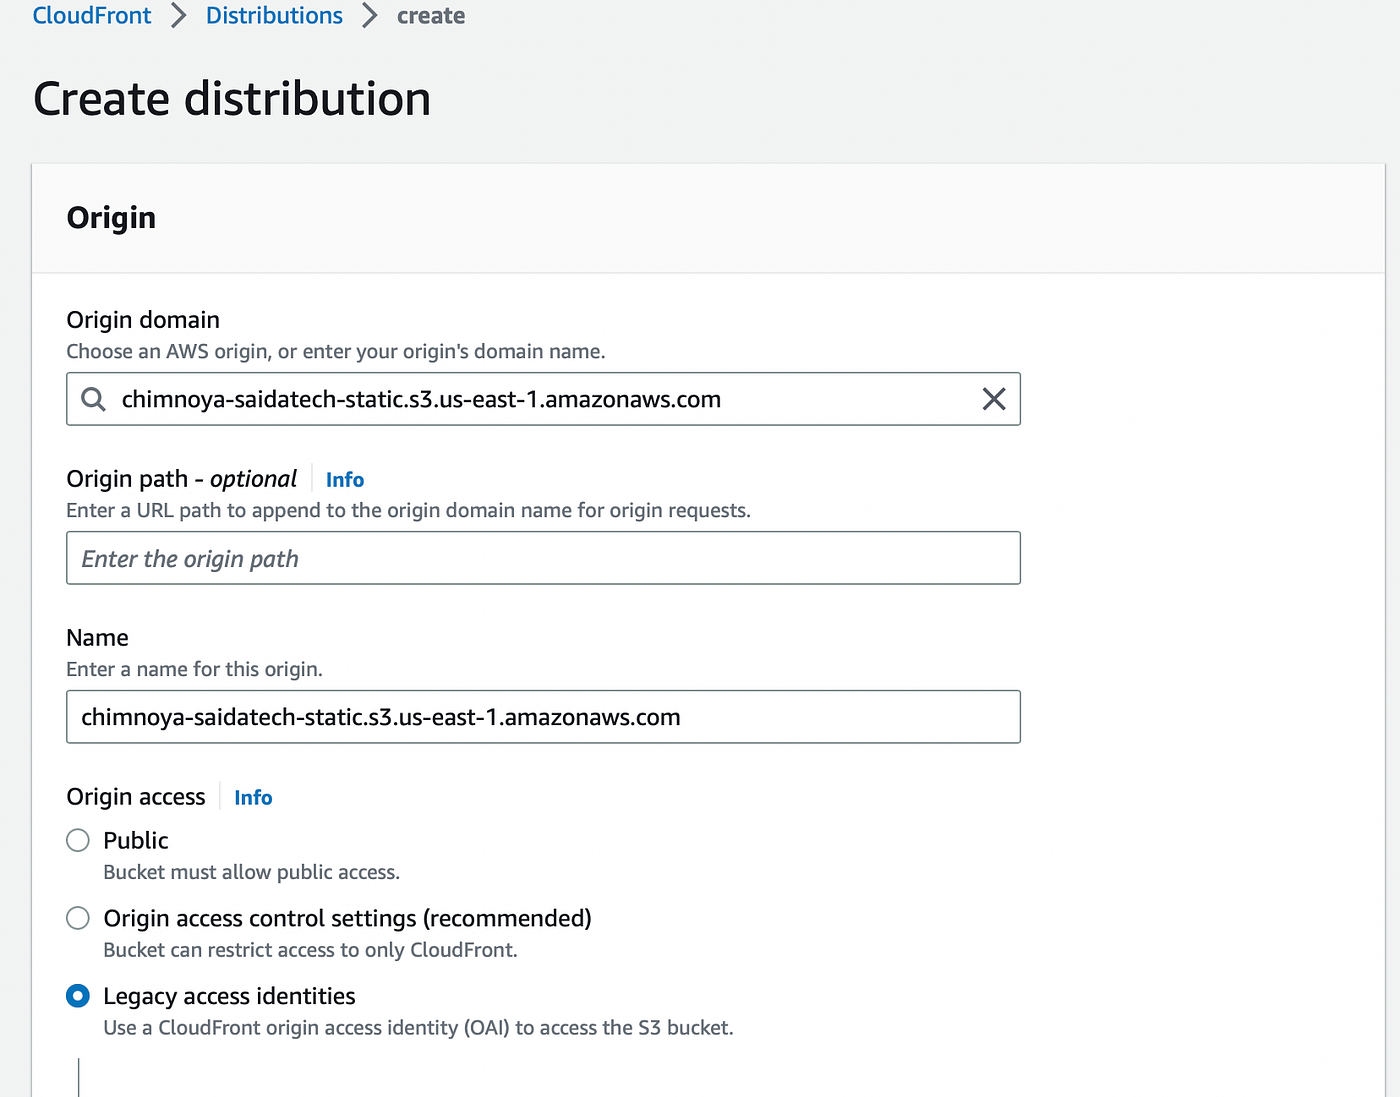
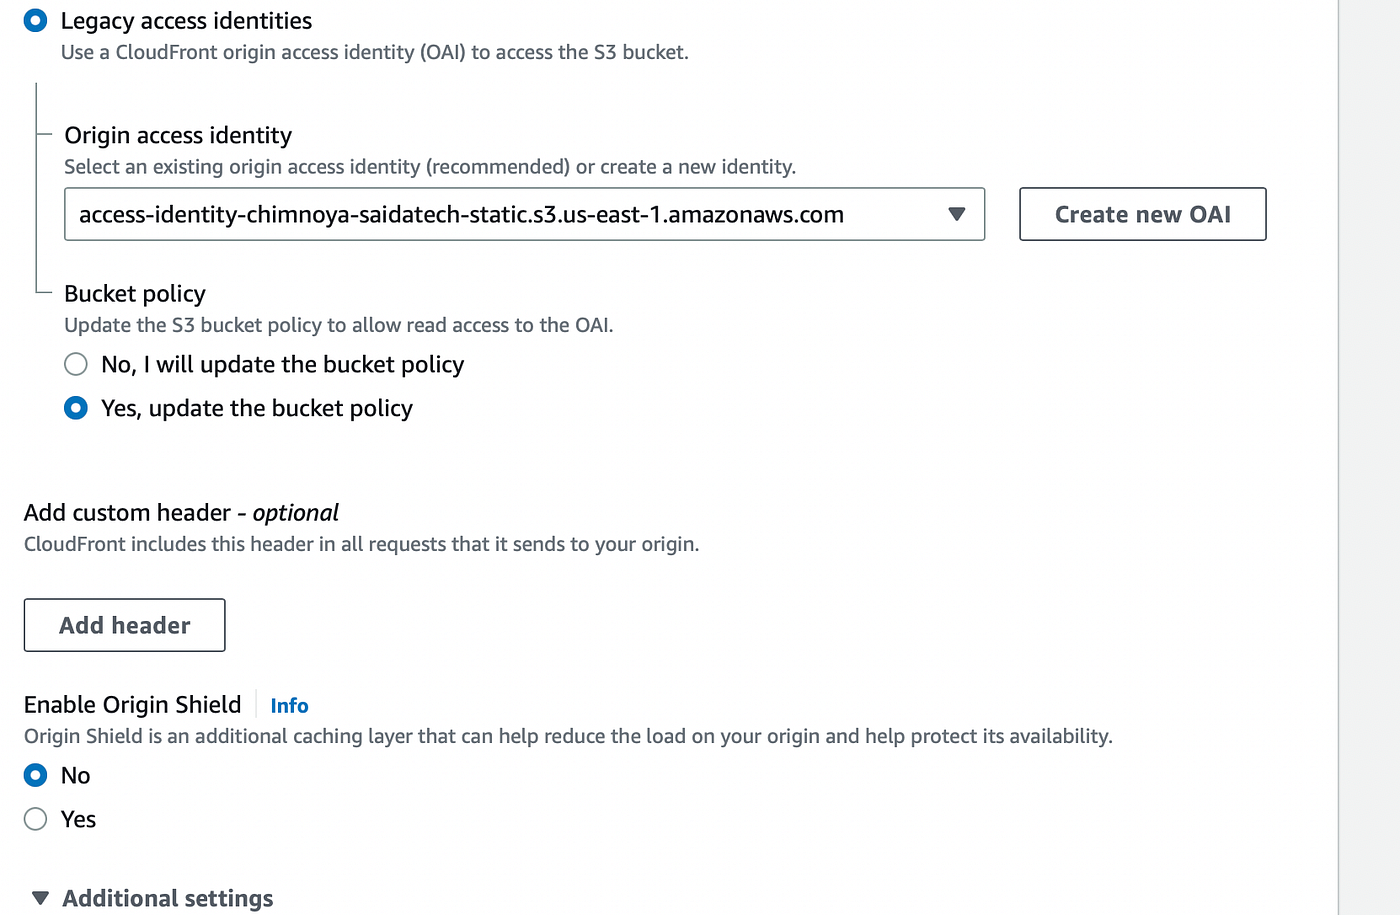

Step 3
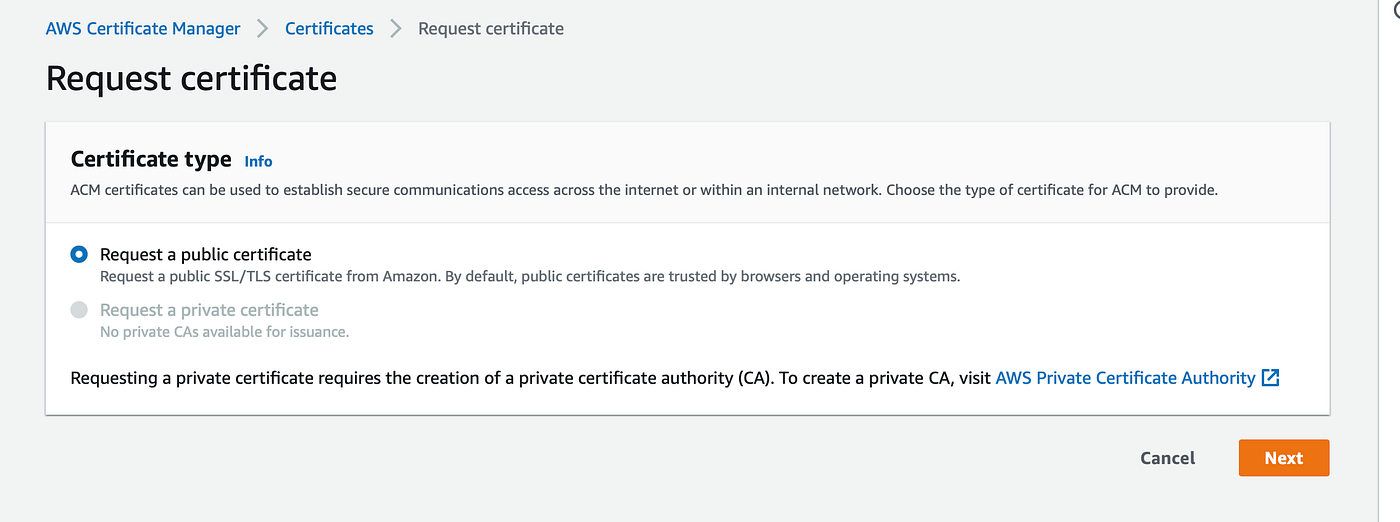
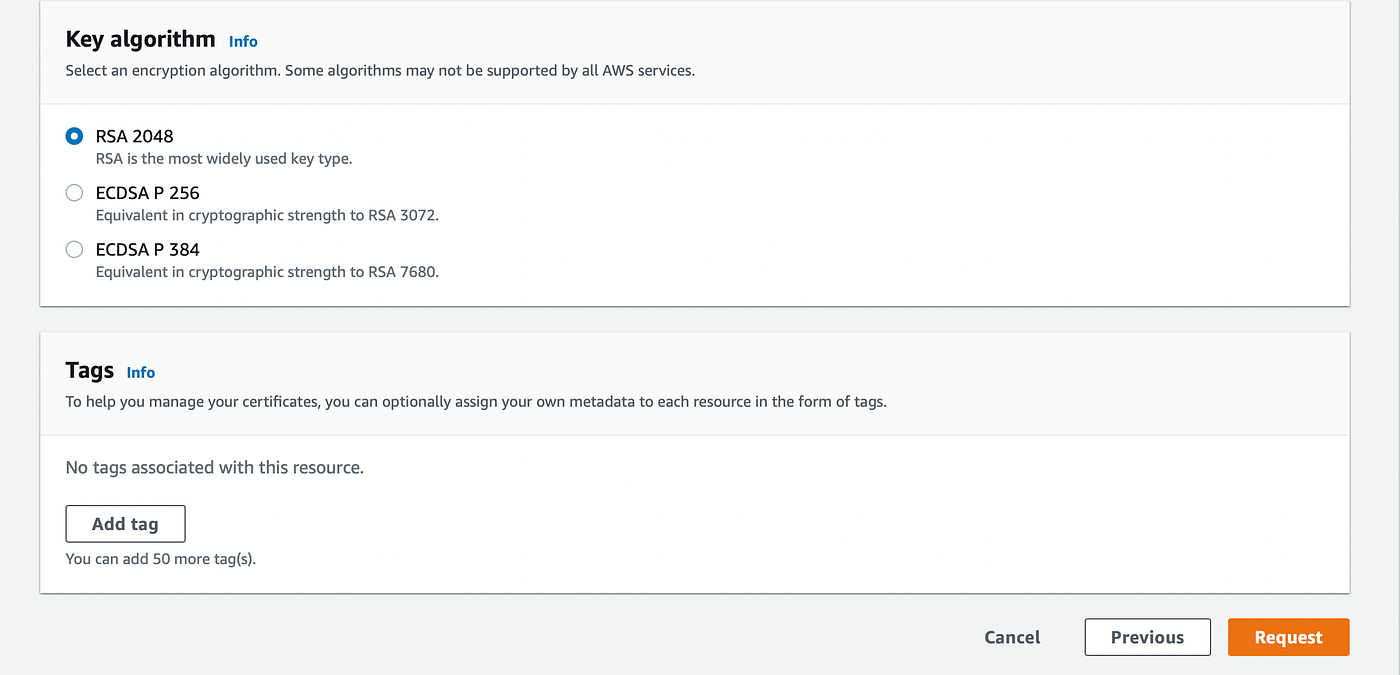
Next up is the option to create a custom SSL Certificate and in order to get one you would need to request one from AWS using ACM. Open a new tab and navigate to ACM on your AWS console.
For this tutorial, I already had a registered domain name and that is what I used below. However, if you do not have one, you can create a free domain name and make use of the same. See here for a free domain name registrar.
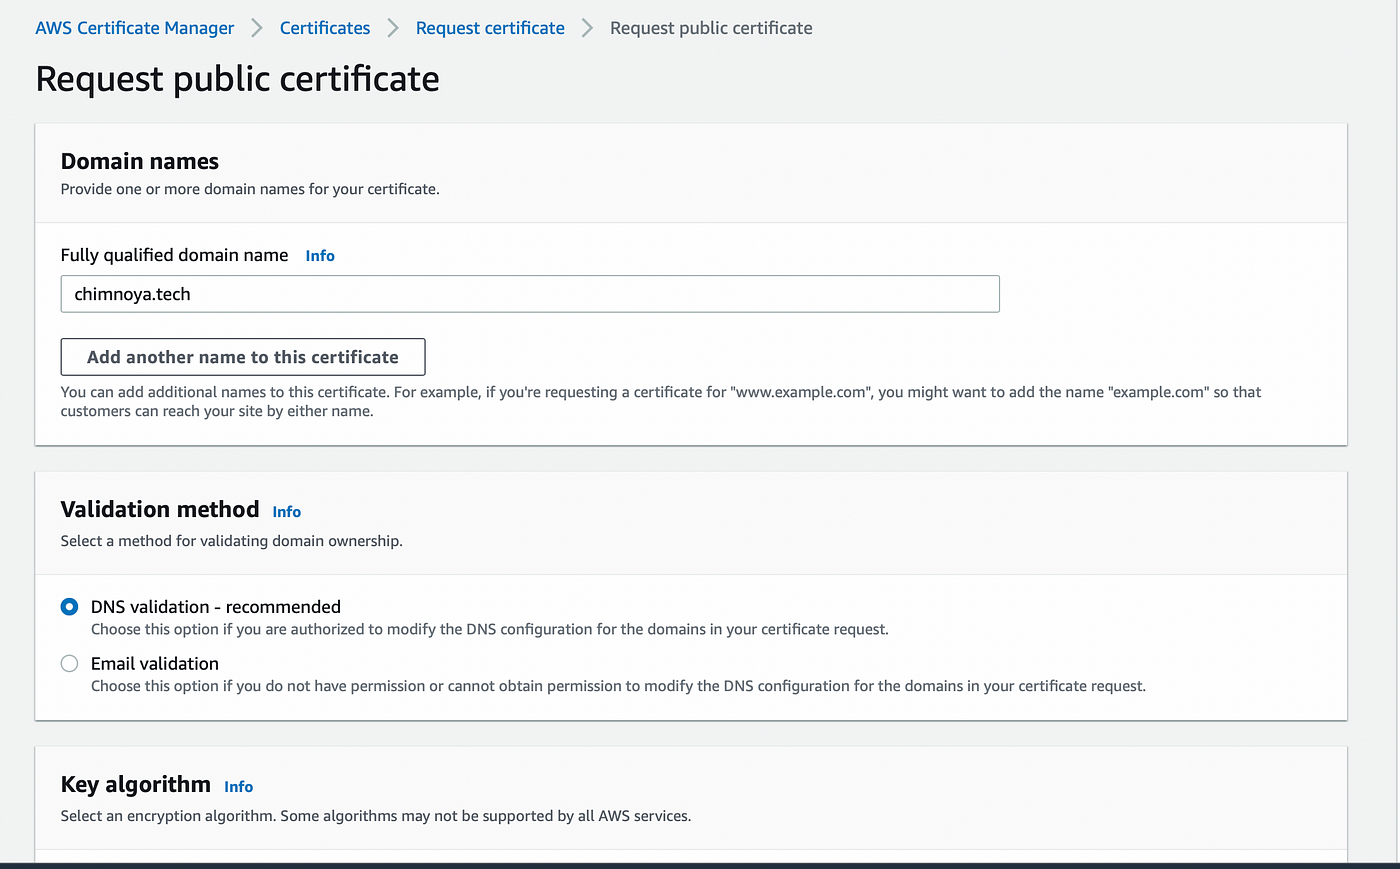
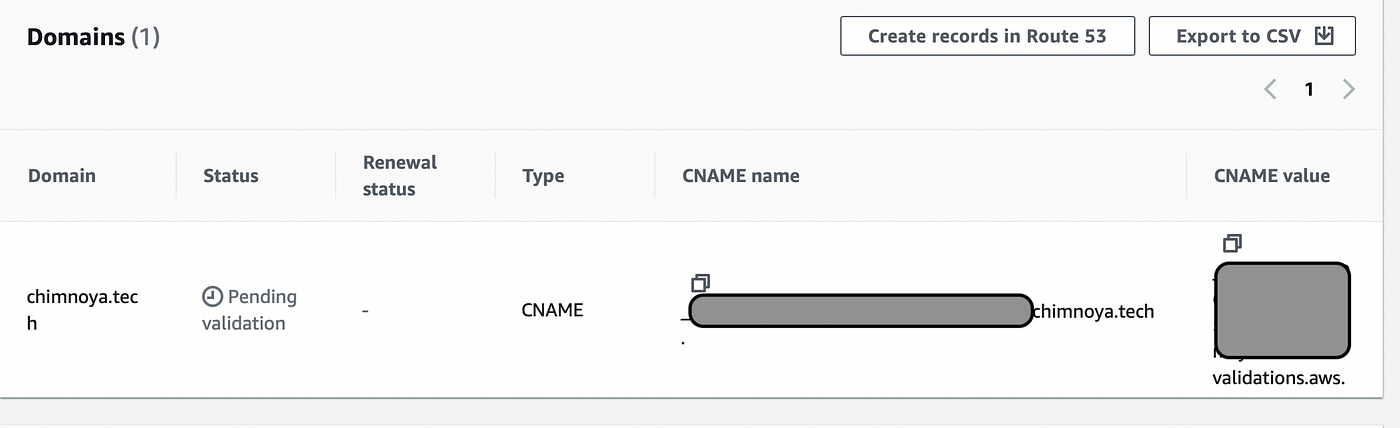
Immediately you click the request button, the below page will be displayed with a Pending validation status.

To validate this request, go to your domain name provider, it could be Namecheap, Freenom, etc and log in to your account. Click on the manage tab and add a new record using the CNAME name and value provided below. Read more on DNS Validation here.
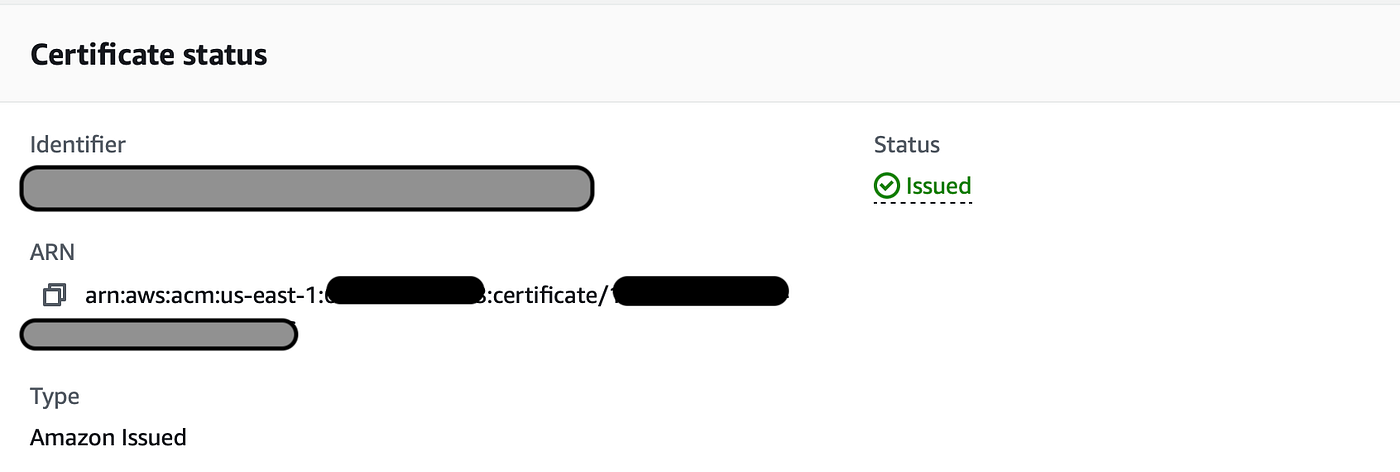
Once the record has been added, give a few minutes and it will sends a message to AWS as a validation that you are truly the owner of the provided domain name and AWS will validate your request and if you refresh your ACM page you will see an “Issued” status as seen below.
Hey, let’s not forget that we have not completed creating our CloudFront Distribution, so let’s get back to that tab and click the refresh button as seen below and your newly created certificate is available as an option. Click on it.

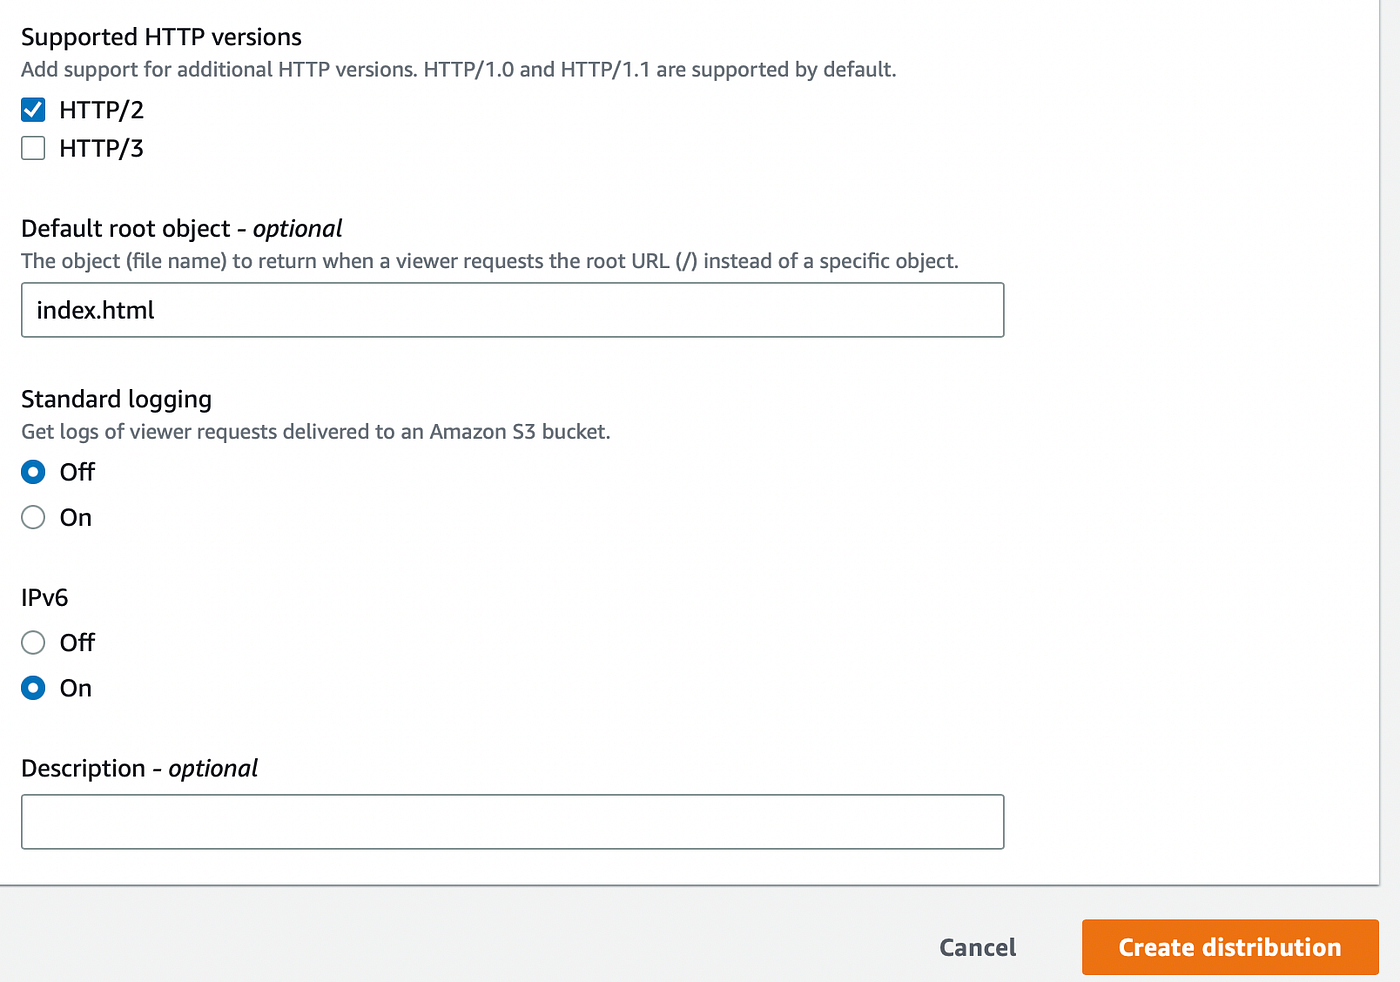
Select HTTP/2 and input index.html as the default root object, then your distribution can now be created.
You will get the below page stating that your CloudFront distribution has been successfully created. Wait till it is done deploying, copy the distribution domain name as seen below and paste it on your browser and voila! your website is successfully running.

Hold up!
I know you are already excited but there is one more step to go. Now we can see that to access our website we are using the distribution domain name but remember, the essence of leveraging CloudFront, using a custom domain name and creating an SSL Certificate to protect that custom domain is so that our users can both easily hit our website and have a name for our website that is easy to remember.
Let’s make this happen.
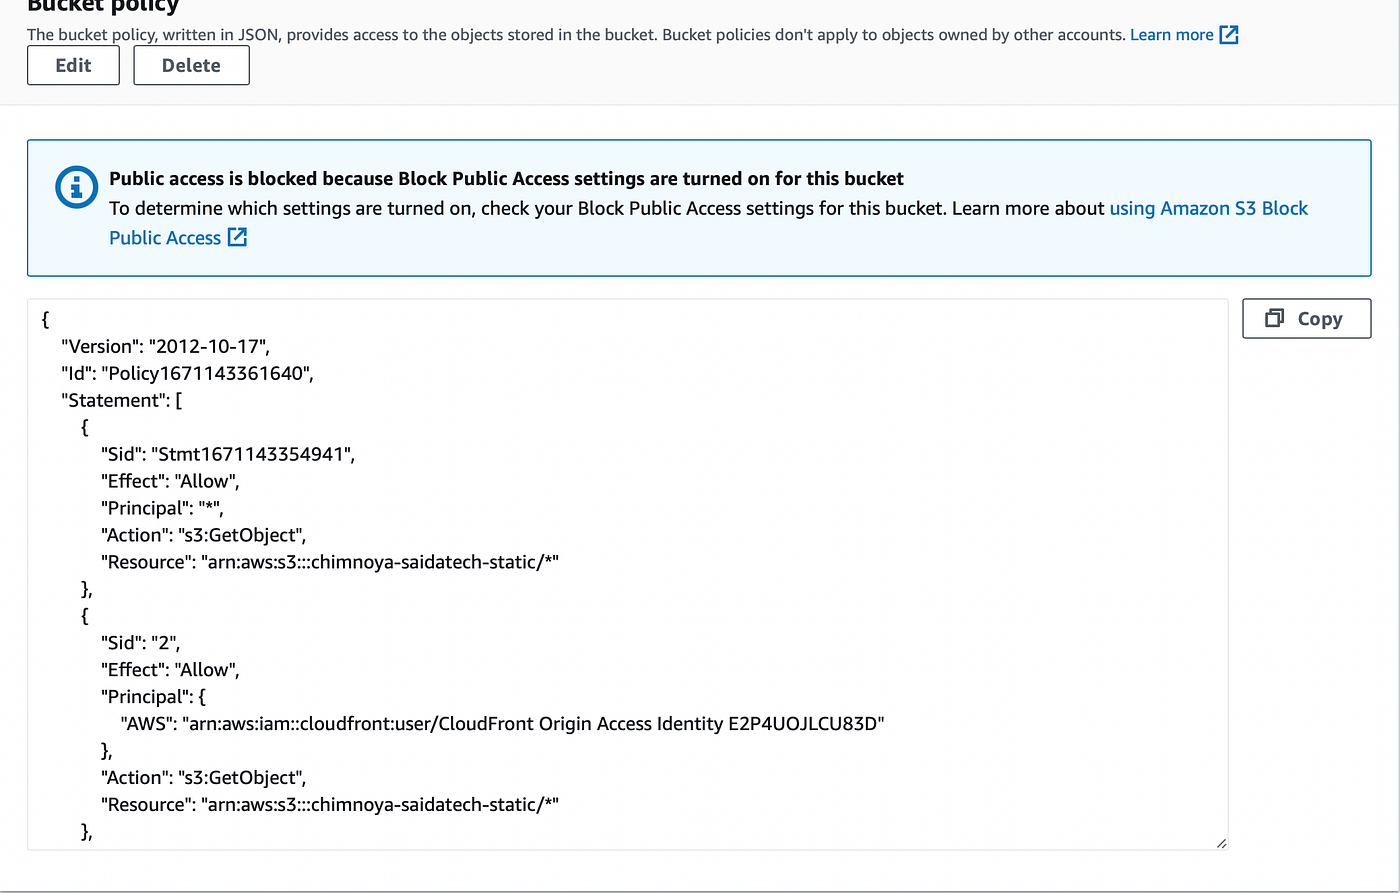
- Go to your S3 Console and change the permission by not making the bucket publicly accessible anymore.
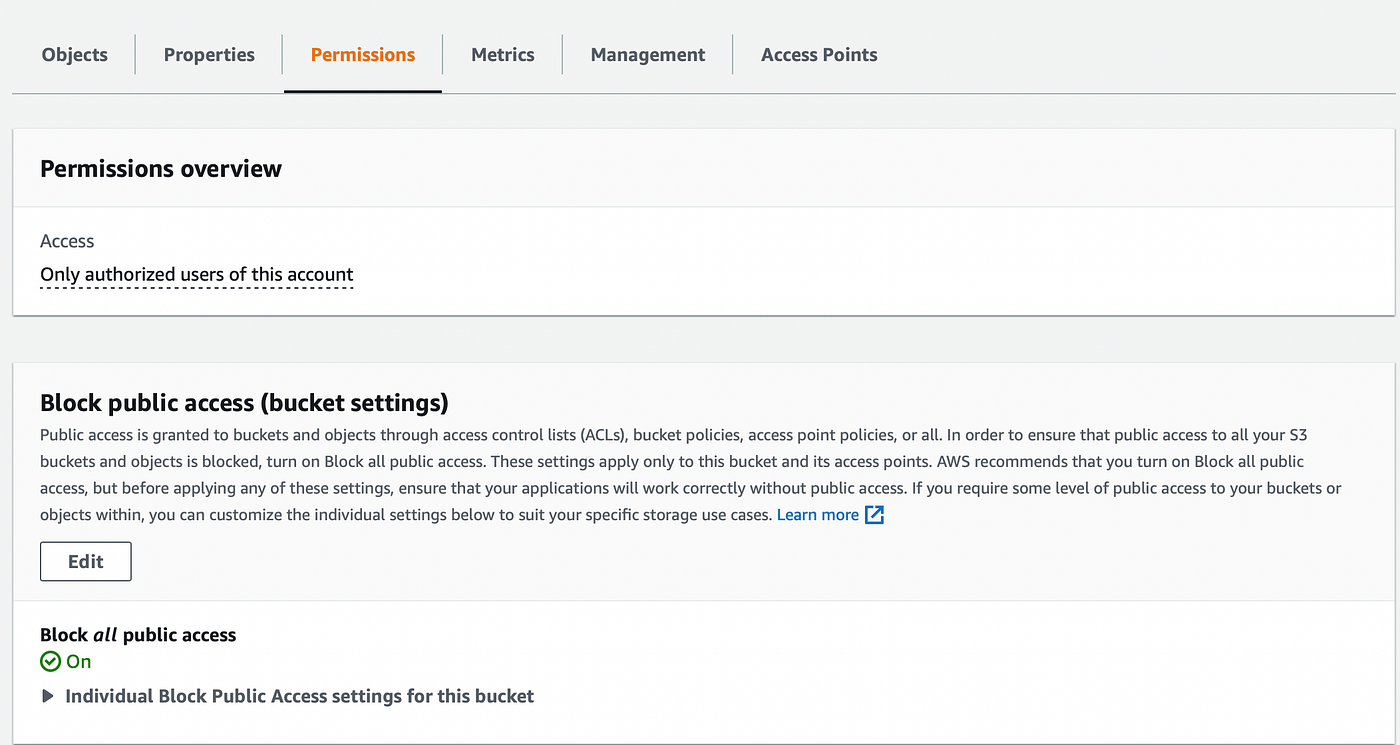
We can now see below that public access has been restricted.
Secondly, go to your DNS Provider, log in and add a new record. Create a
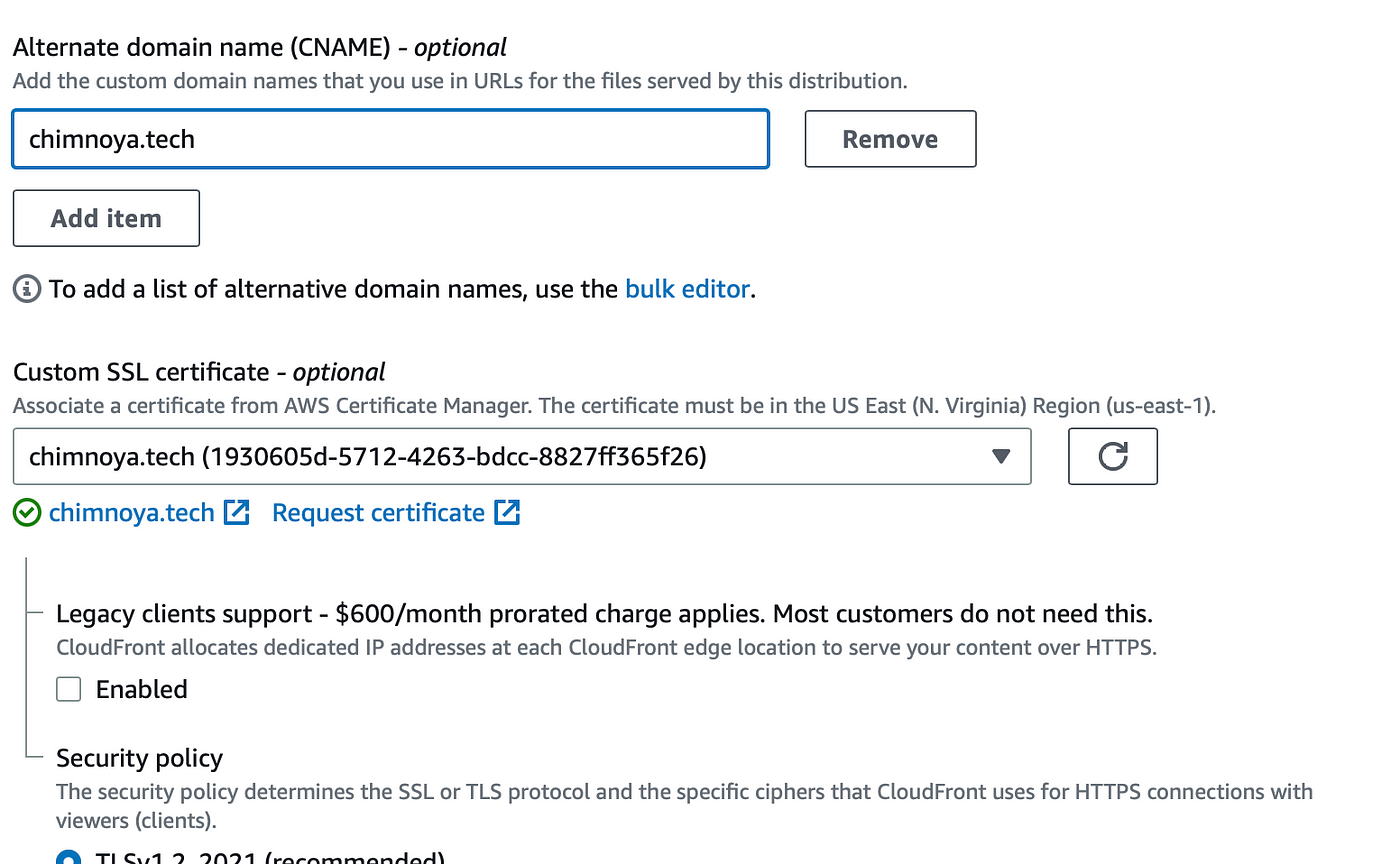
CNAMEtype and point it to your CloudFront distribution domain name.Once that is done, navigate to CloudFront on your AWS Console and click on your already created distribution and on the
General Tabunder settings, click onEditand add analternate domain nameas seen below. Then update your distribution.
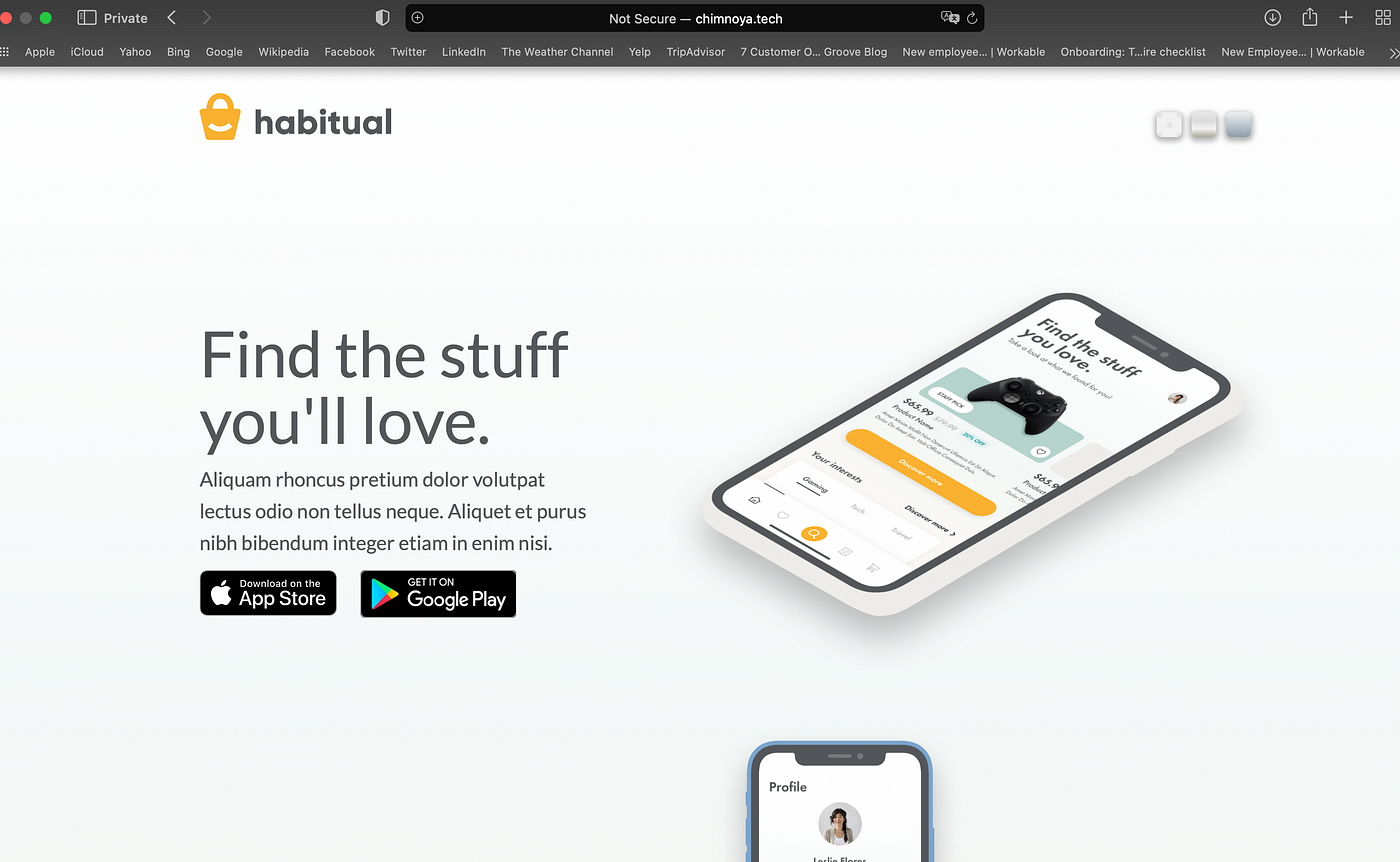
Wait for your distribution to be completely deployed, this could take a few minutes, then hit your domain and in this case chimnoya.tech on your browser and your website will be up and running!
PS: One thing you may encounter during this is the beauty of CloudFront caching and how it distributes content requests among different regions. For example, if you are in Asia or Africa and you have successfully updated your distribution with the alternate domain name and have tried hitting it on your browser but it has failed to connect, try using your VPN with a set location in the United States, and you will see that your website works perfectly fine.
So, give it may take up to 10 minutes before it fully propagates to your location!
Amazing! If you have read till this point, thank you so much and I hope this was worth your time. Till next time, feel free to drop your comments, like, share, or clap on this article and also on my previous articles.