
Welcome back! Let's dive right in.

Project Prerequisites
AWS account
Knowledge of creating VPC, EC2, Target Group, Load Balancer, etc.
Introduction
This is a guide on how to manually deploy a website hosted on an EC2 instance which can be publicly accessed using a Static Load Balancer Public DNS.
EC2 instances are either Linux or Windows servers used to run applications or websites. For an EC2 instance to exist you have to create/launch one and before that you have to create a VPC.
A VPC is a Virtual Private Cloud which is isolated in the AWS Cloud that is used for networking, running applications, hosting websites and more.
Step 1 Create a custom VPC
Always begin by choosing your region. For the purpose of this tutorial we will be using us-east-1. Go to your AWS Console, login, navigate to AWS VPC and create a custom VPC.
AWS has made it easier with their new feature which has a VPC and more section where you can visualise the resources created and it automatically generates all the resources needed for your VPC to be fully functional and you can just customise it as you please with the necessary subnets (we will be using 2 public subnets in us-east-1a and us-east-1-b), route tables, Internet Gateway(IGW), availability zones(you should have at least 2 AZ's, this is to encourage high availability), etc.

Below is a screenshot of all the resources AWS automatically creates for you when you use the VPC and more section which you would have ordinarily created by yourself if you used the VPC only option.
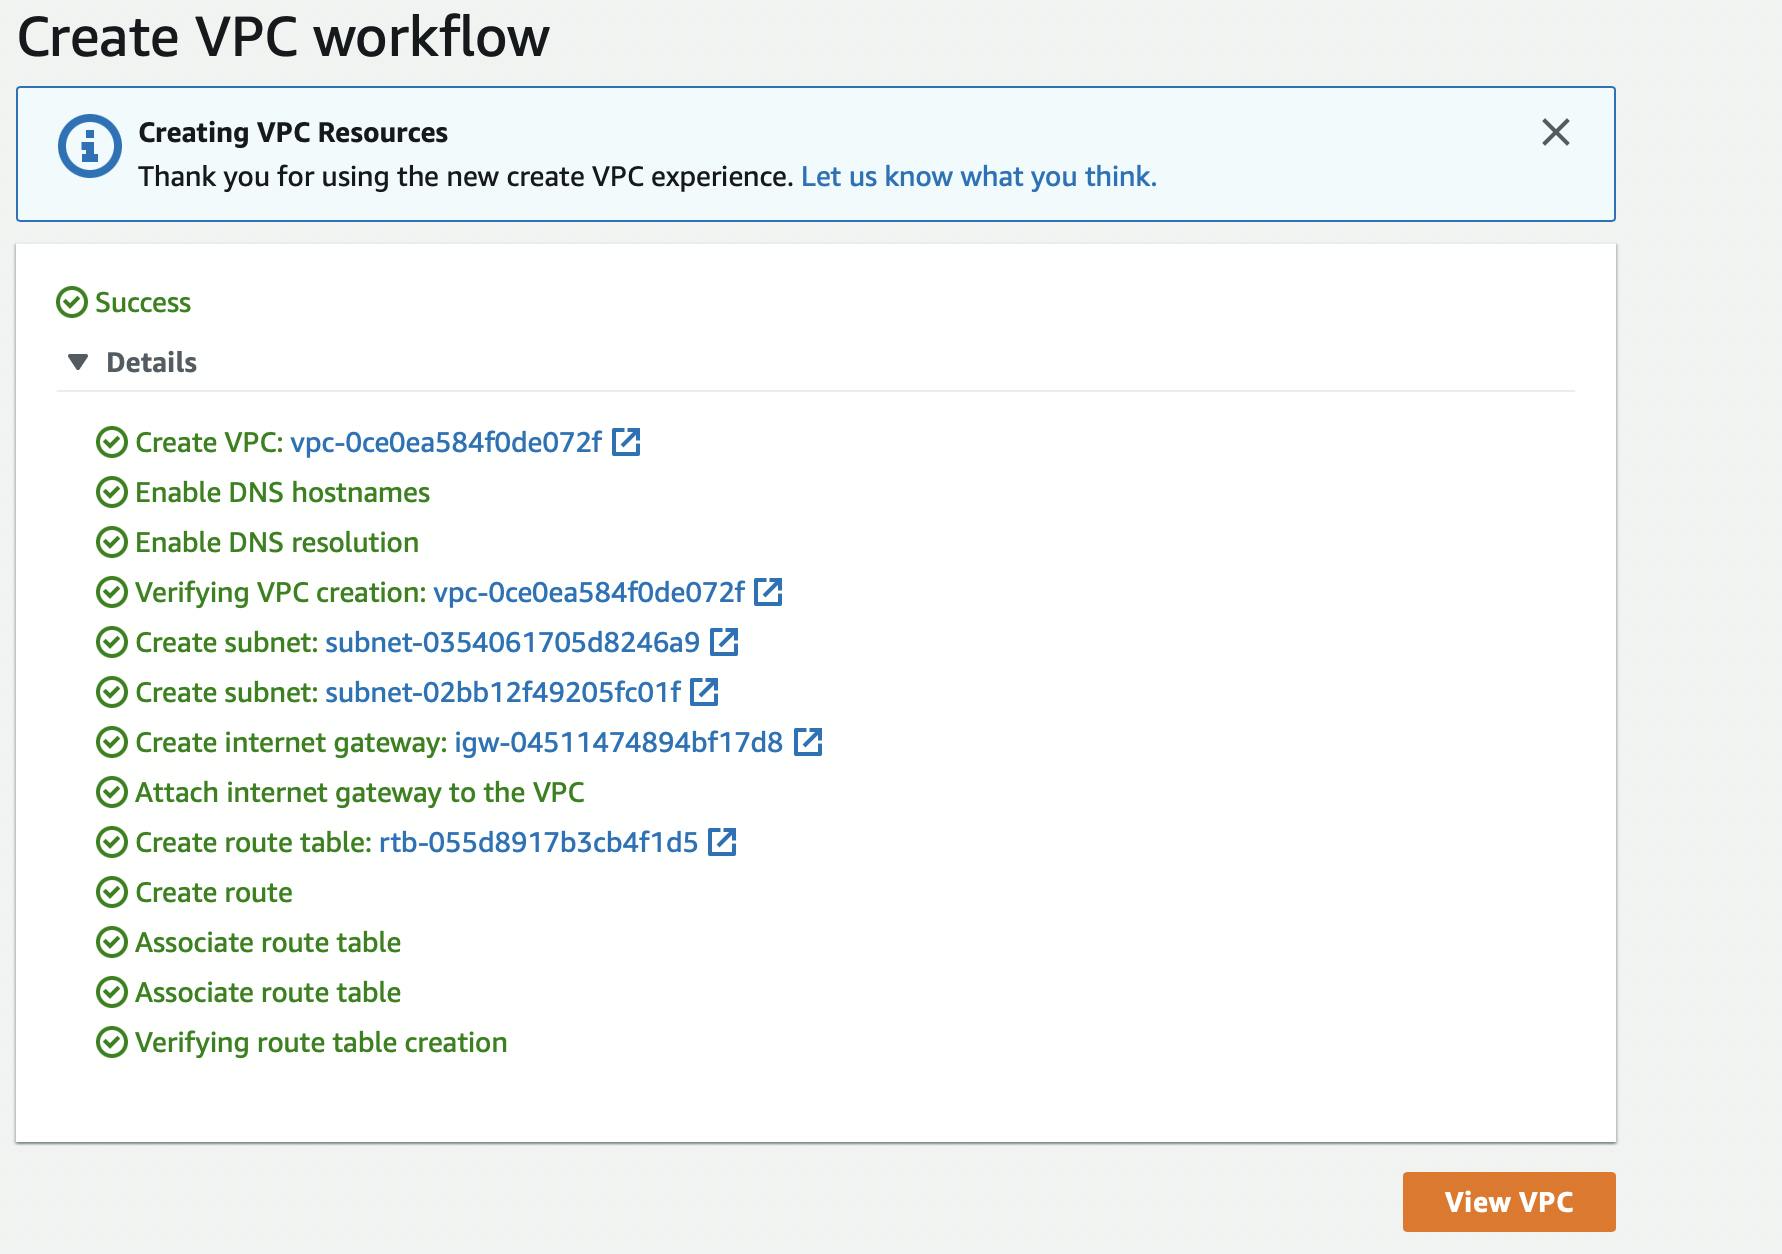
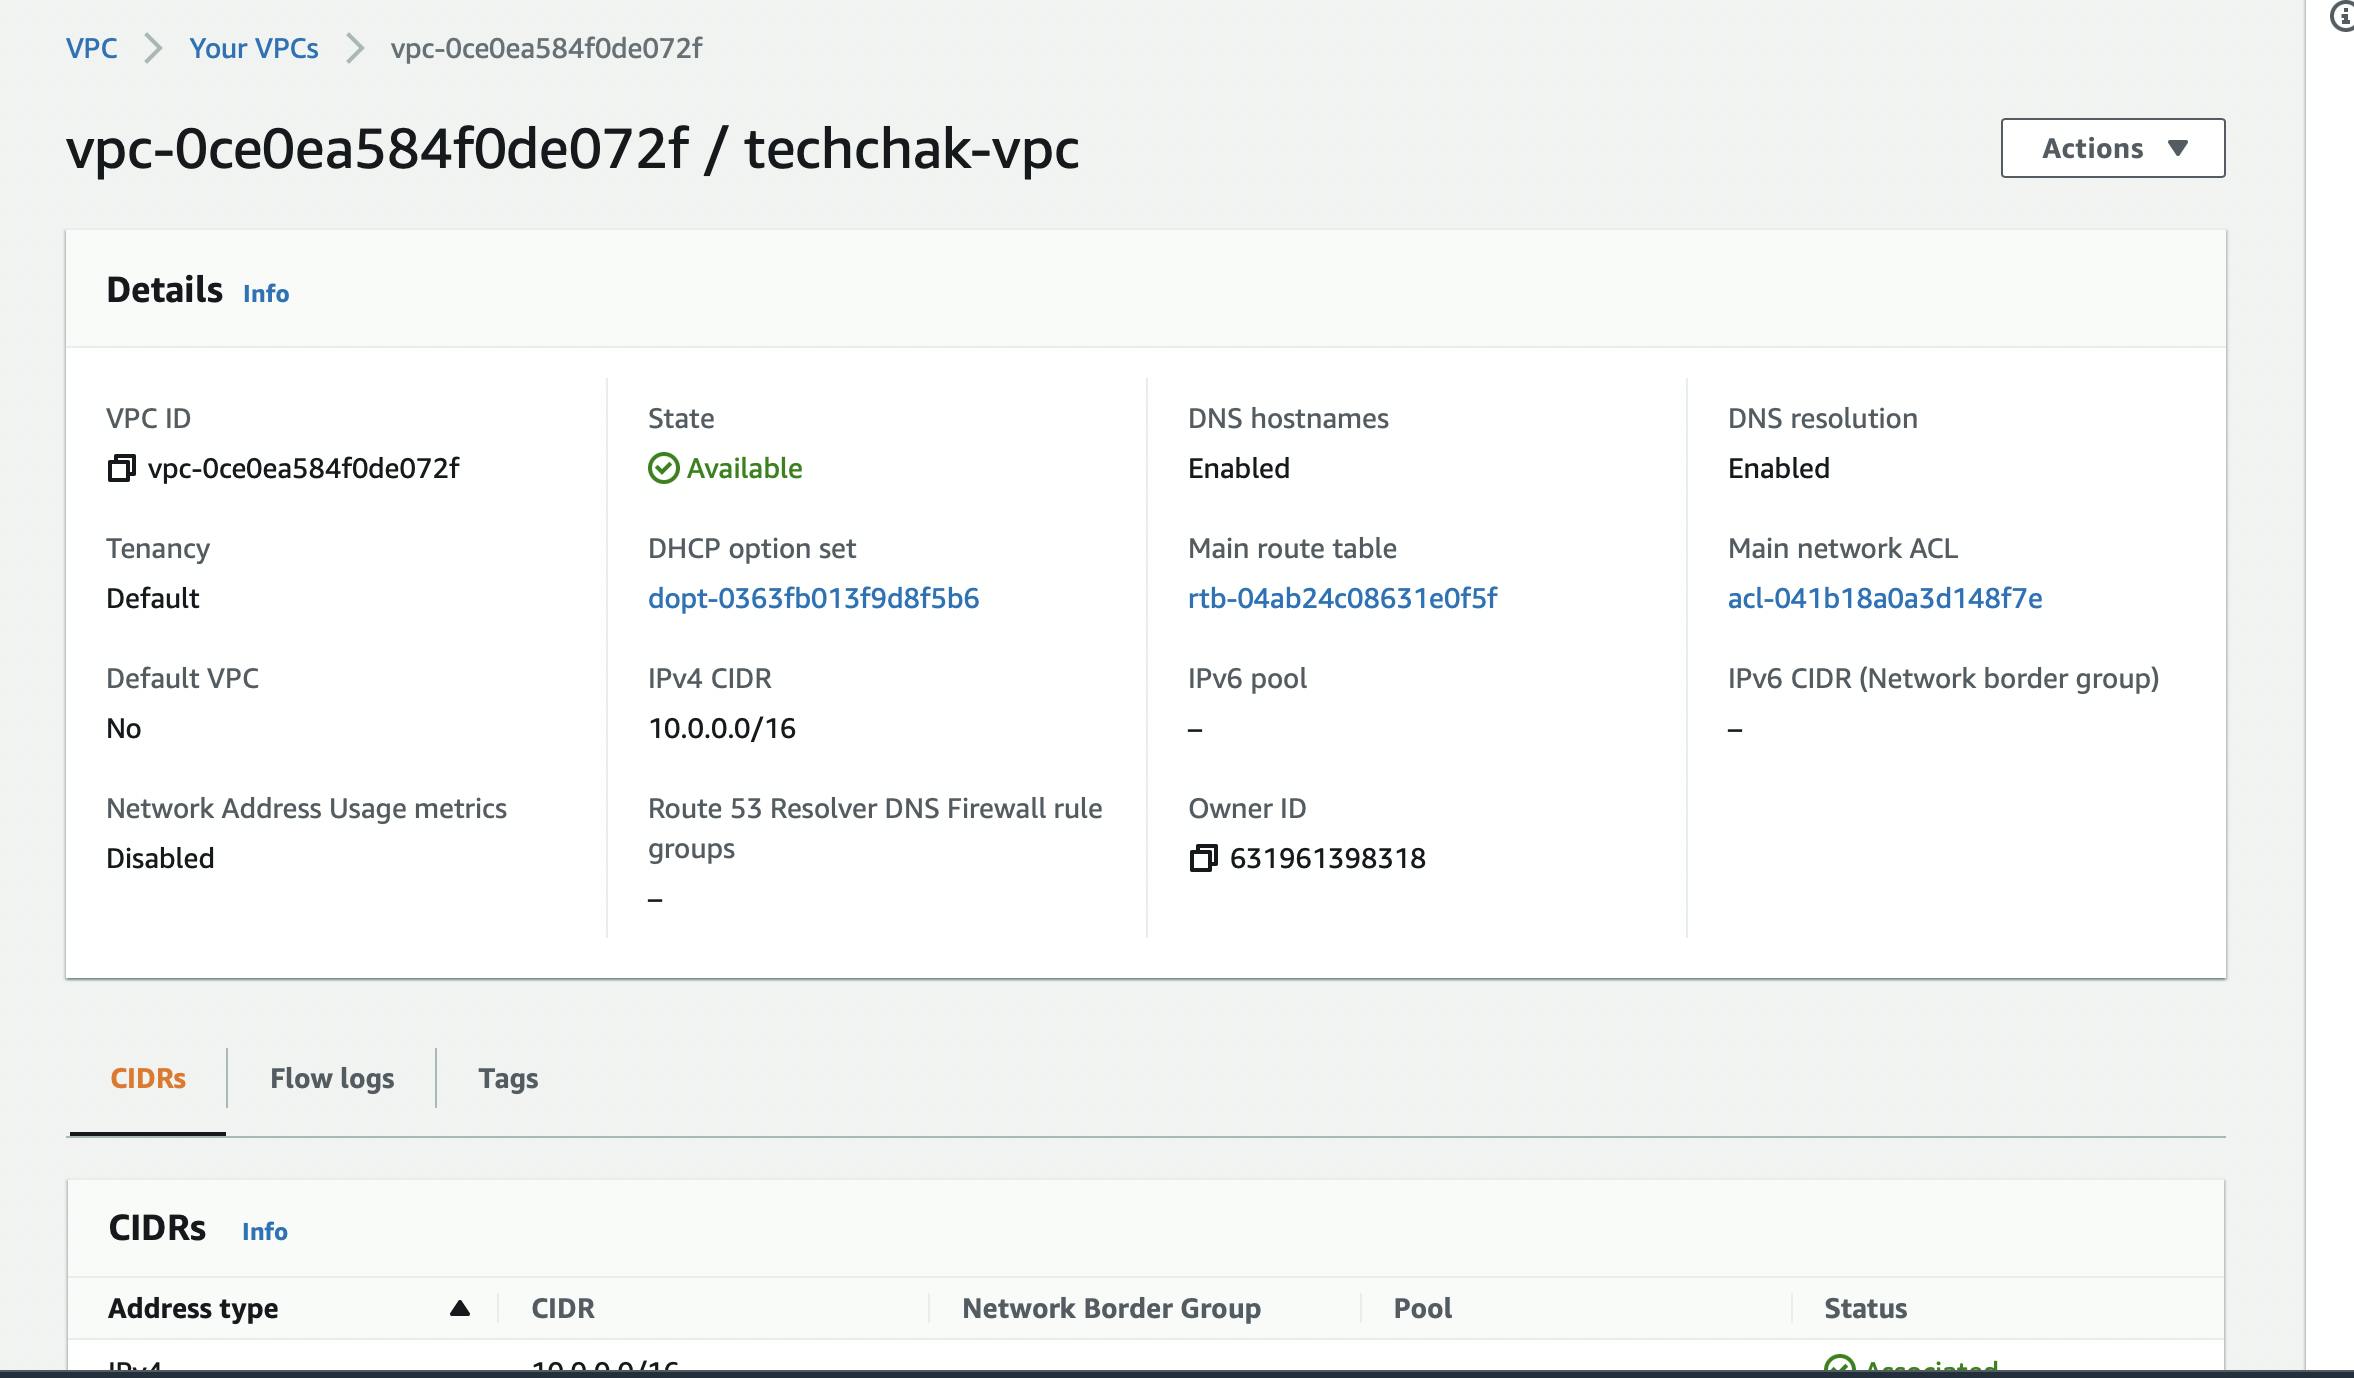
You can now proceed to view your VPC
Step 2 Launch EC2 in your custom VPC
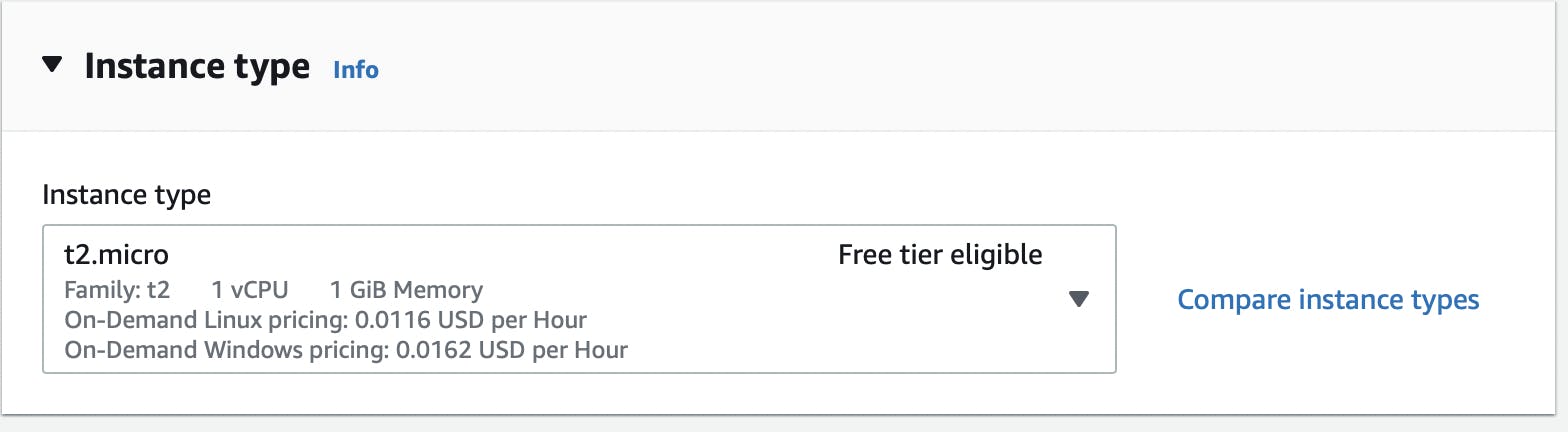
Still on your console, navigate to EC2 and instances then click on launch instances. A page will appear for you to configure your EC2 instance. For the purpose of your learning, choose a t2 micro instance type because it is free and it would not rack up bills for you.
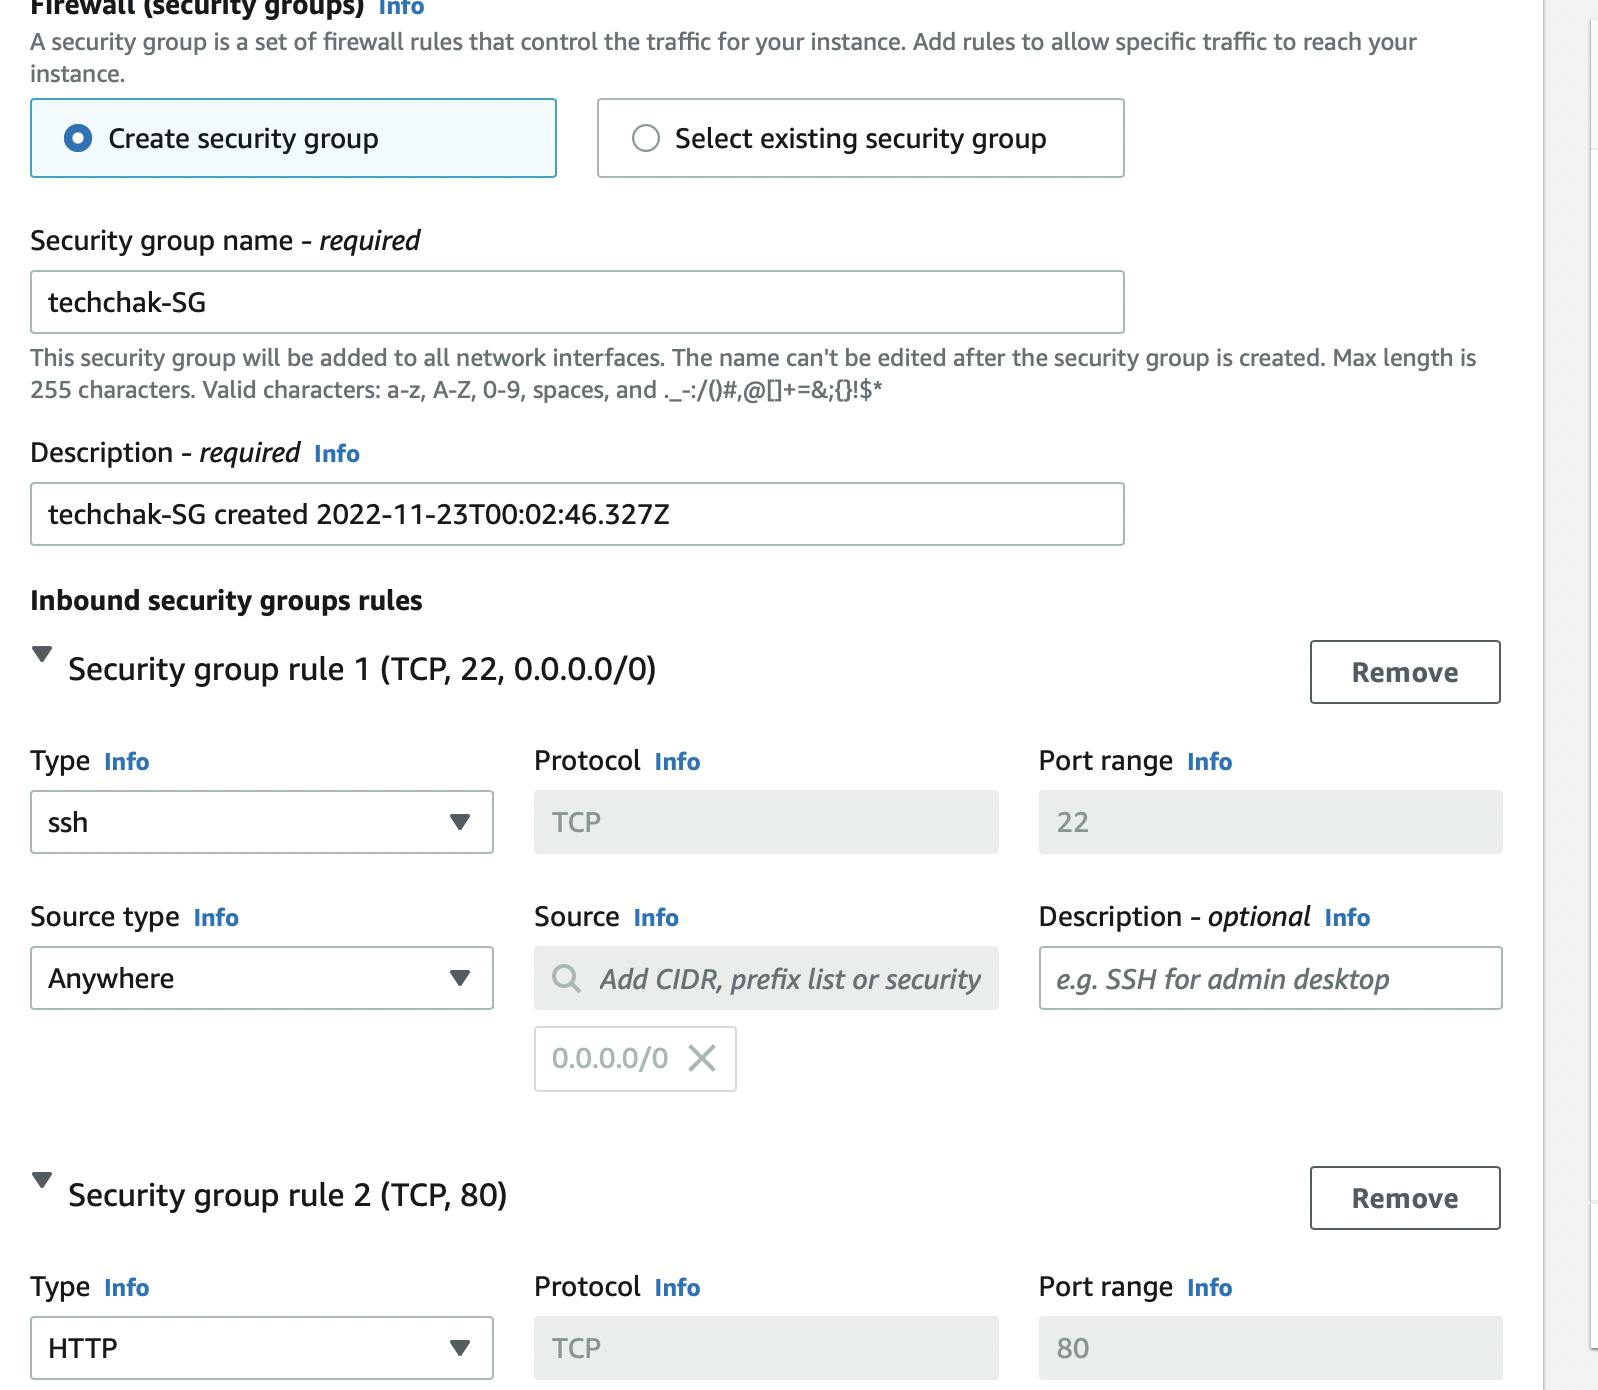
Remember to edit your network settings with the custom VPC you created earlier and also for your security group, allow your IP on http and HTTP which is port 80 so that your IP can hit your EC2 instance on your web browser.
Then, under advanced settings remember to input your script in the User Data section which will run once the EC2 instance is launched.
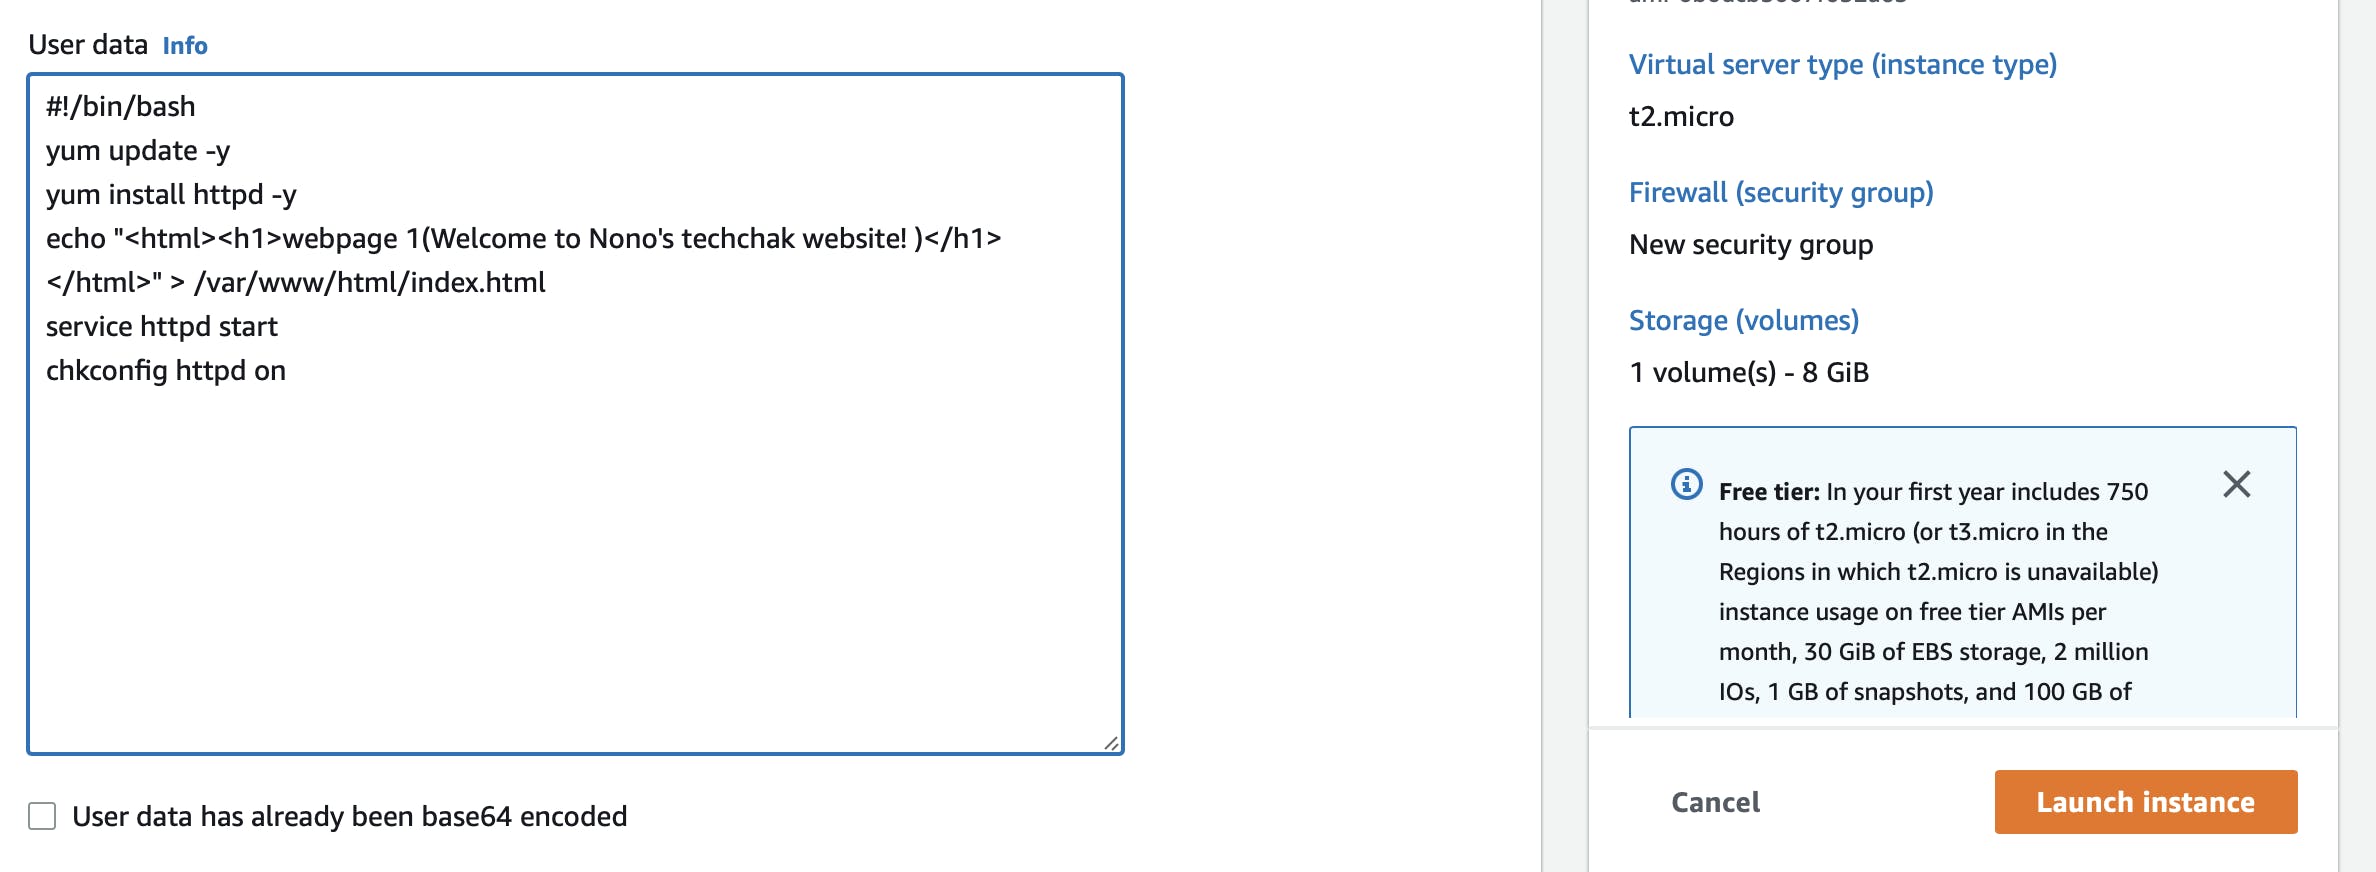
Now, you are ready to launch your instance and you should get this showing that it launched successfully.

View your instance and grab the Public IPV4 DNS and paste on your web browser and you should see that your script will have successfully run and you should get this
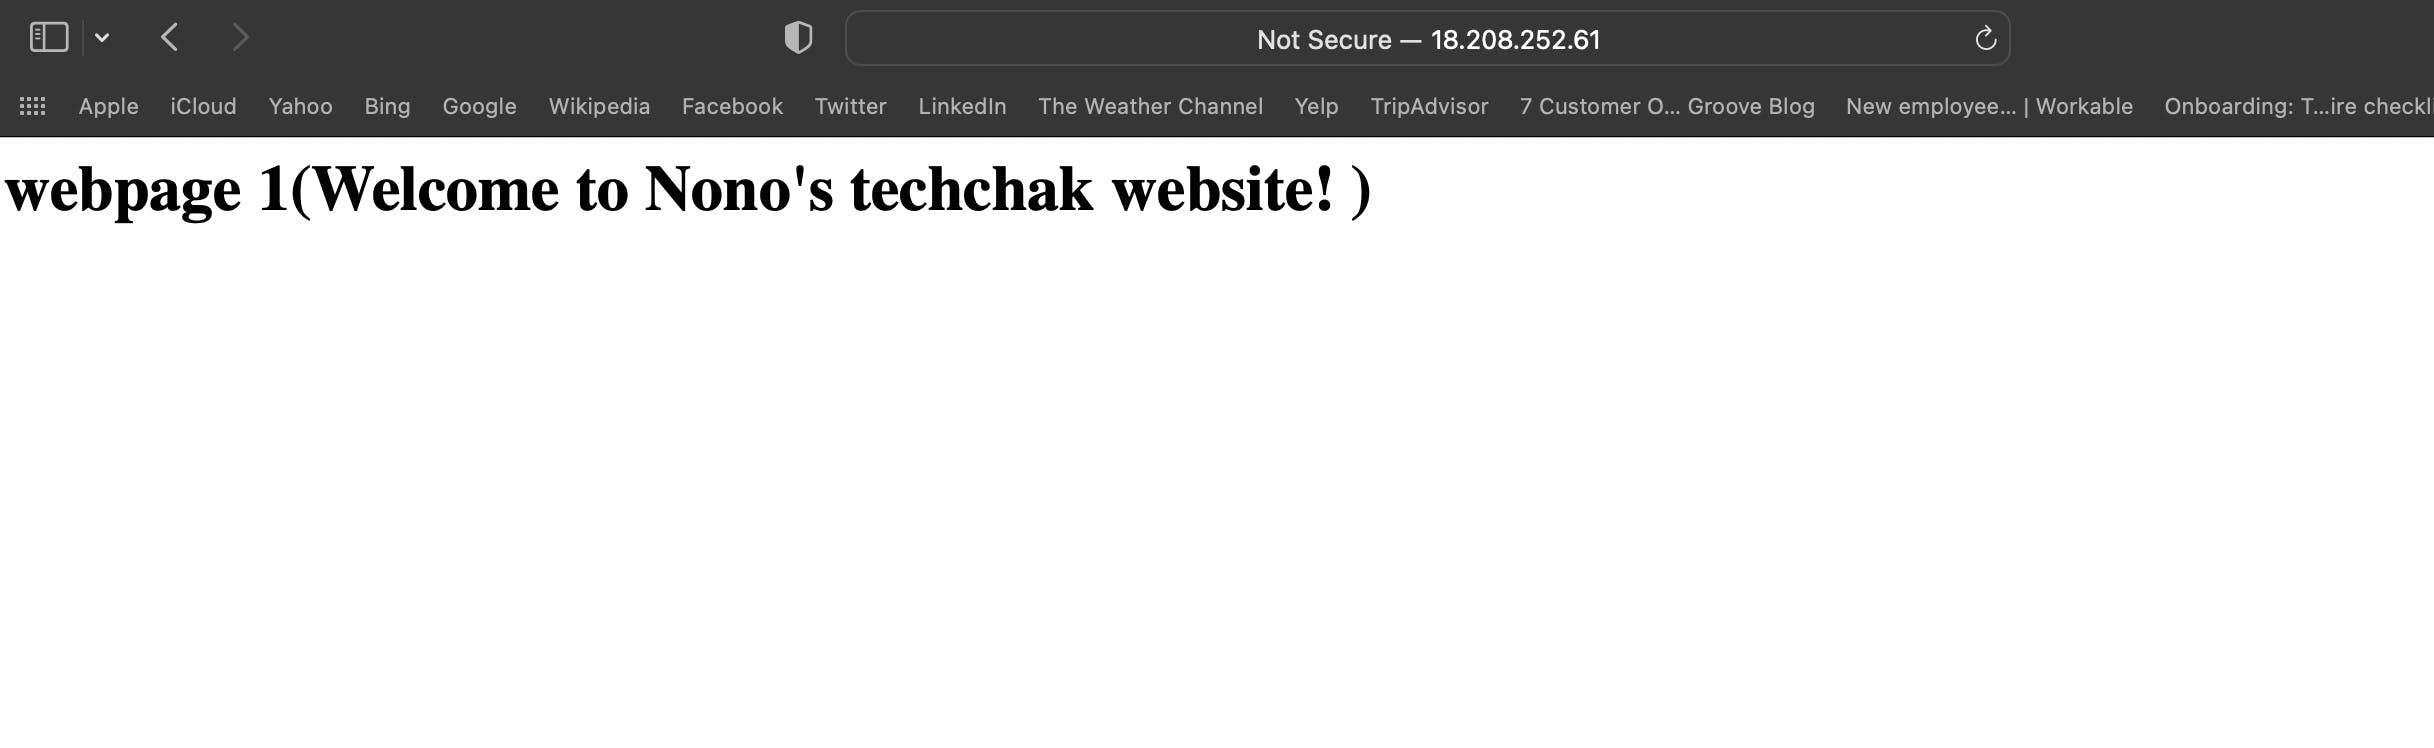
Congratulations! You have successfully deployed an EC2 instance that hosted your web app.

Now let's move a step ahead.
In a real working environment, like I mentioned in my previous article here. It is best practice to create a Load Balancer which users can hit in order to access your website. This is because, your load balancer has or will have a static Public DNS or you can map a custom domain name to the Load Balancer Public DNS which is easier for users to remember.
NEXT STEP
How To Create A Load Balancer
Attach your instance to a target group and then associate your target to the Load Balancer so that the public/users can hit the Load Balancer inorder to access your website hosted on your EC2. The Load Balancer will be in a public subnet that you have created while customising and creating your VPC and this is to enable the public access your web app.
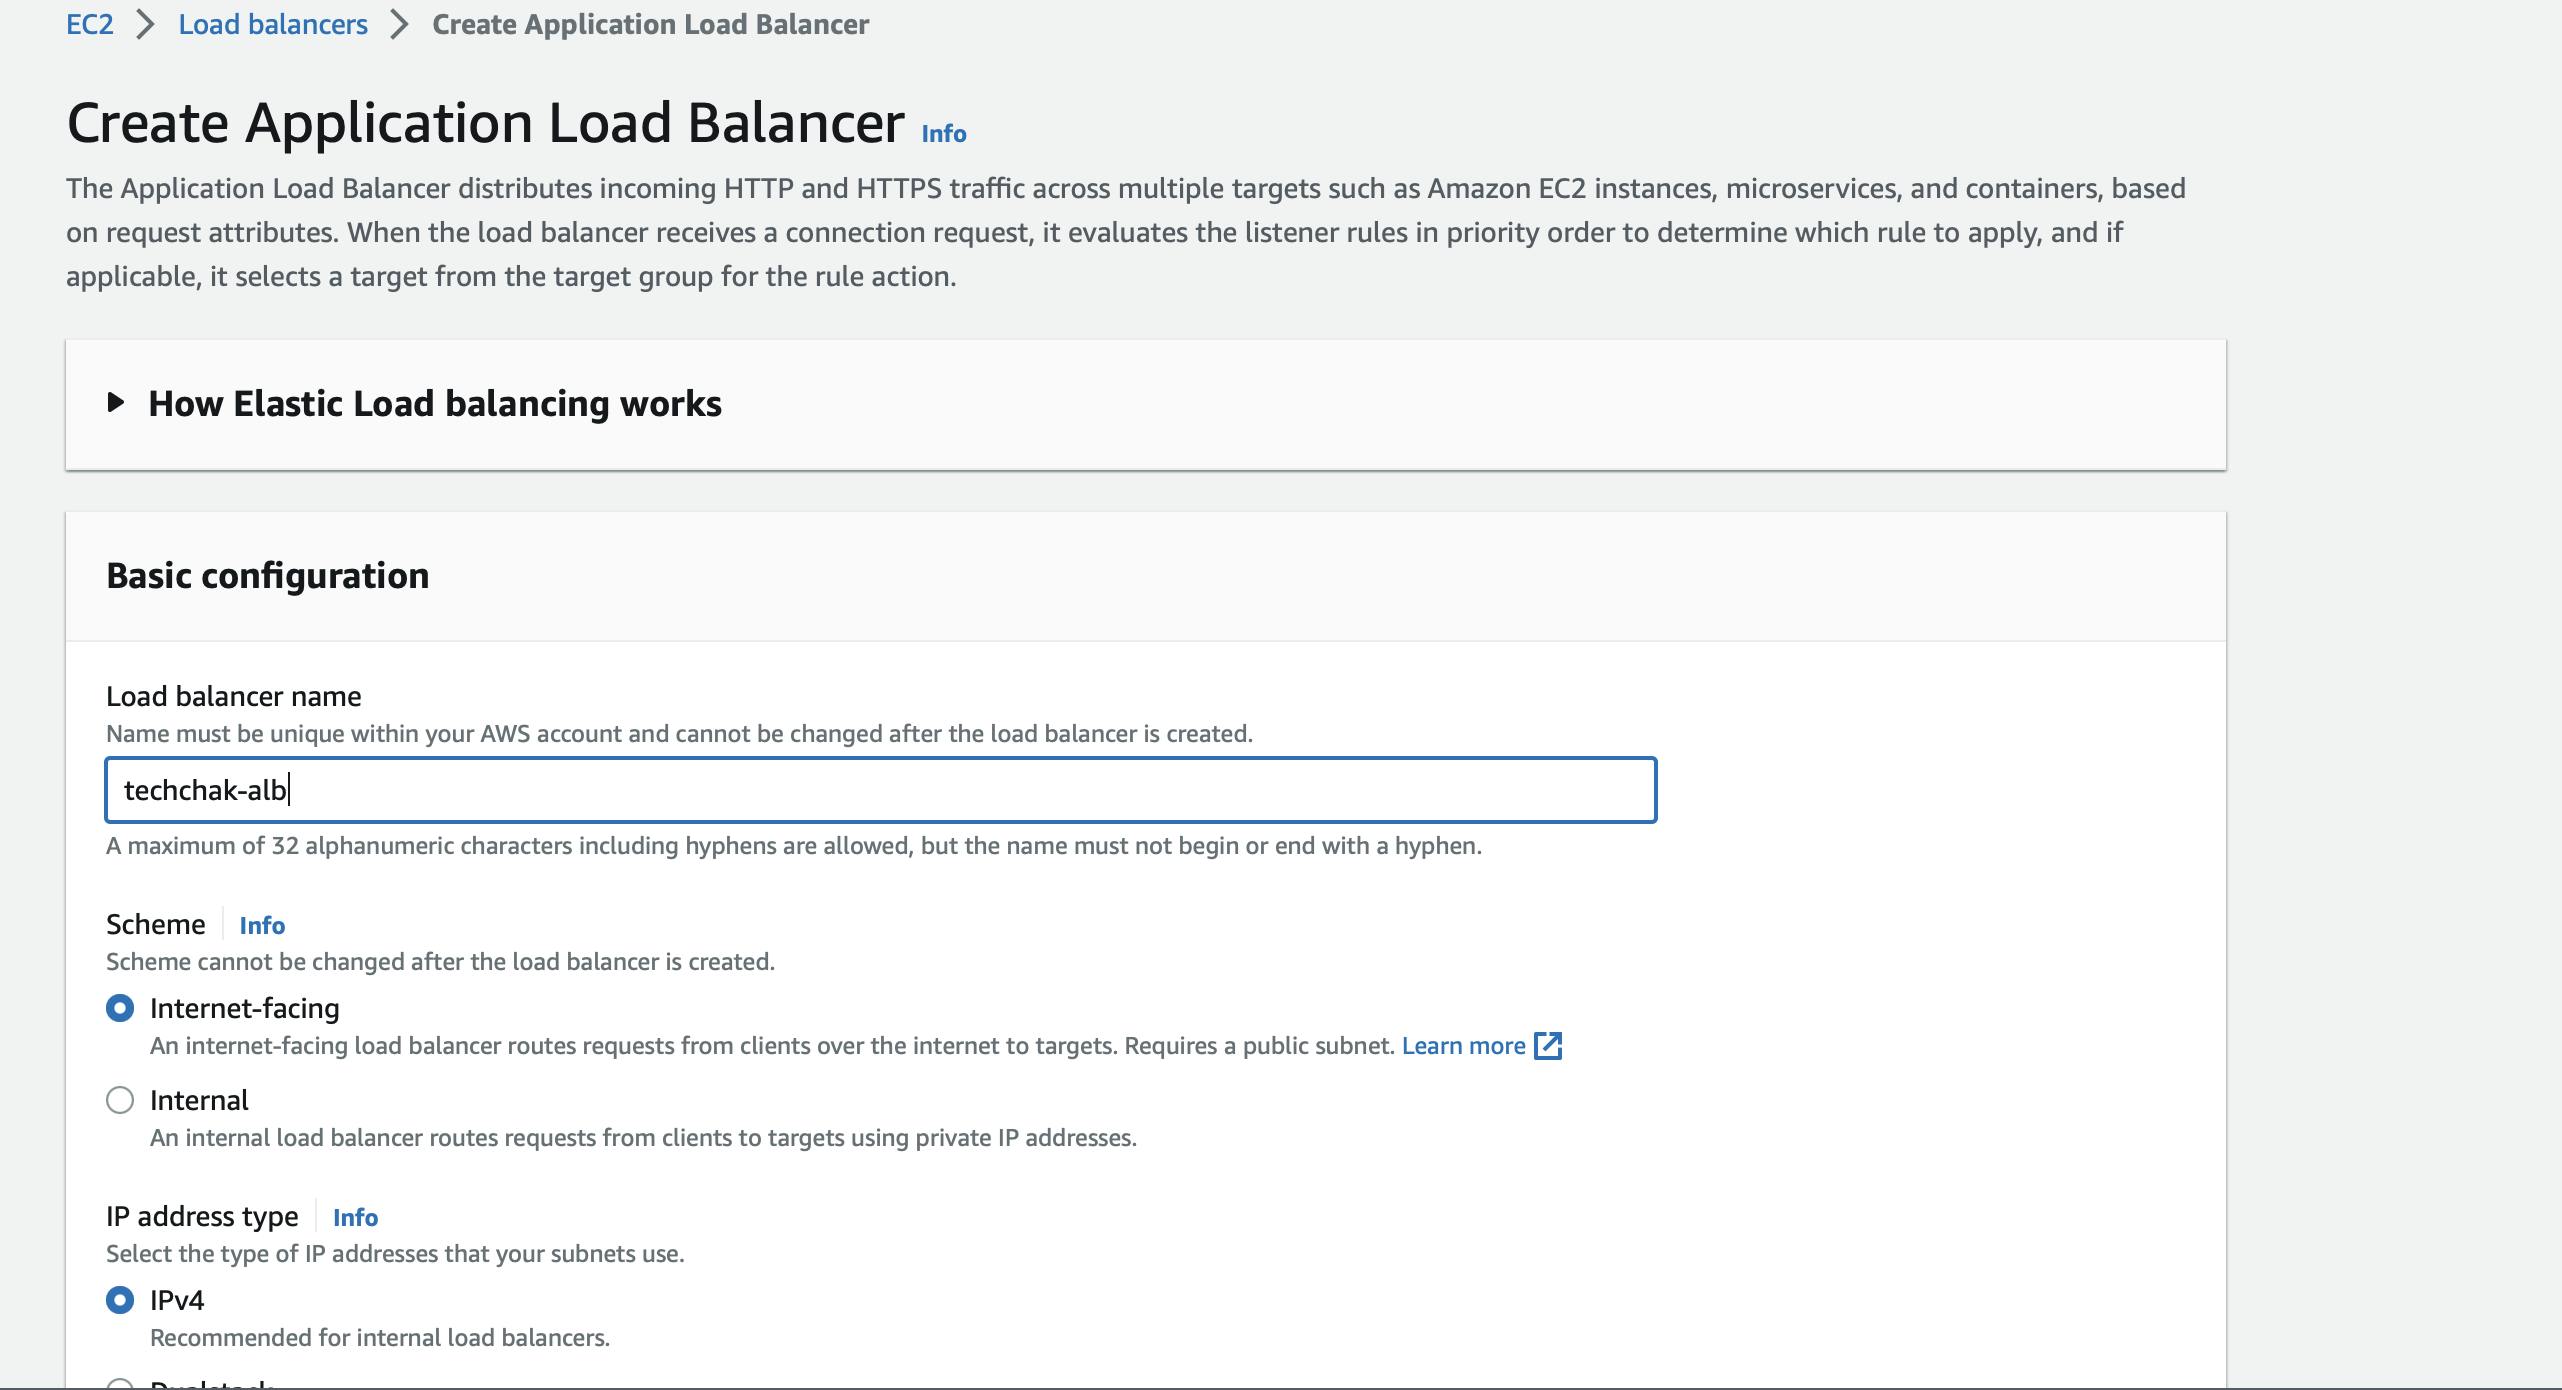
Step 1- Create a Load Balancer
Go to your AWS Console, search for Load balancers in your EC2 console. Chose an Application Load Balancer because my application is a web facing app.

Input the Load Balancer name and Scheme
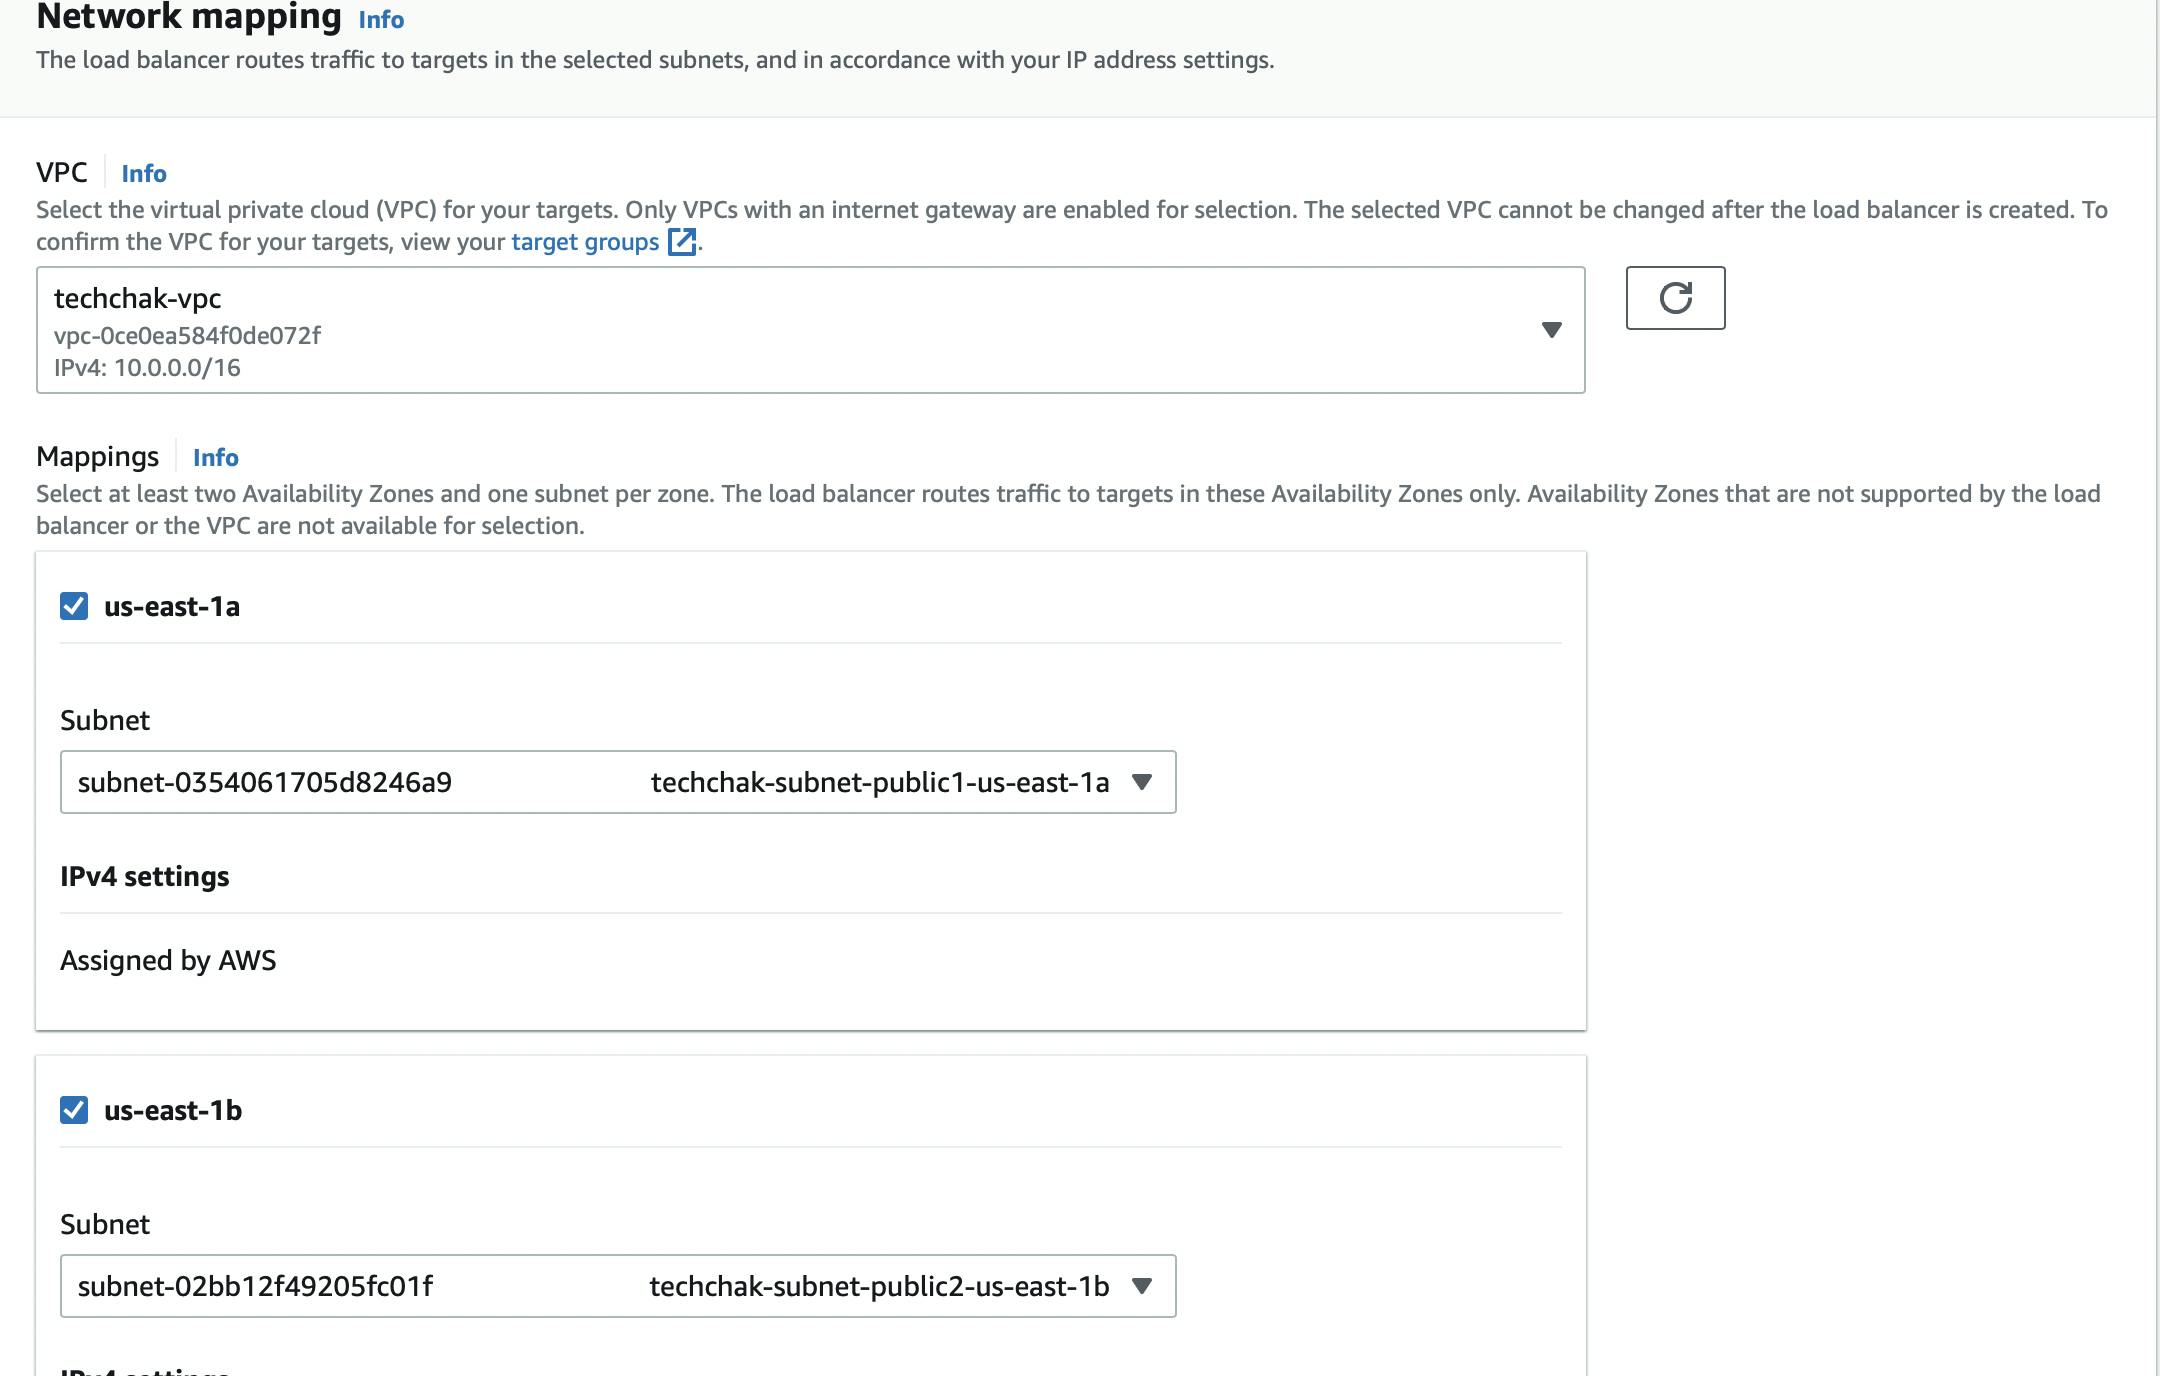
Step 2- Network Mapping
Select your already created VPC and select at least 2 Availability Zones where traffic will be routed to
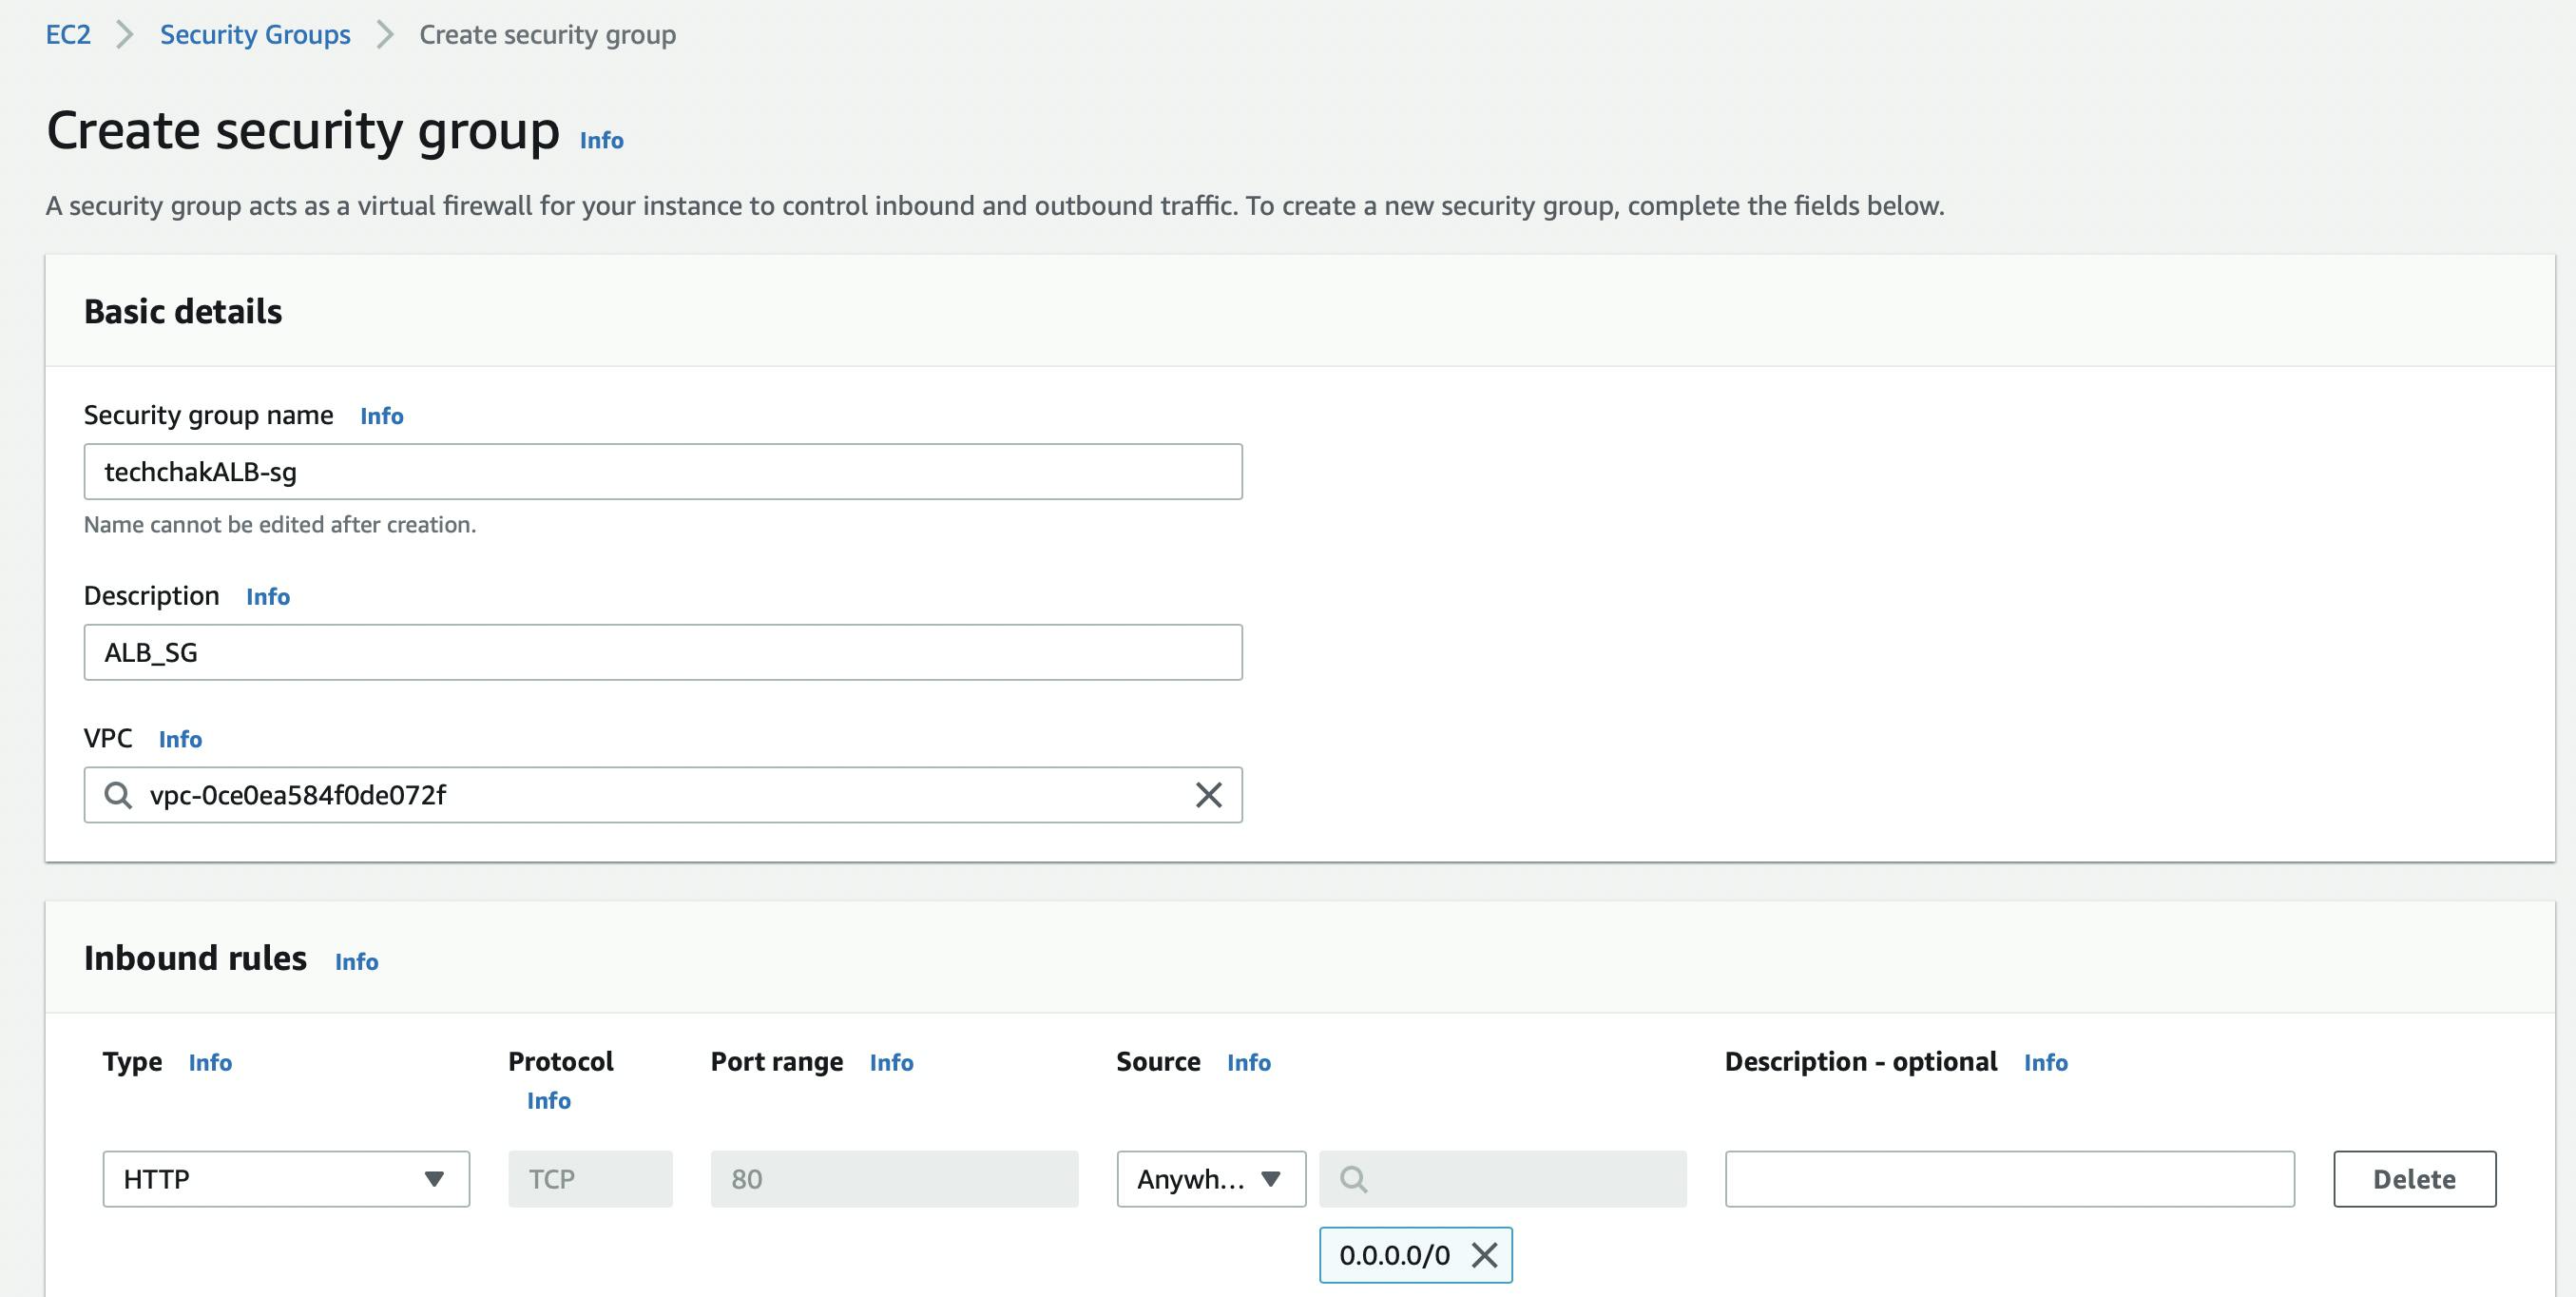
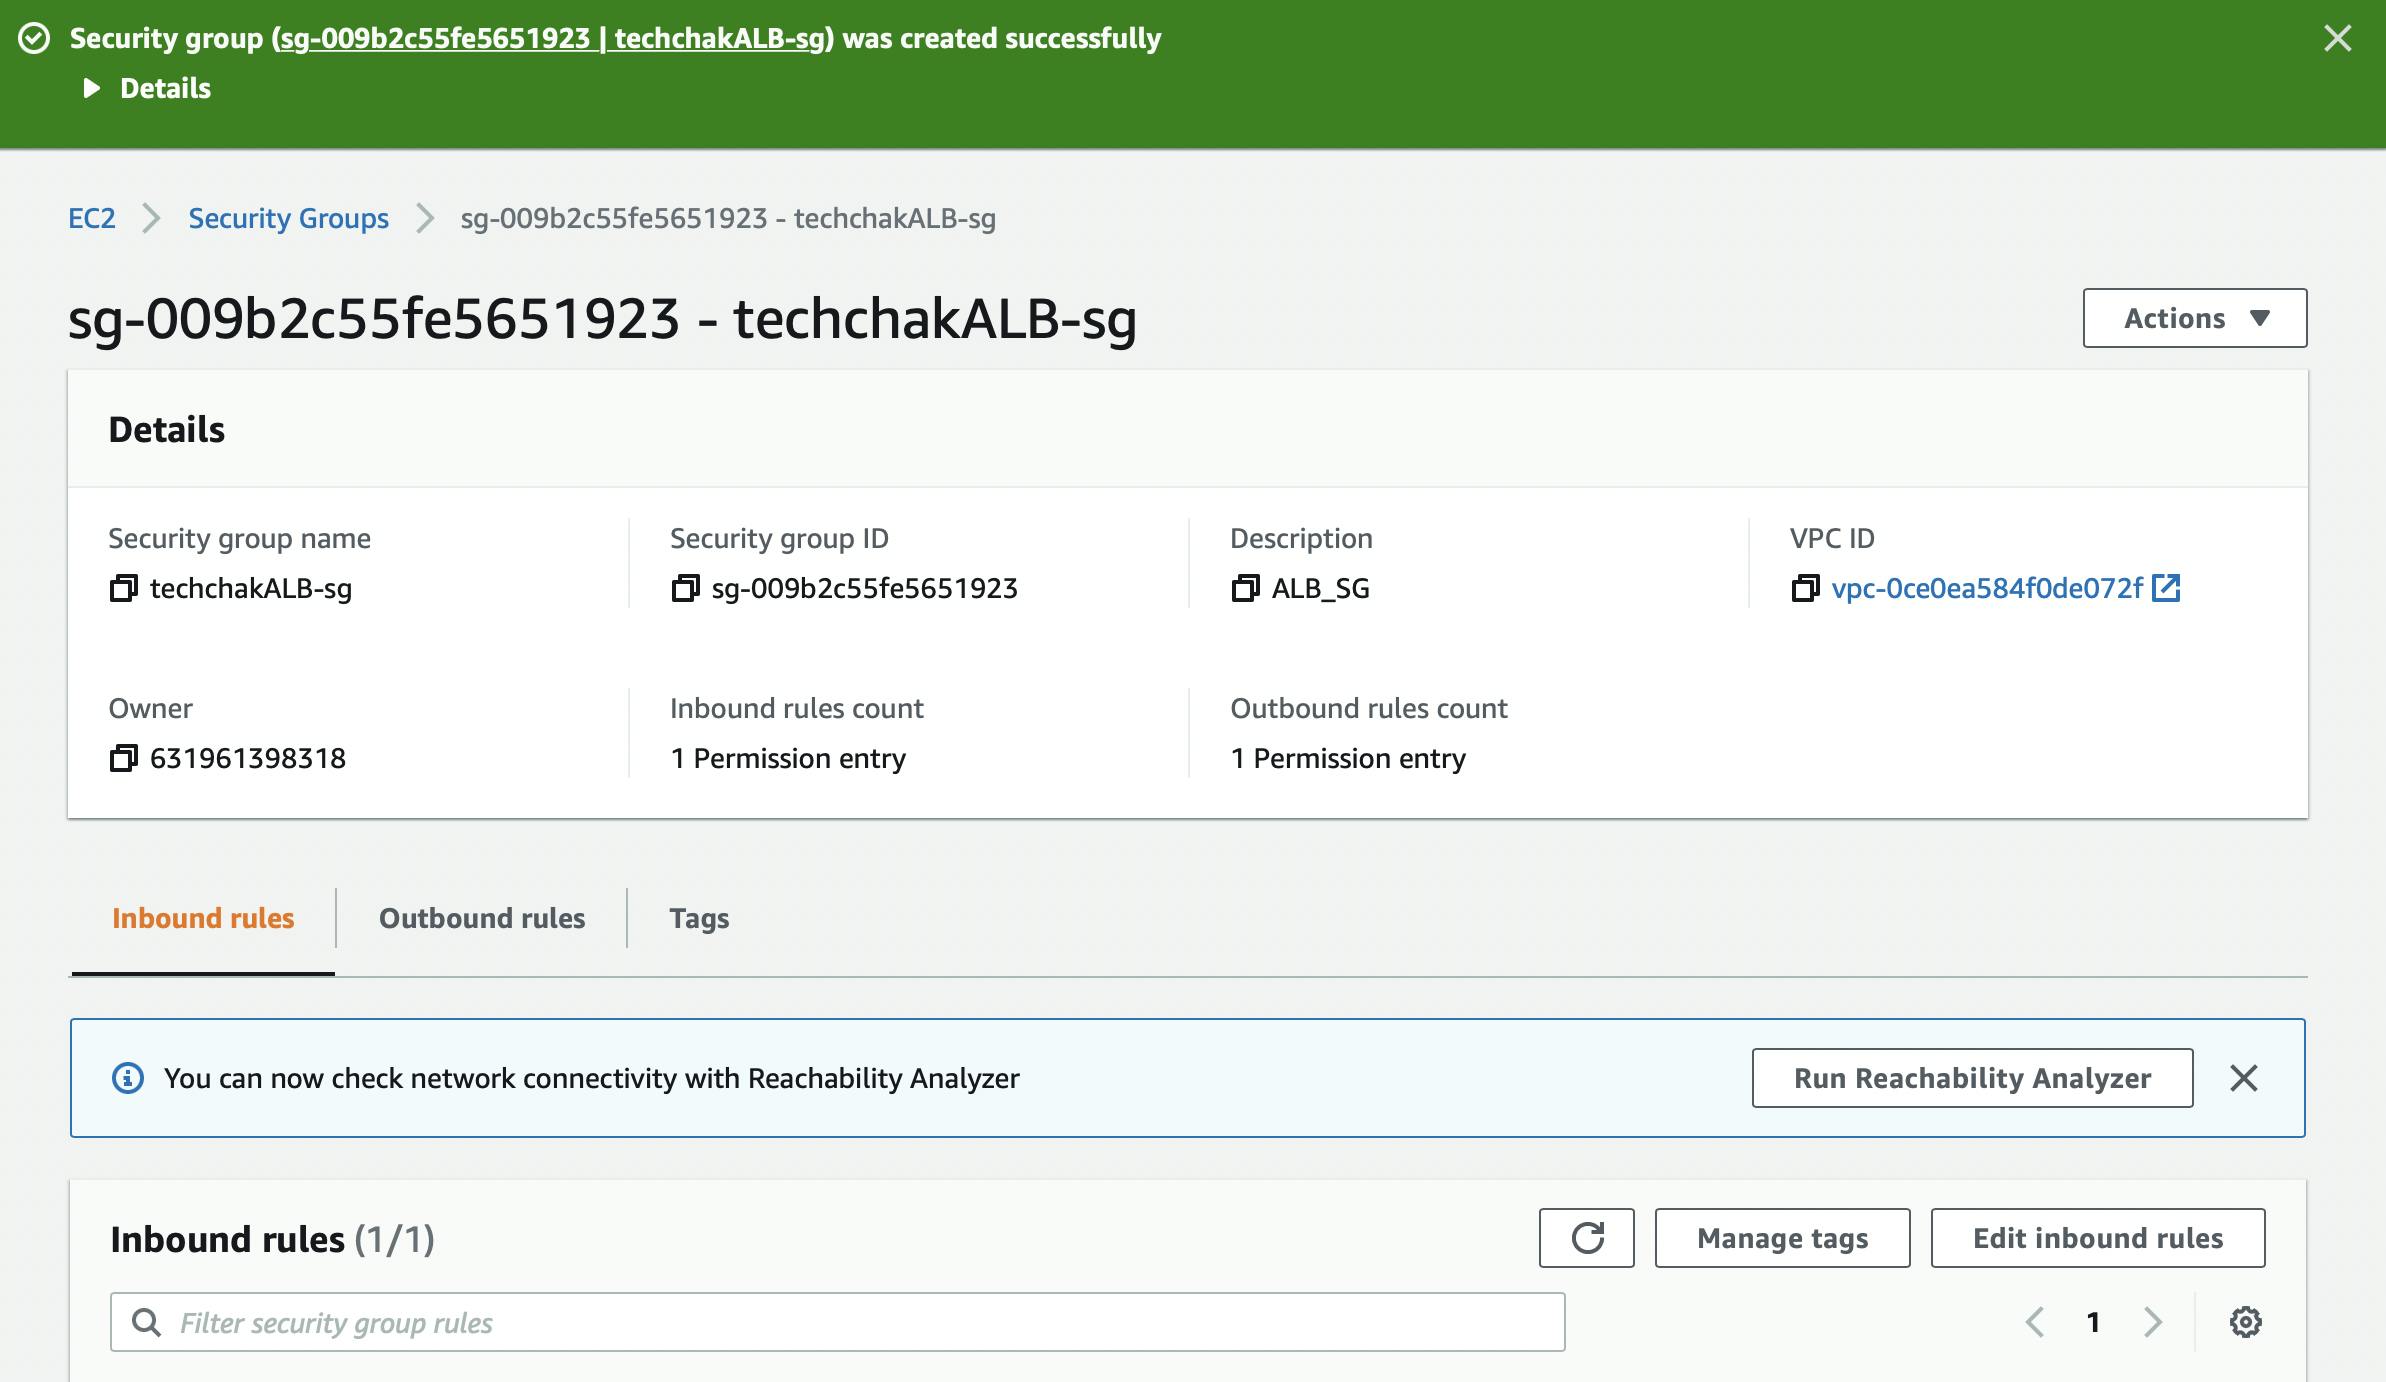
Step 3- Create an ALB SG
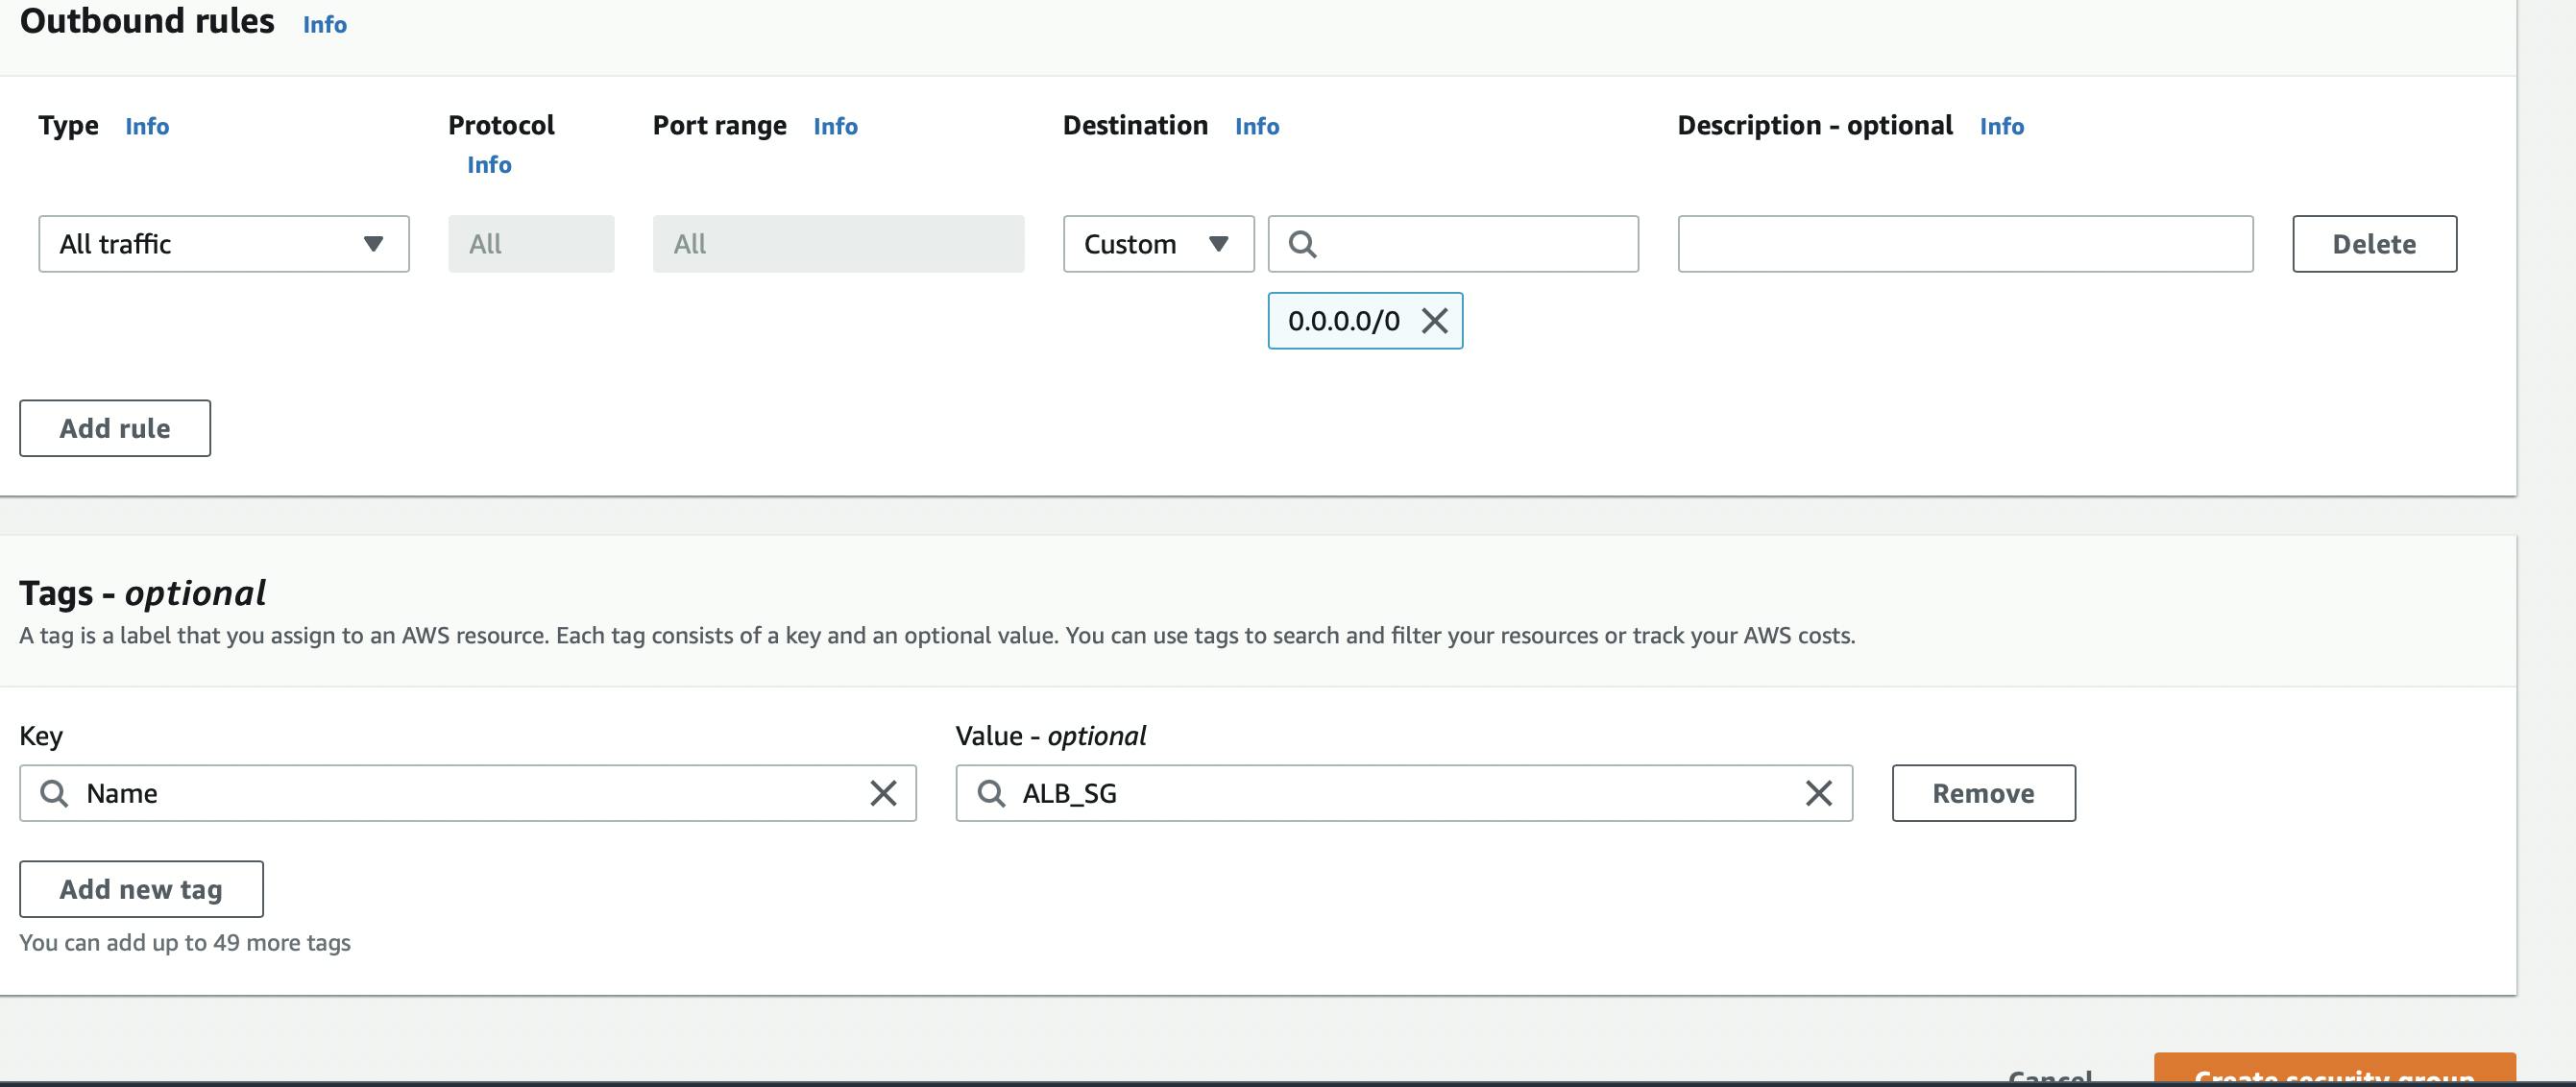
It is better to create a Security Group (SG) for your ALB. The SG controls access from the internet. Edit the ALB security Group to allow traffic in from anywhere/internet 0.0.0.0/0
Step 4- Edit your SG Inbound Rule
Go to your EC2 Instance and edit the Security Group inbound rule to allow traffic from the ALB you have created.
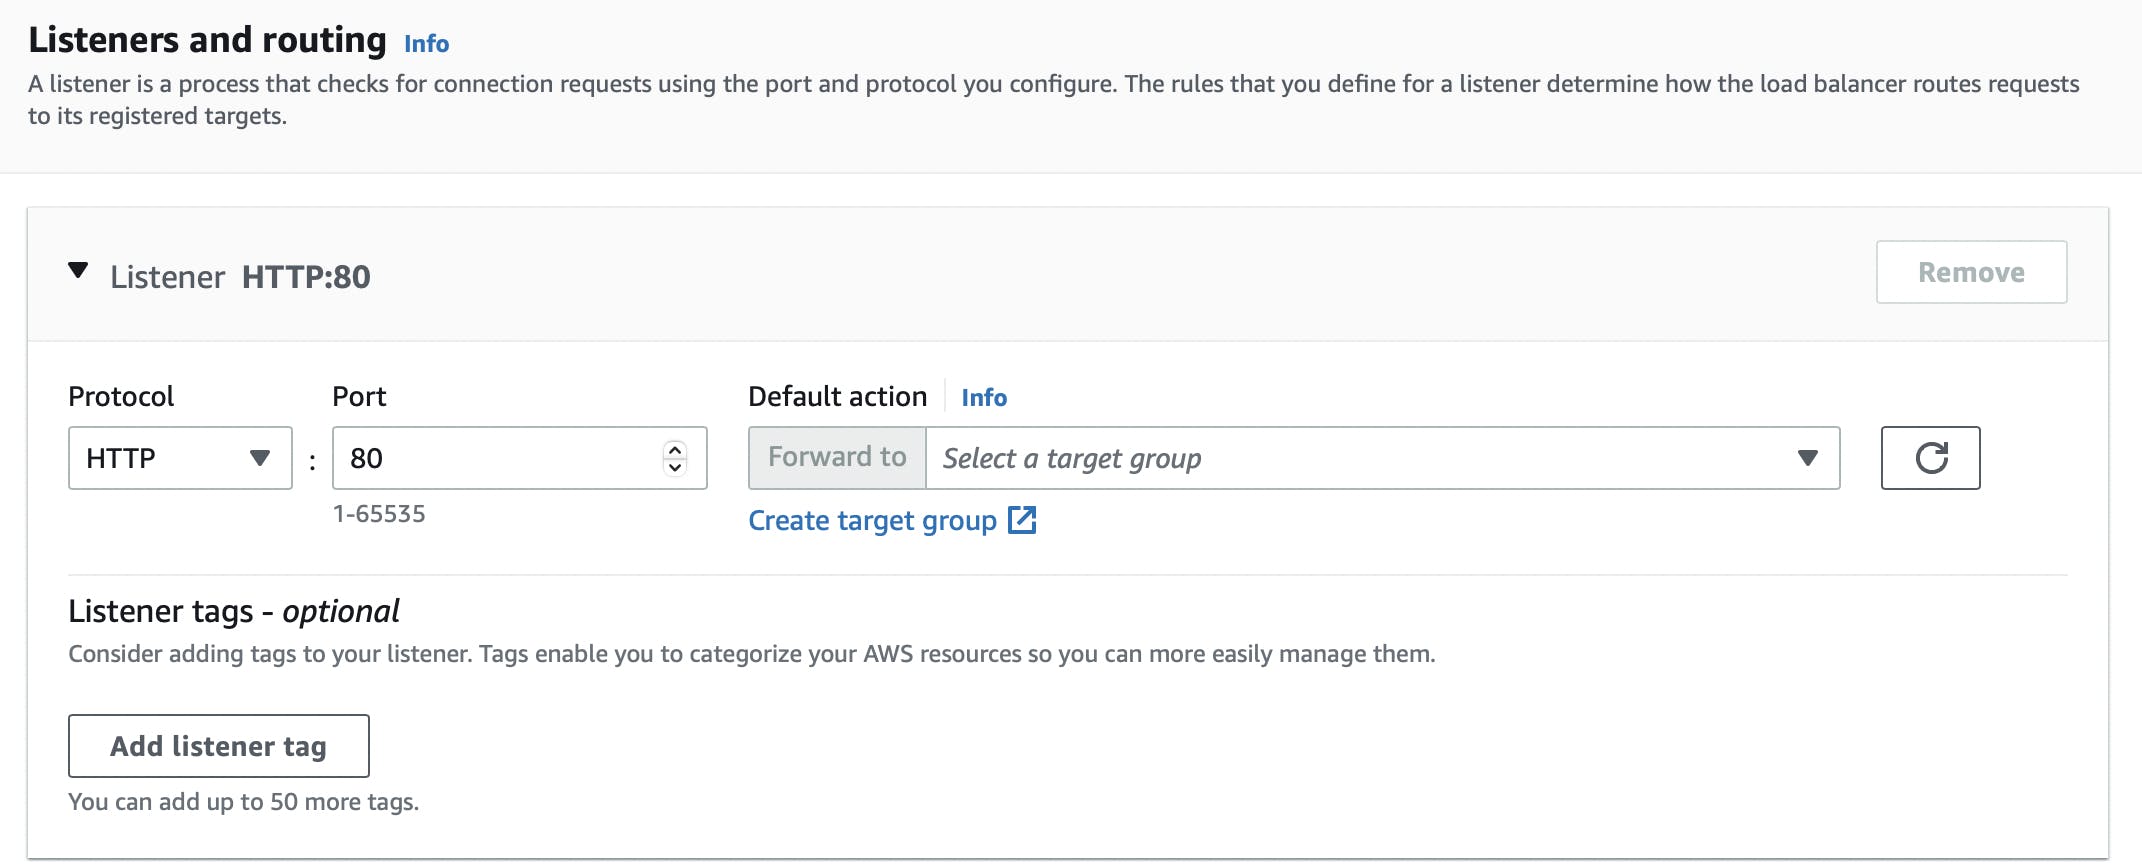
Step 5- Listeners and Routing
This helps to ensure that connection requests are received and routed to the appropriate ports based on the rules you have specified. So, go ahead and Create a Target Group
Choose your target type and name your target group and select the instance (techchak_vpc) you want included in your target group

Step 6- Target Group Port
This is the port your app on your target (EC2 instances) are listening on.
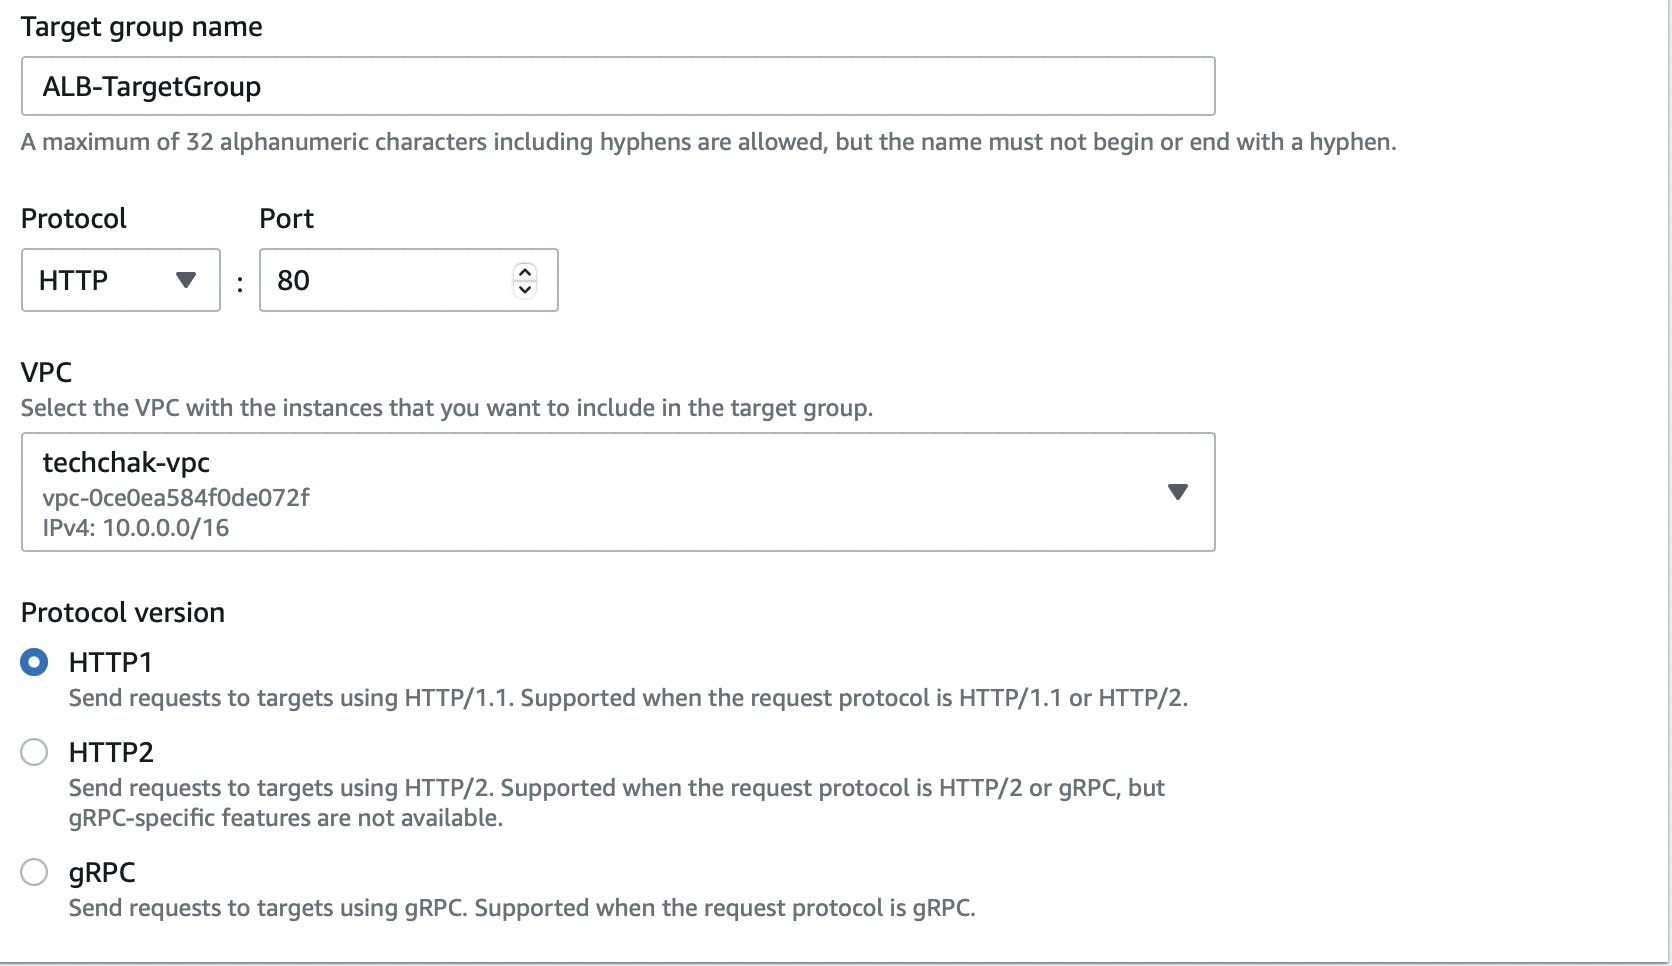
There is however a difference between Target Group Port and ALB Listener Port. Target Group Port is basically the port your app listens on while the Load Balancer Port is the port which allows users hit the Load Balancer first, which then routes traffic to the Target Group Port.
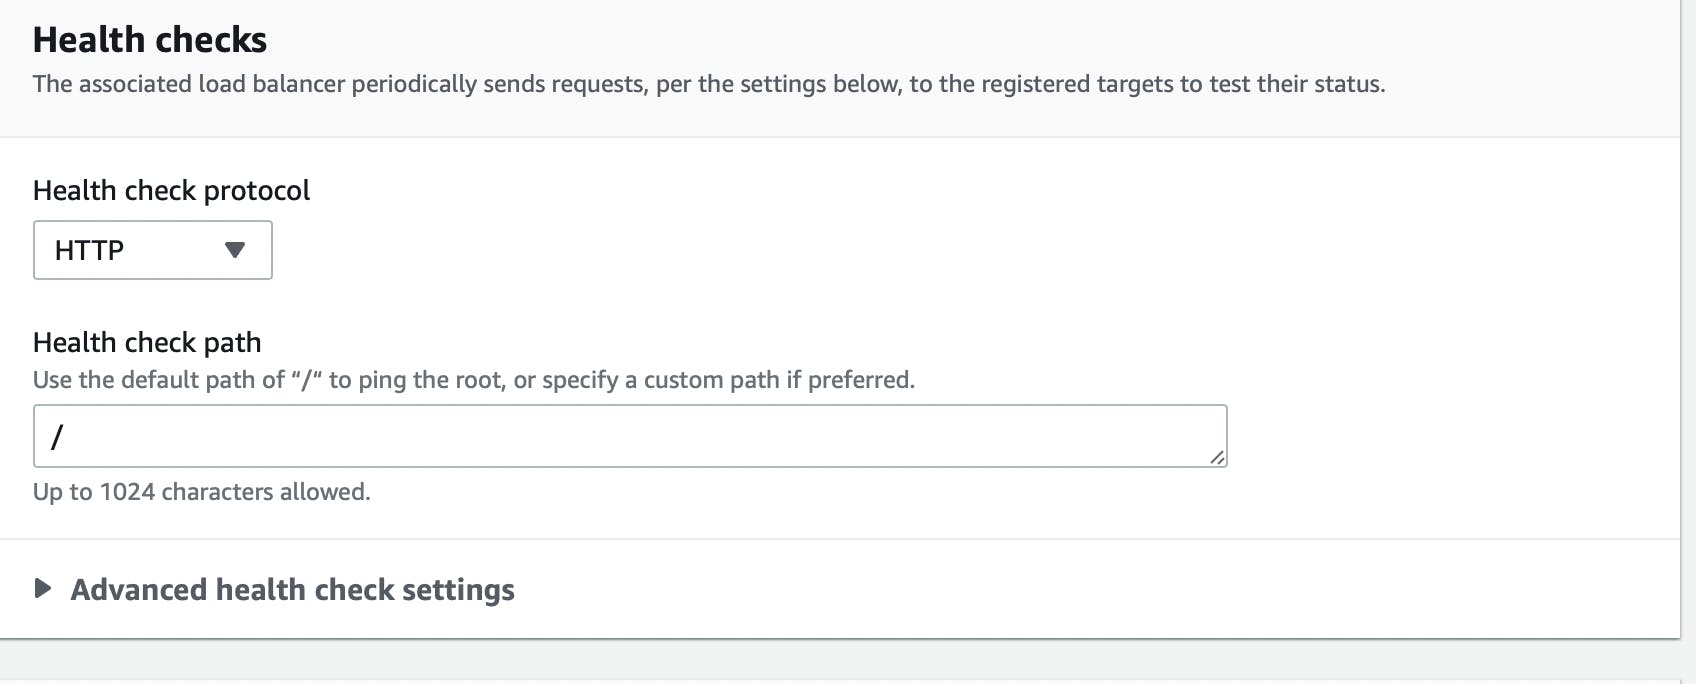
Step 7- Health Checks
This is a Target Group feature that ensures your target/instance is up and running. This is achieved by having the Load Balancer send periodic requests to the target. Leave the advanced health checks with the default value
Step 8- Register your targets
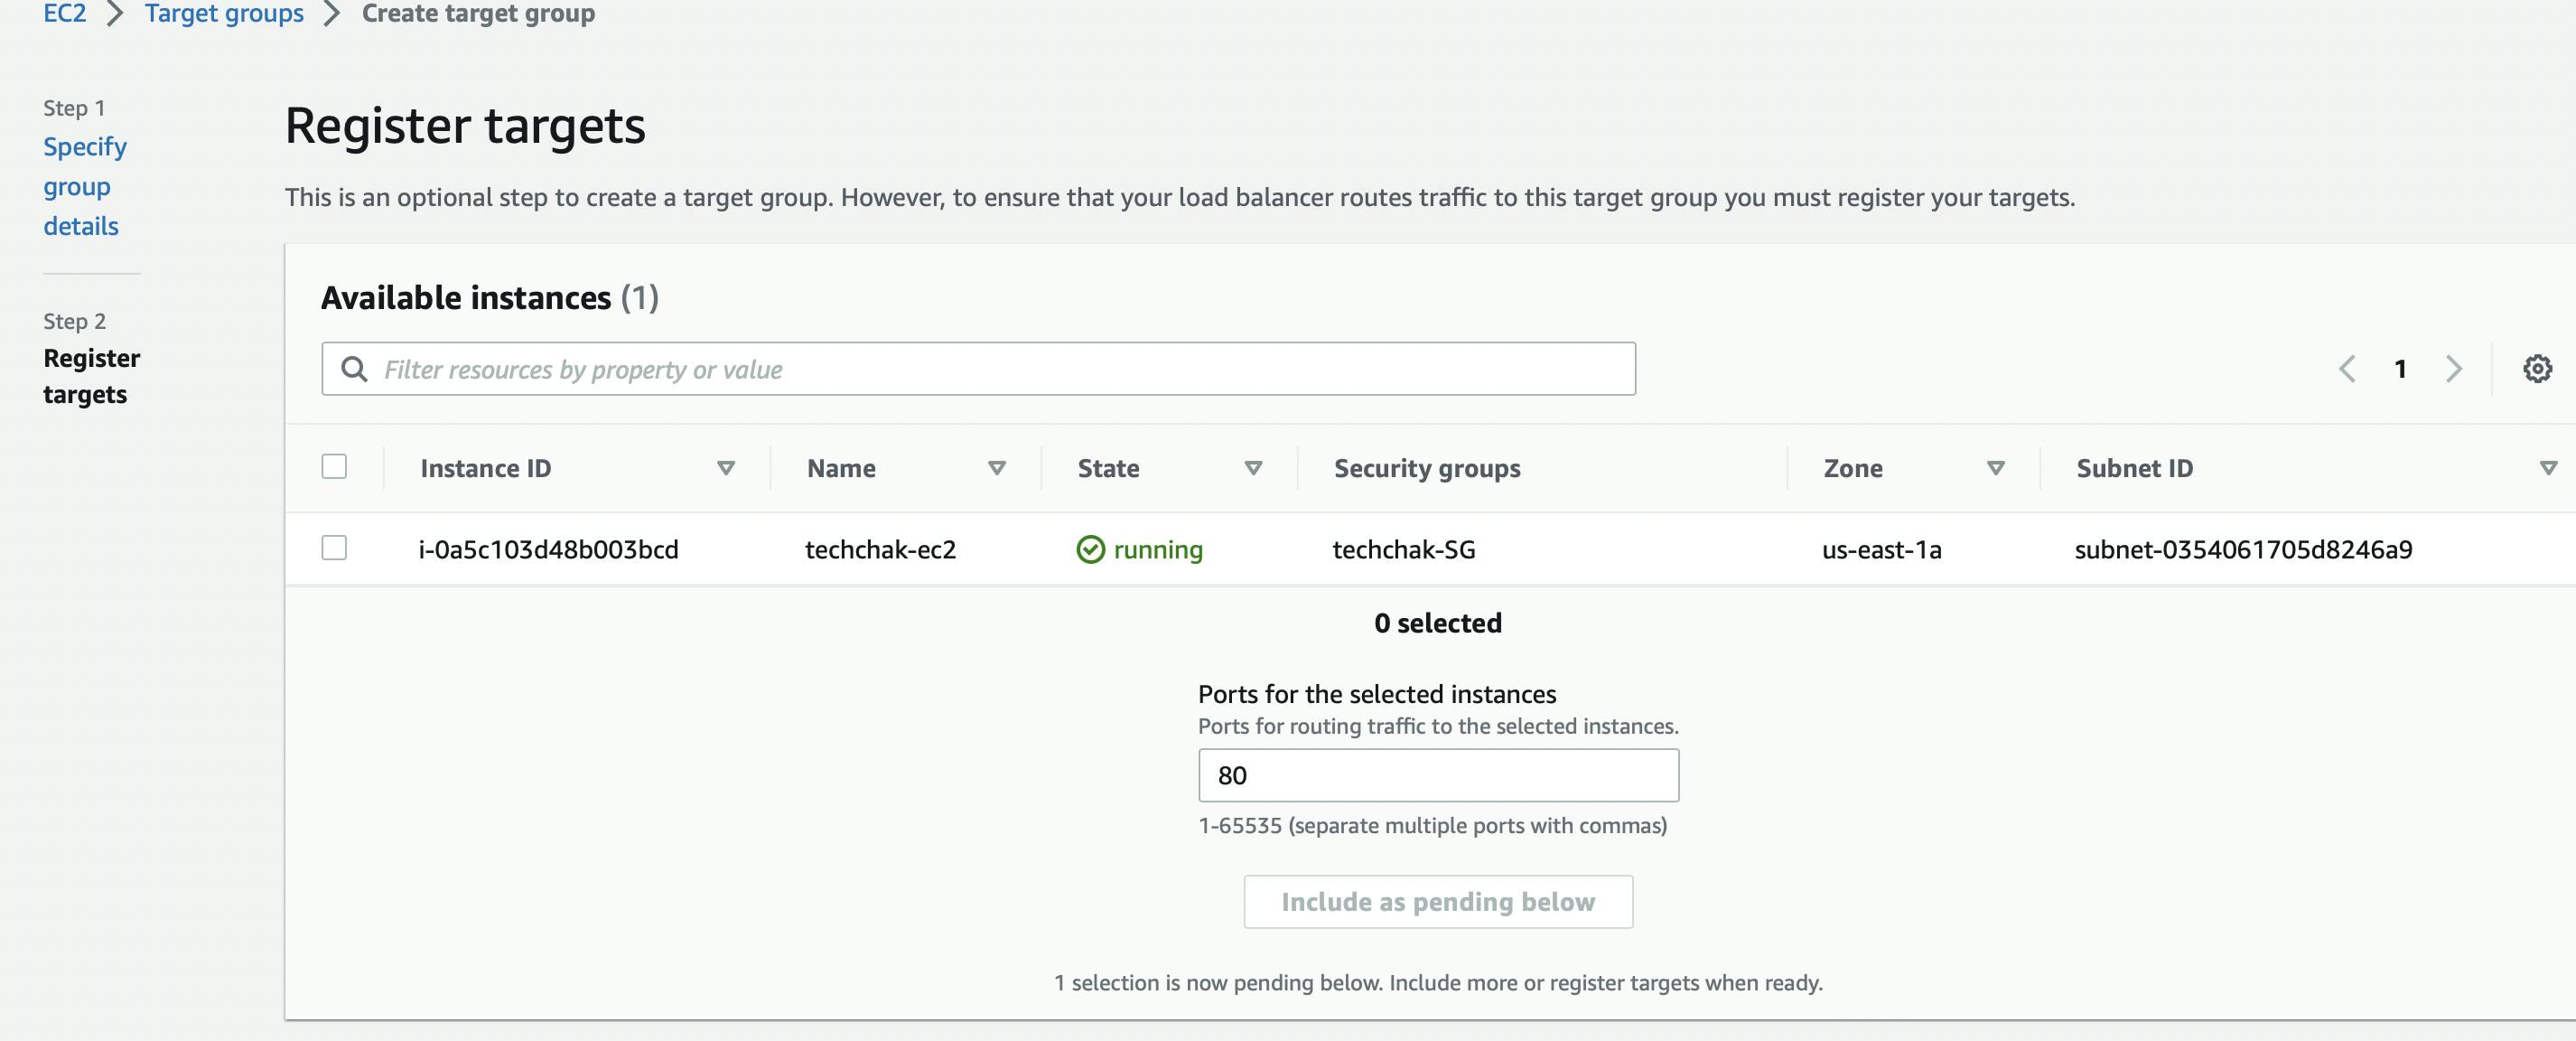
Note If you recall, while creating our website, under the User Data section, we ran a bash script which executed when the instance was created. That bash script installed httpd, which is Apache, a webserver.
Now, by default Apache runs on port 80. Our app(techchak website) therefore by default listens on port 80 . It is therefore now pertinent to ensure that the port set for the targets (selected instance) must be the same port that your application is listening on(in this instance, port 80).
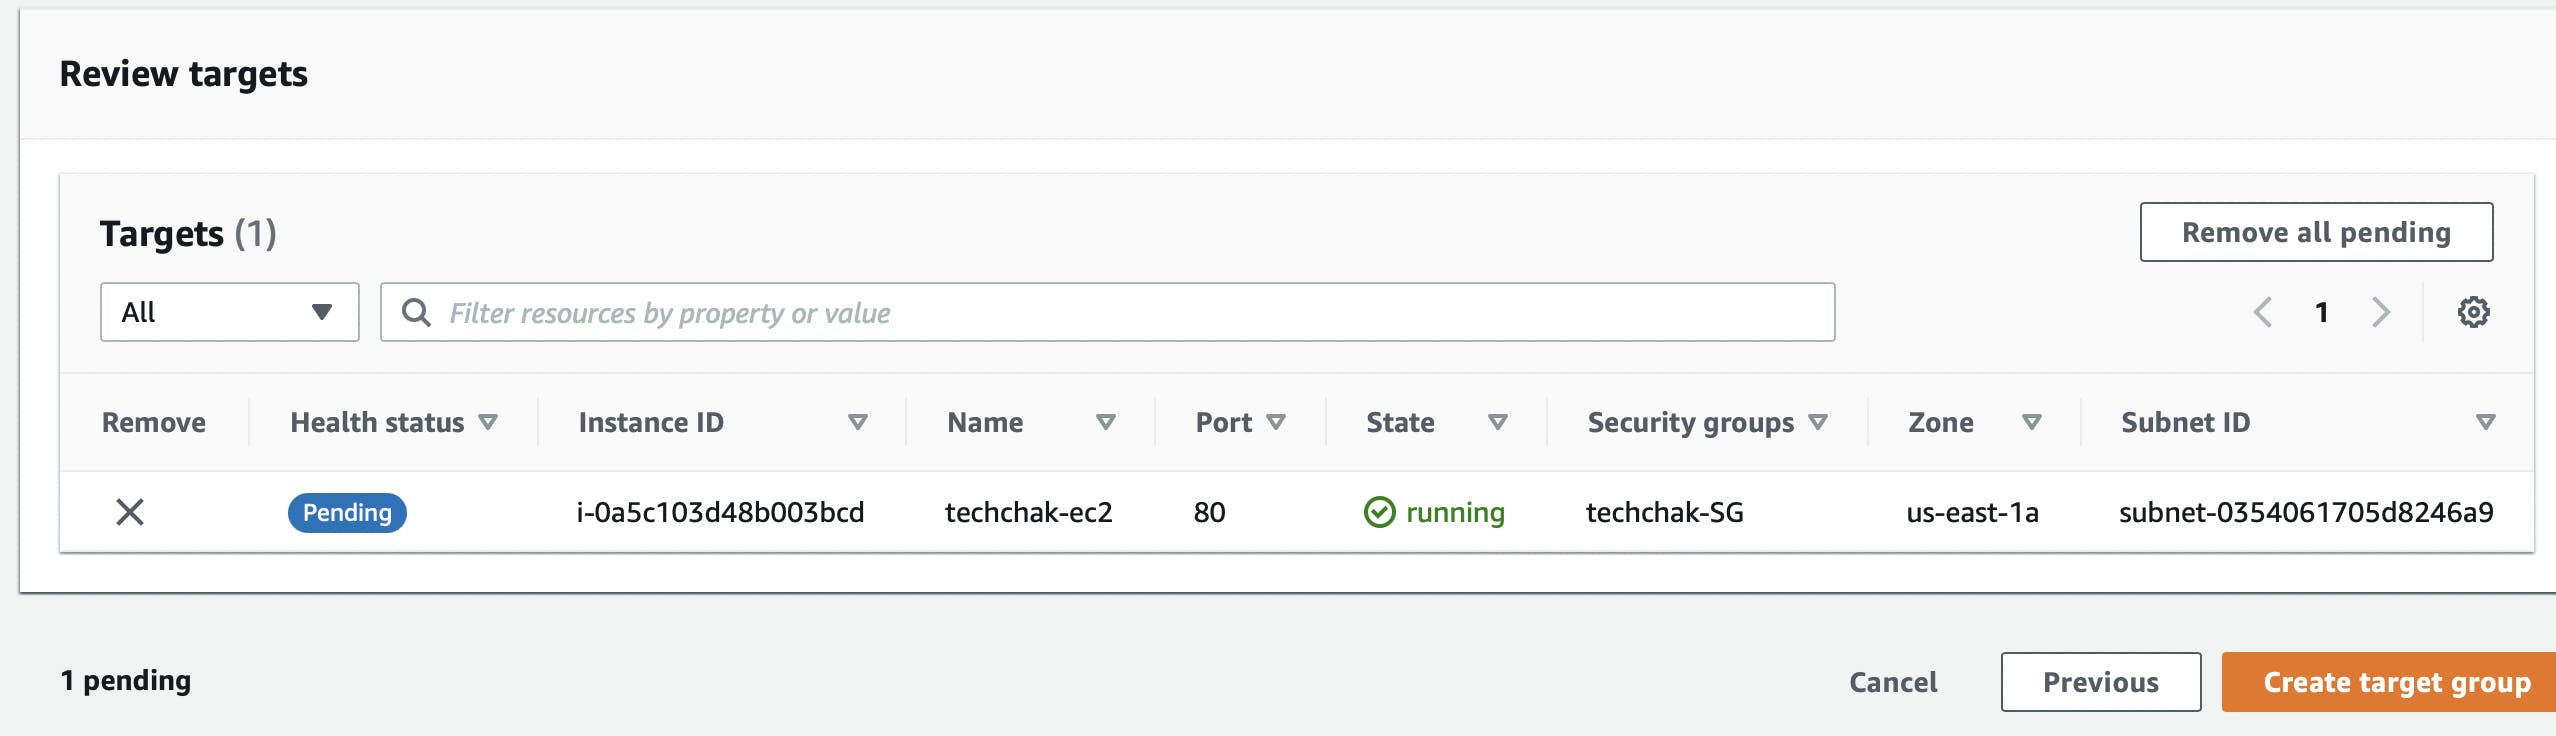
Step 9- Review targets
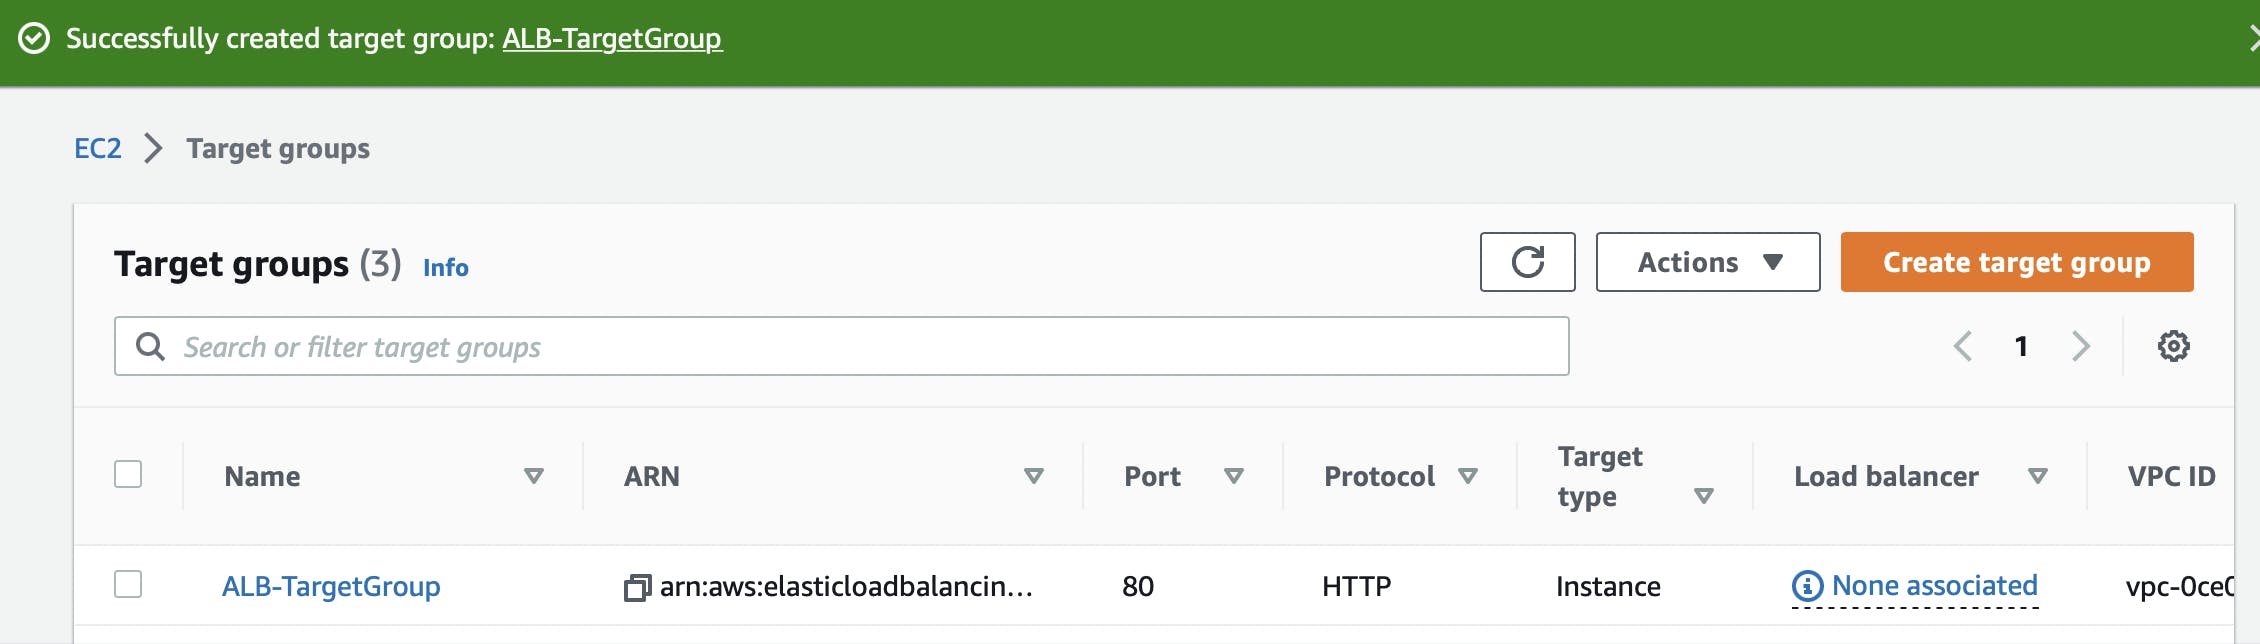
Review targets and go ahead and create your Target Group.
Here, you can see that the target group has been successfully created.
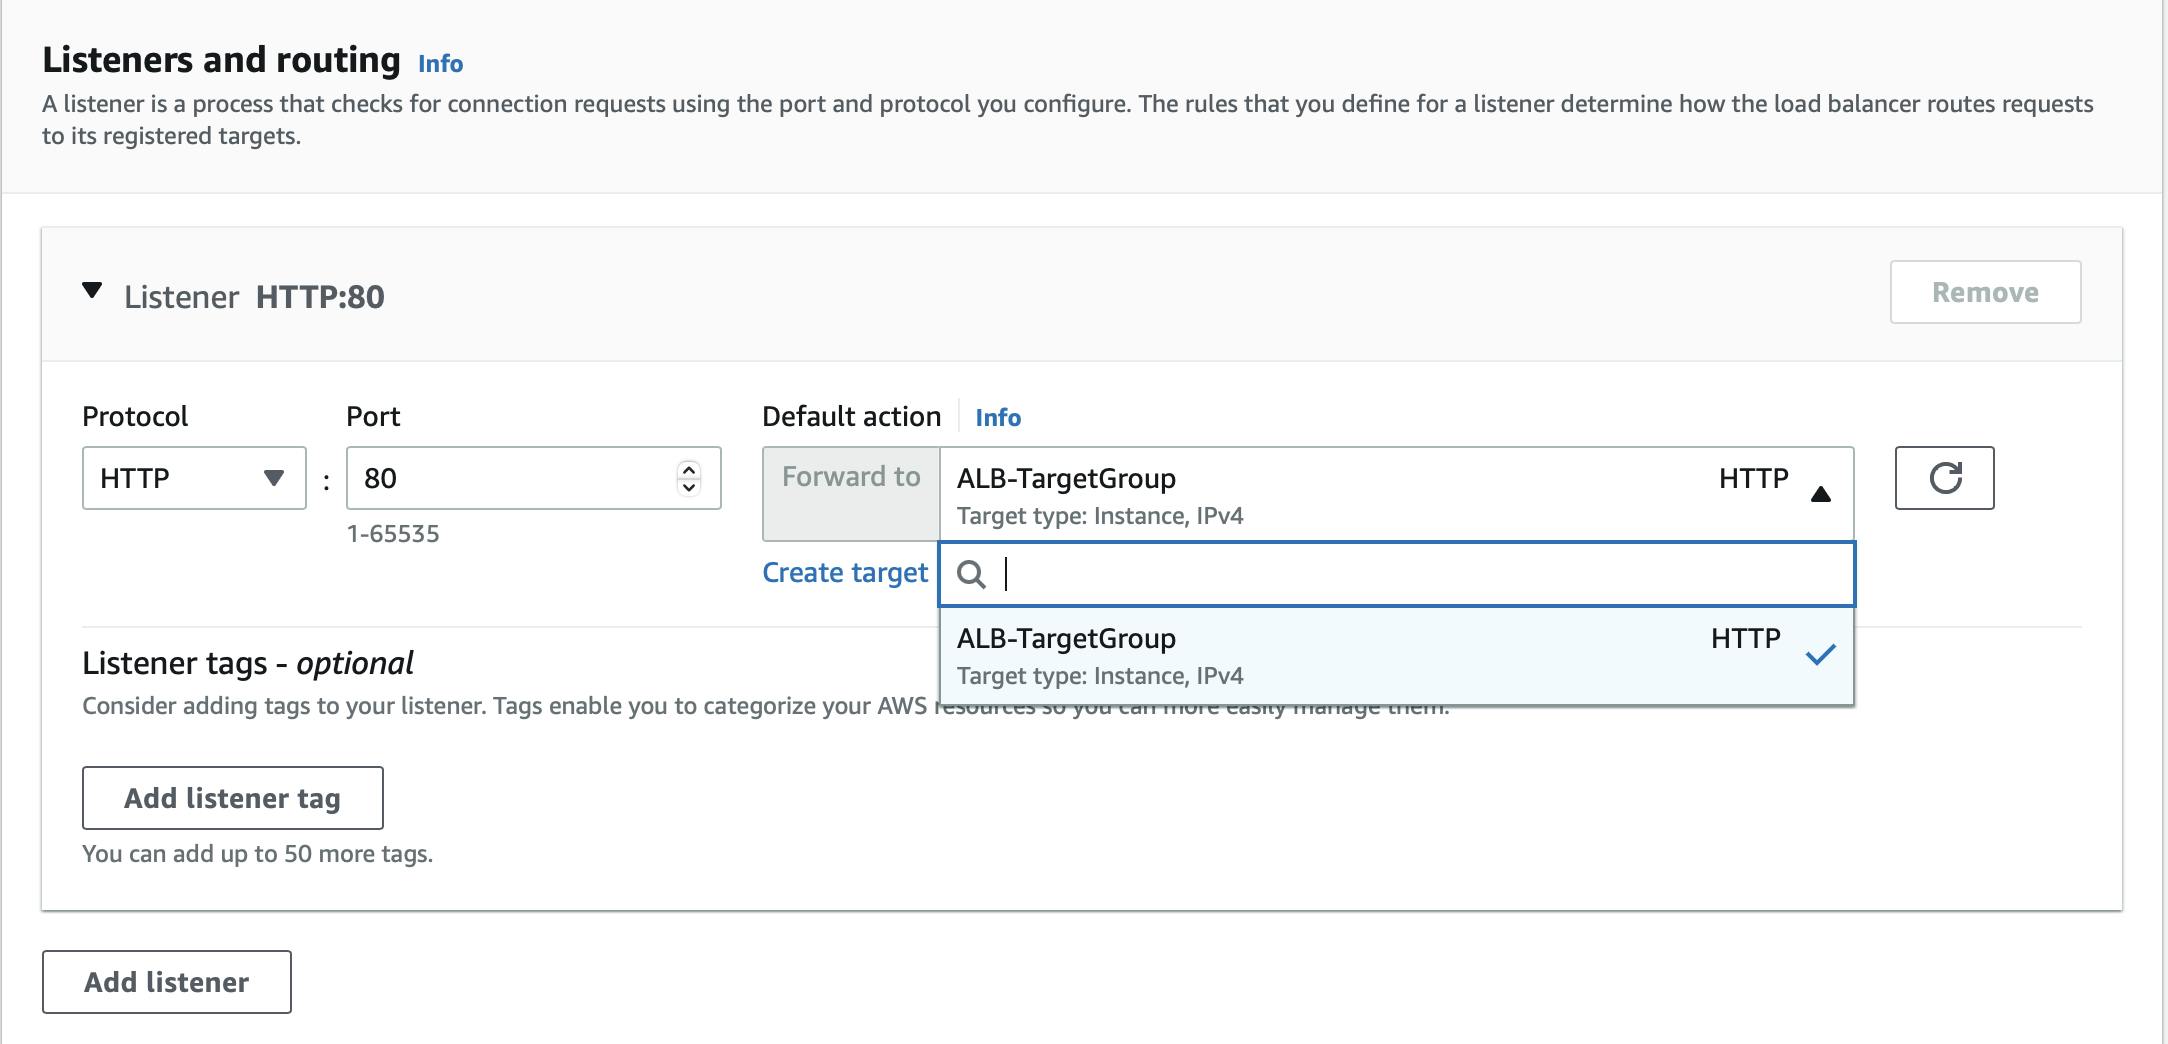
Step 10- Associate your target group
Now recall, we first started with creating our load balancer and in one of steps, we needed to create a target group. Now, the target group has been successfully created. Go back to your load balancer page on the listening and port section, refresh the part that requires you to select your target group and then Associate your target group with your load balancer.
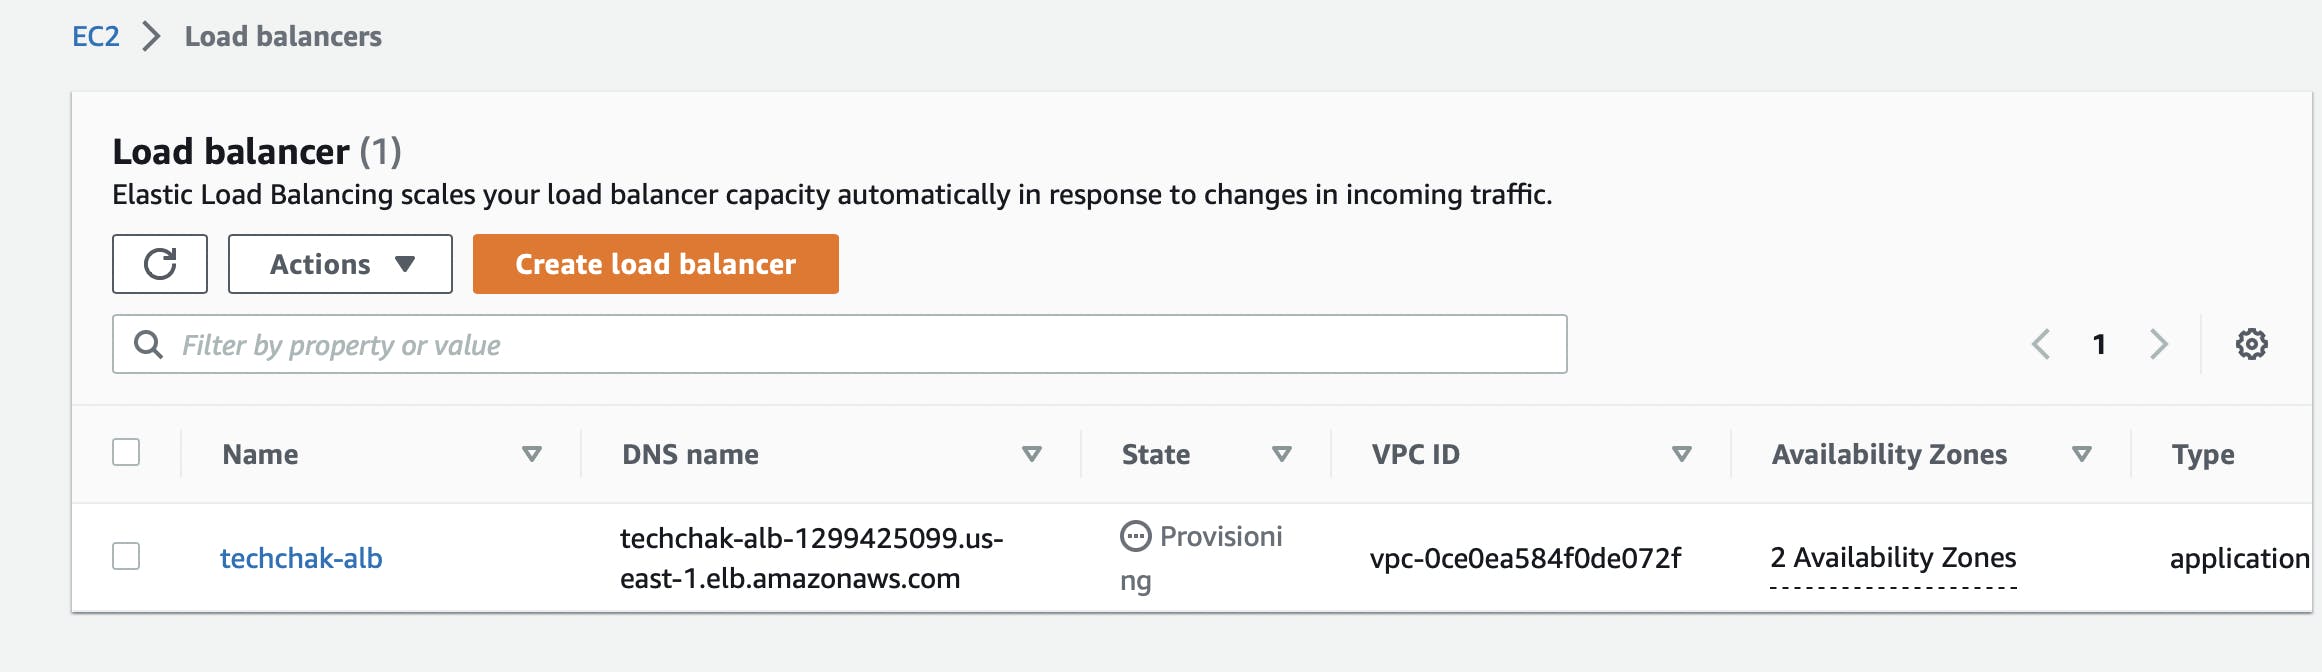
Voila! you can now click on the create load balancer button and your load balancer is successfully created and once it shows the state as active, you are good to go.
Okayyyy... do not be too quick to go, lol! Now, I tried to hit my website using my Load Balancer DNS and it returned a 504 error.
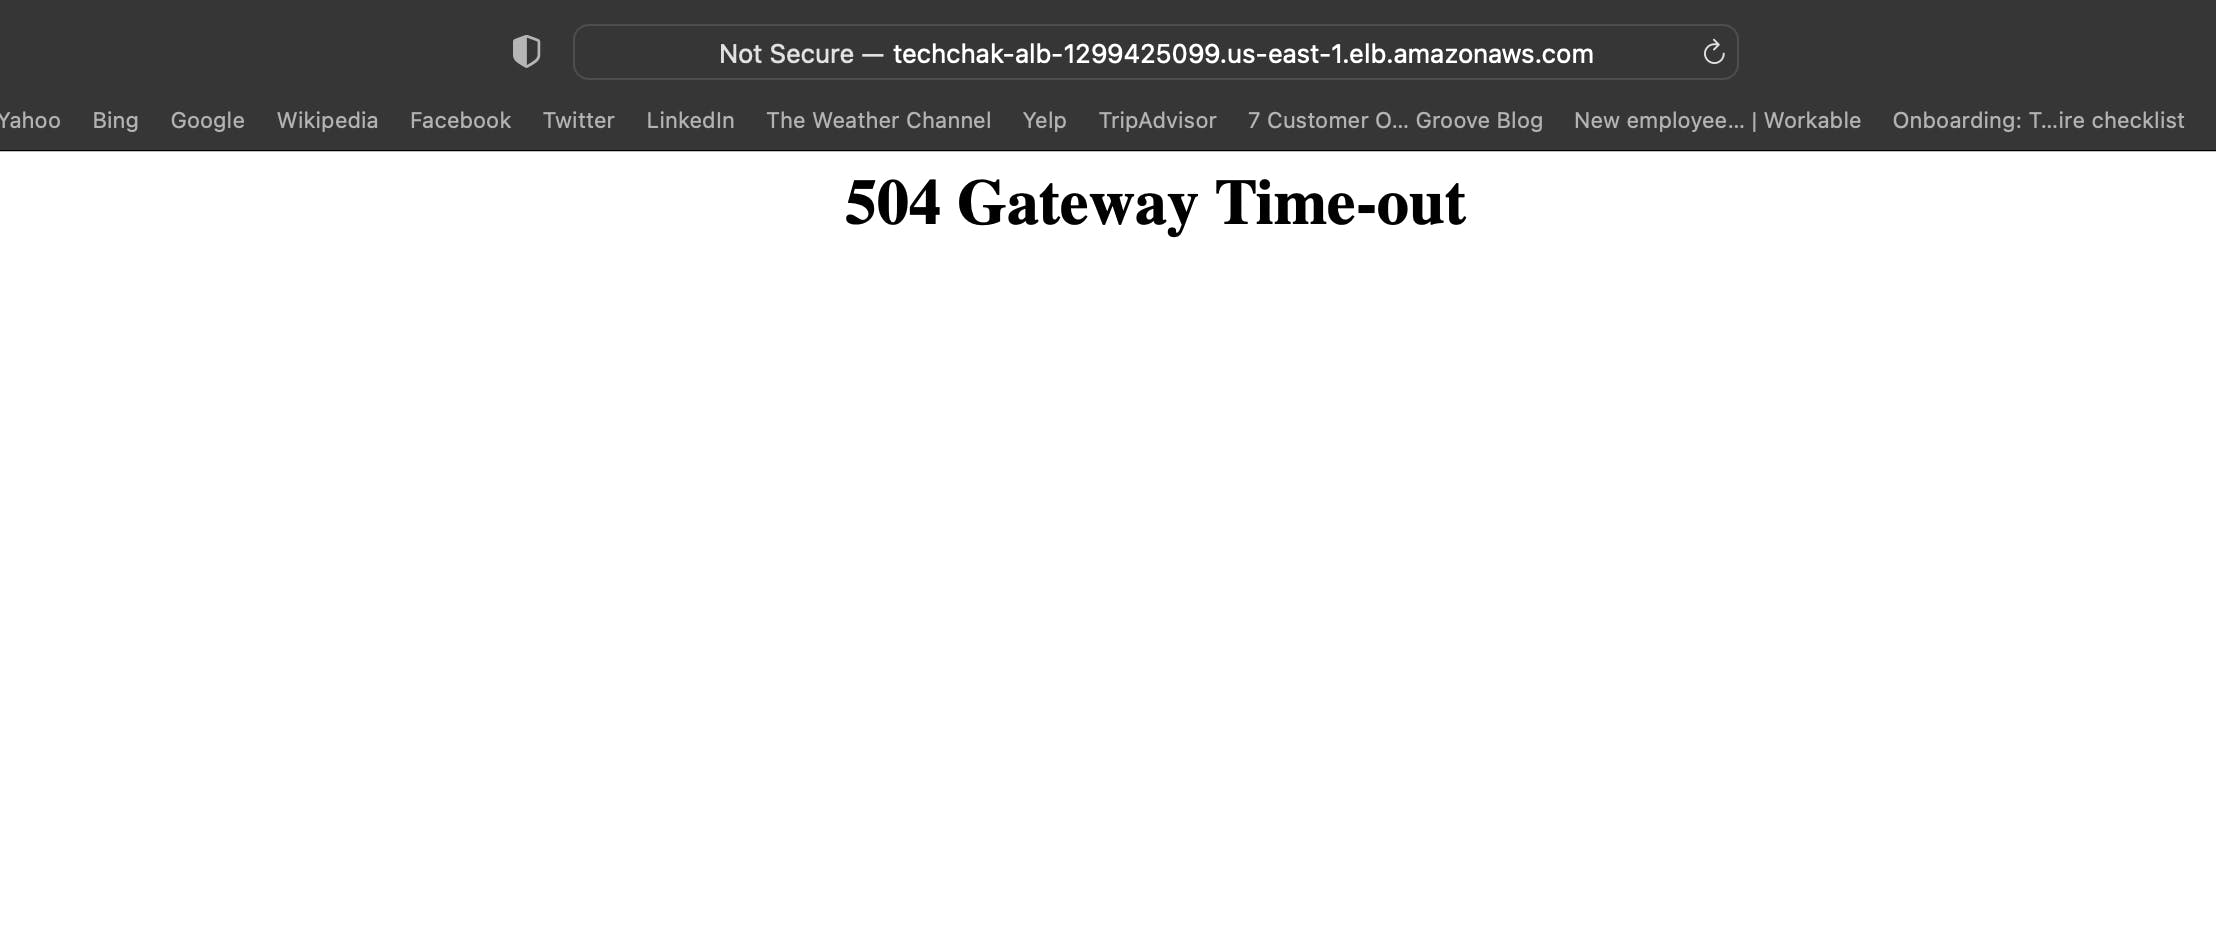
What do you think could be the issue? Usually, when you get a 504 error, it means that the Load Balancer is trying to hit the instance but it cannot or the instance is taking too long to respond. I immediately checked my Target Group and it showed that my instance was unhealthy and the reason was request timeout.
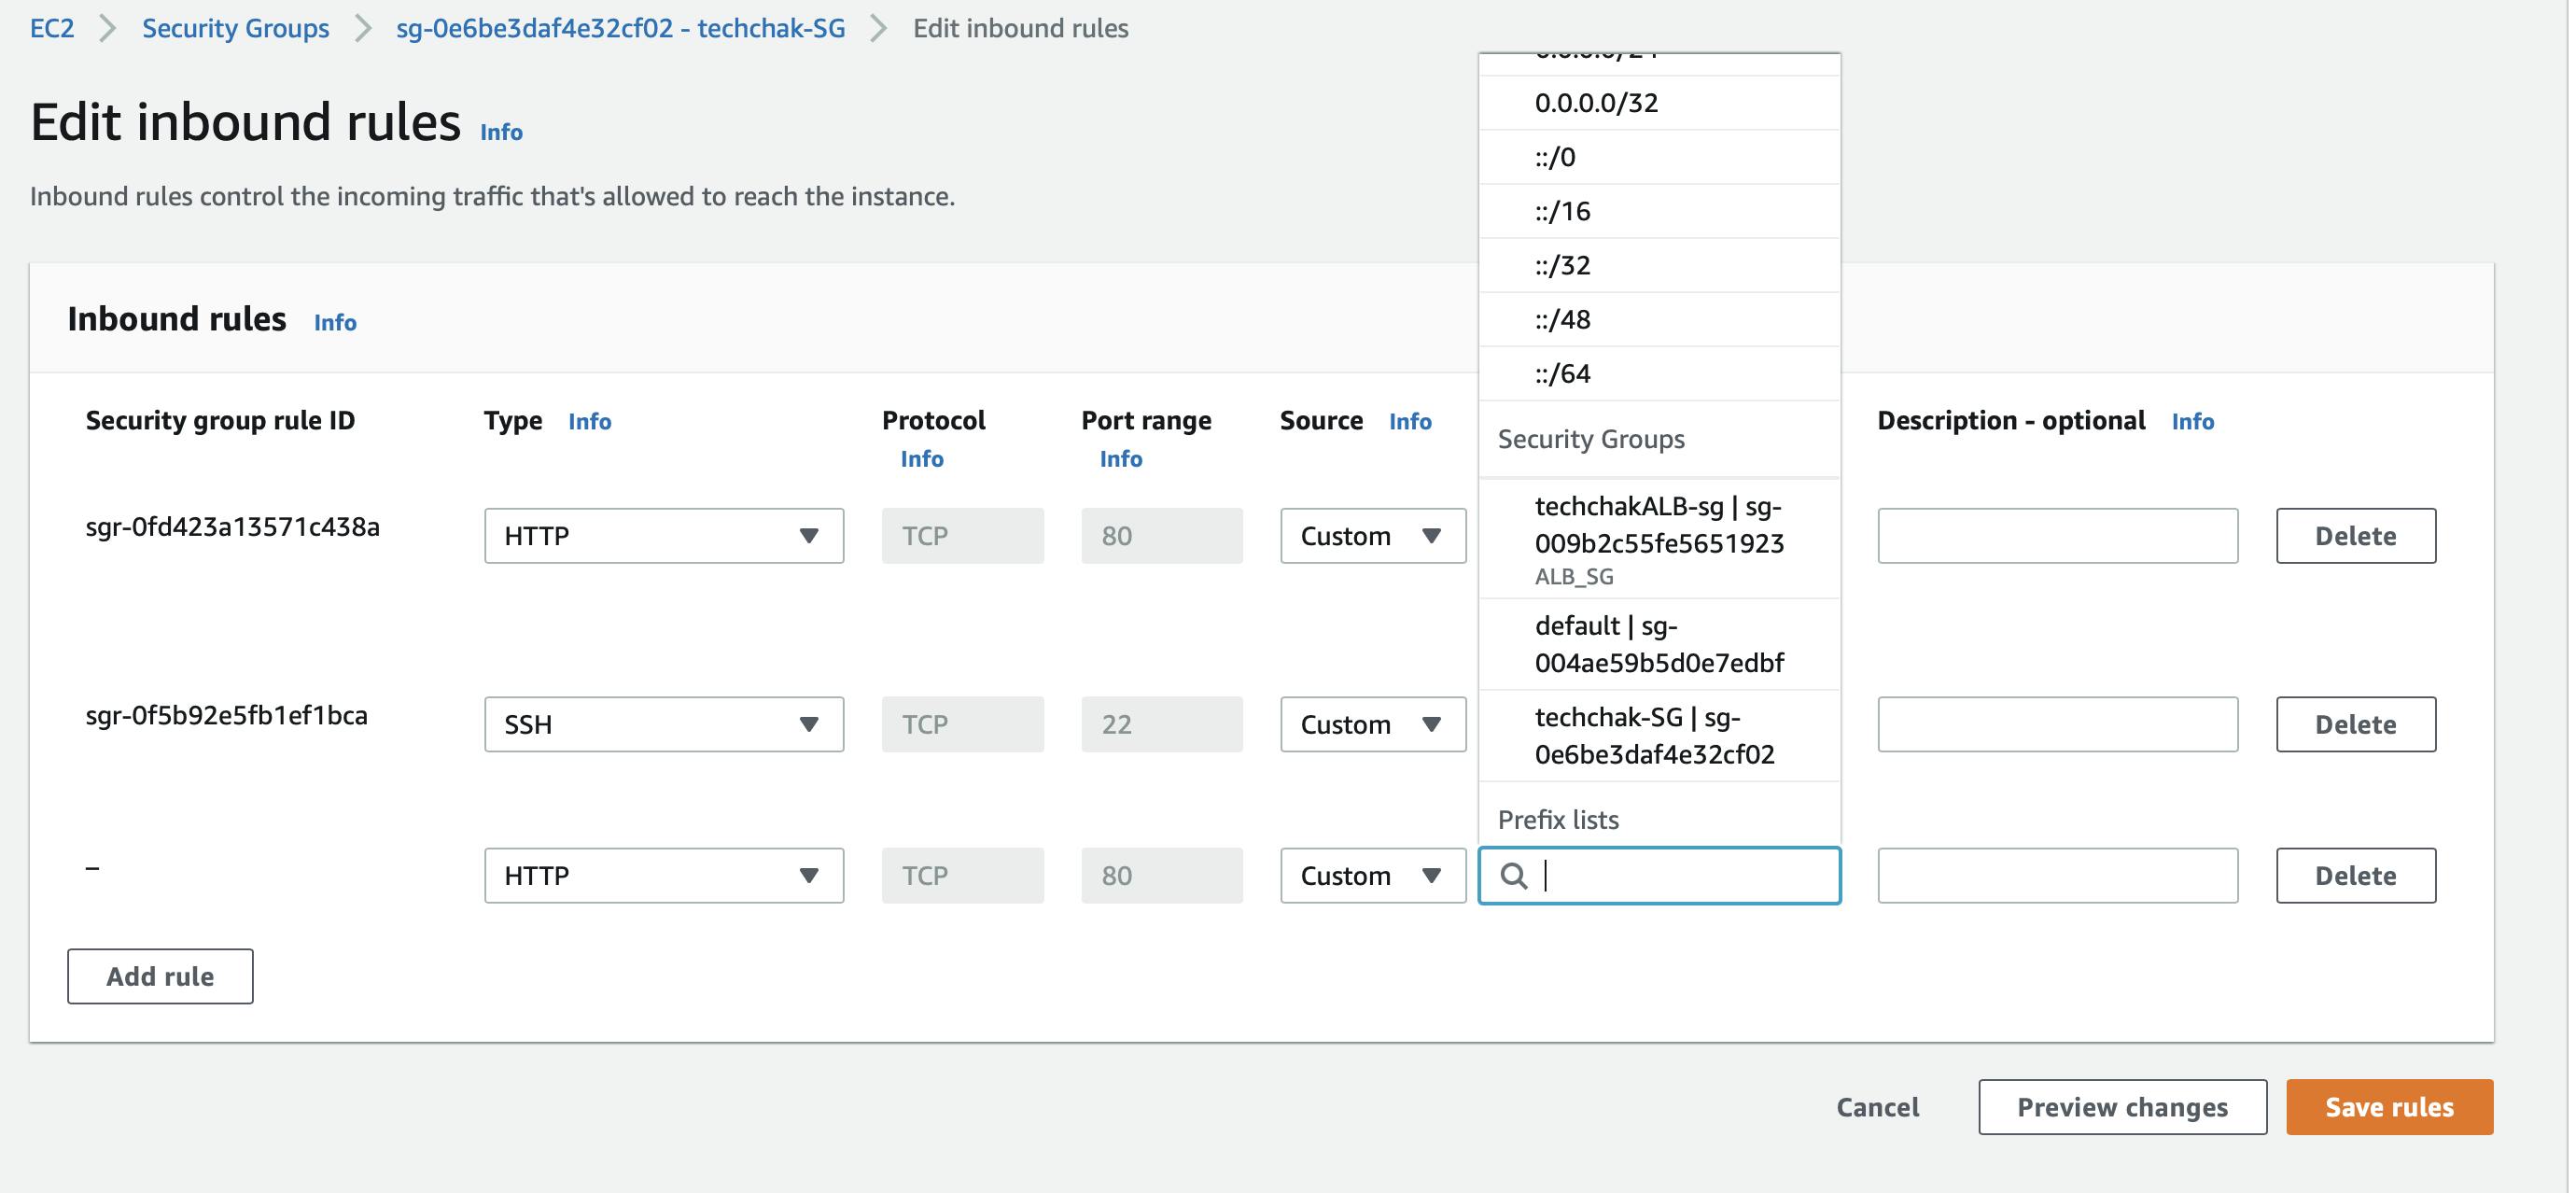
Request timeout errors generally means that the source (ALB/Load Balancer) is not able to reach the destination (EC2 Instances). This is a traffic routing issue so let us go to our Instance Security Group and find out if we have the necessary ports open.
We have only HTTP port 80 which allows my IP address and SSH Port 22 which allows anywhere. What is the issue here? The issue seems to be that we do not have any inbound rule that allows the Load Balancer (source) to reach the destination (instance) configured here. So, no matter how much the Load Balancer tries to reach our instance, it will keep getting the 504 error.
Let us quickly fix it by allowing HTTP for our Load Balancer.
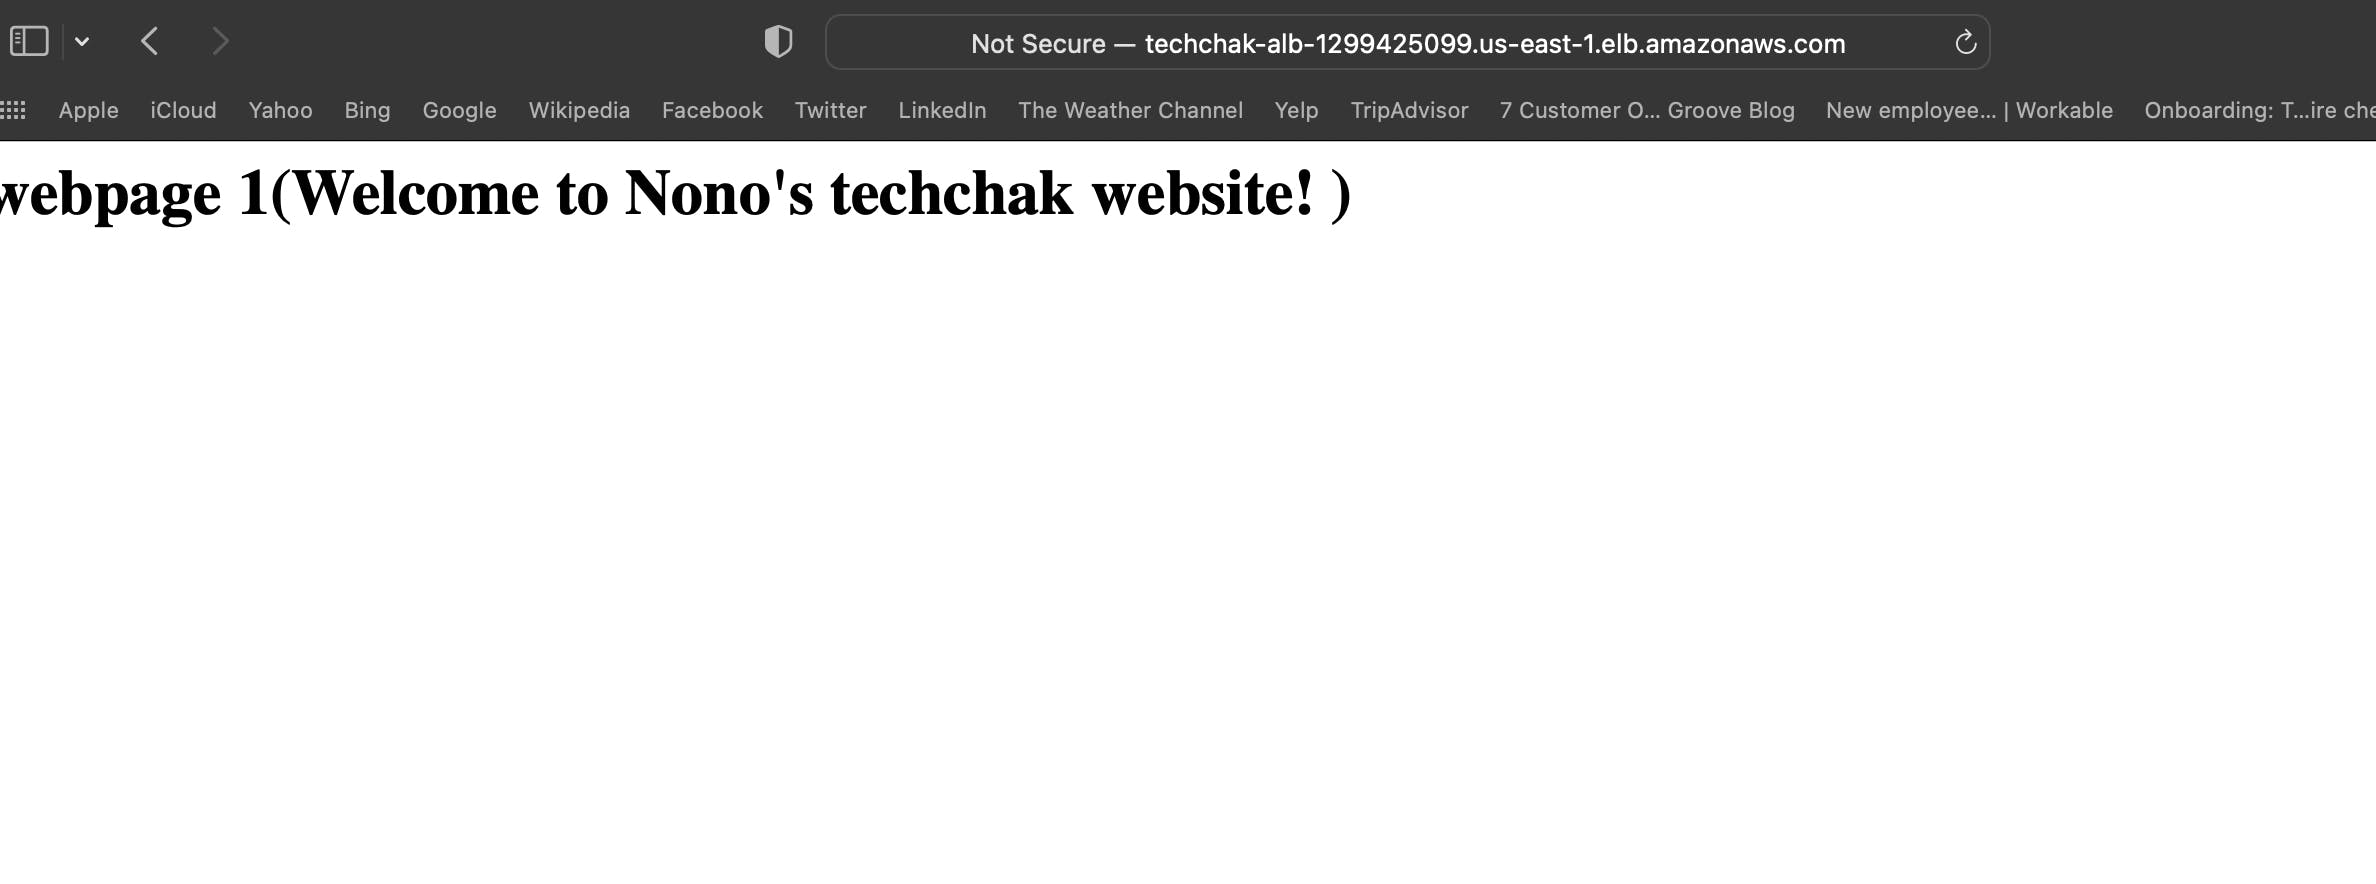
And now, our Load Balancer is doing its work and we can successfully see our website.
Thank you for reading and keep an eye out for my next post!